

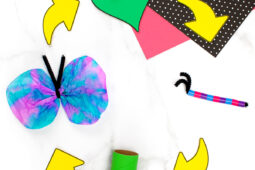
This hands-on Butterfly Life Cycle Craft helps kids learn about the four stages—egg, caterpillar, chrysalis, and adult—through fun, creative play. With two free printable templates included, it’s a great educational project for preschool and kindergarten students.

Butterfly Life Cycle Craft
If you’ve been here a while, you know how much my kids and I love raising and releasing butterflies. So far this summer, we’ve raised 24 black swallowtails from eggs—and we’re not done yet!
Watching the butterfly life cycle—especially the monarch butterfly life cycle—up close is always fascinating. In this simple, hands-on craft, kids can explore each stage of metamorphosis using everyday materials like toilet paper rolls, beads, and pipe cleaners.
It’s a fun and educational butterfly activity—perfect for spring or summer!
Craft Supplies Needed for the Butterfly Life Cycle Craft
Before you get started, make sure you have all the right supplies!
- Free Printable Leaf and Arrows Template
- Green and gold cardstock
- Scissors
- Perler Biggie Beads
- Toilet paper roll
- Green acrylic paint
- Paintbrush
- Coffee filters
- Liquid watercolors
- Eye droppers
- Black pipe cleaners
- White school glue
- Spray bottle filled with water
Watch the Video Tutorial
Watch the video below to see how we created this craft.
Directions for Life Cycle of a Butterfly Craft
Follow the steps below to help kids create each stage of the butterfly life cycle using simple craft materials.
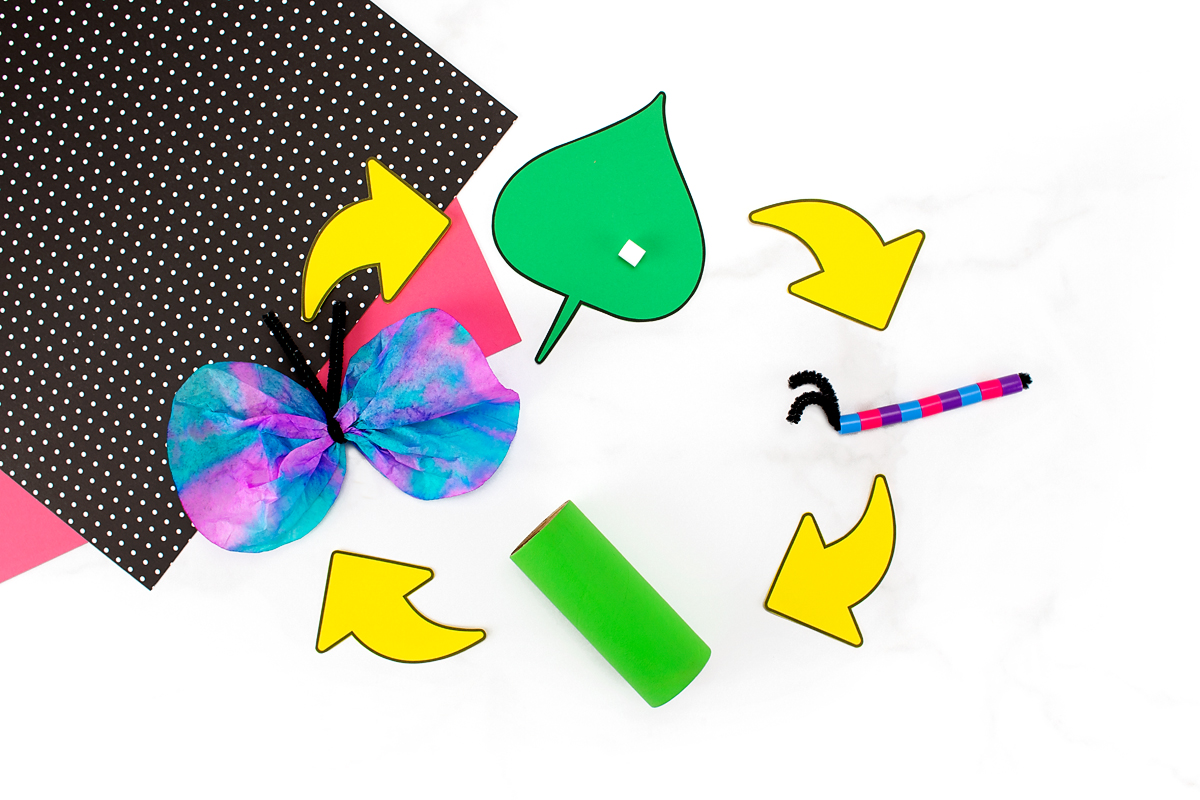
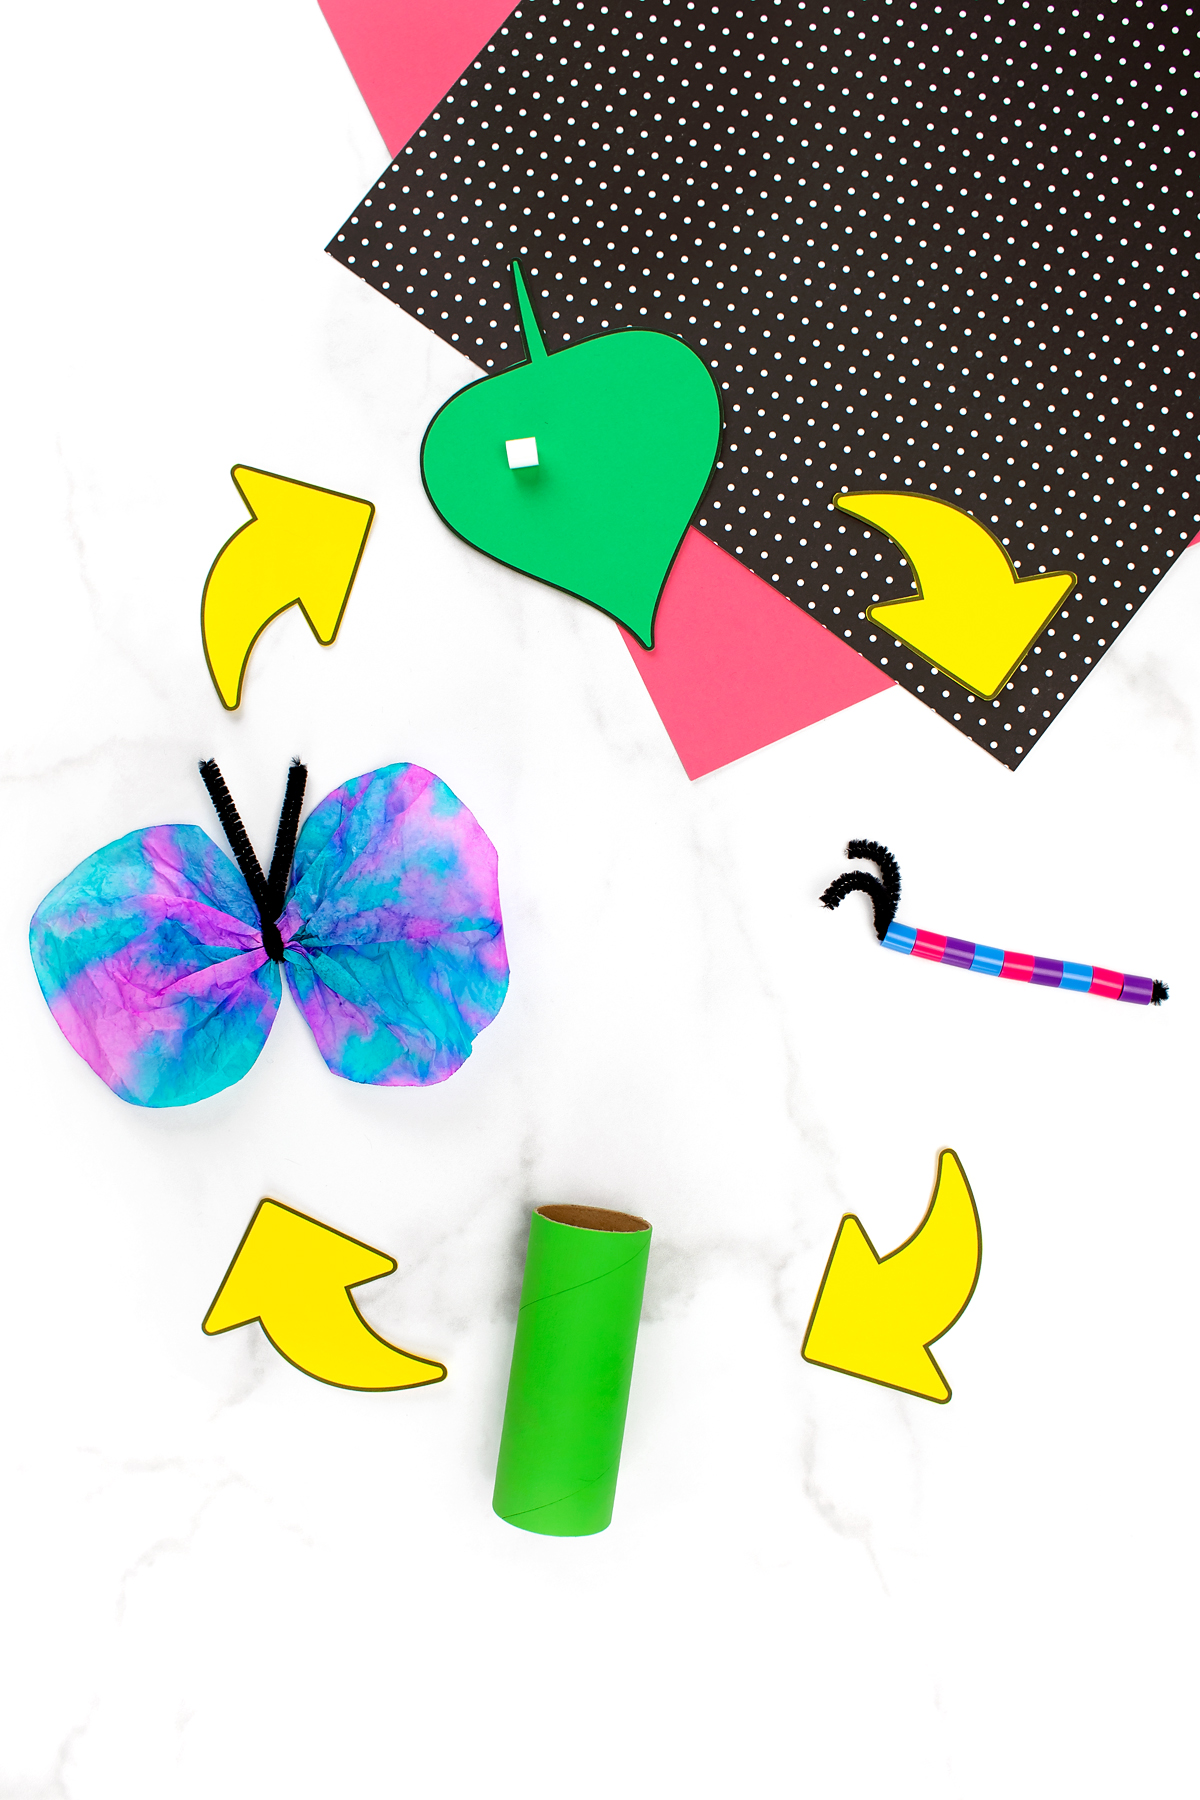
STEP 1: Download and print the templates. First, print the leaf and arrows template on green and gold cardstock. Each child will need to cut out 2 leaves and 4 arrows.

STEP 2: Add the egg. Glue one white Perler Biggie Bead onto each green leaf. The bead represents a butterfly egg!

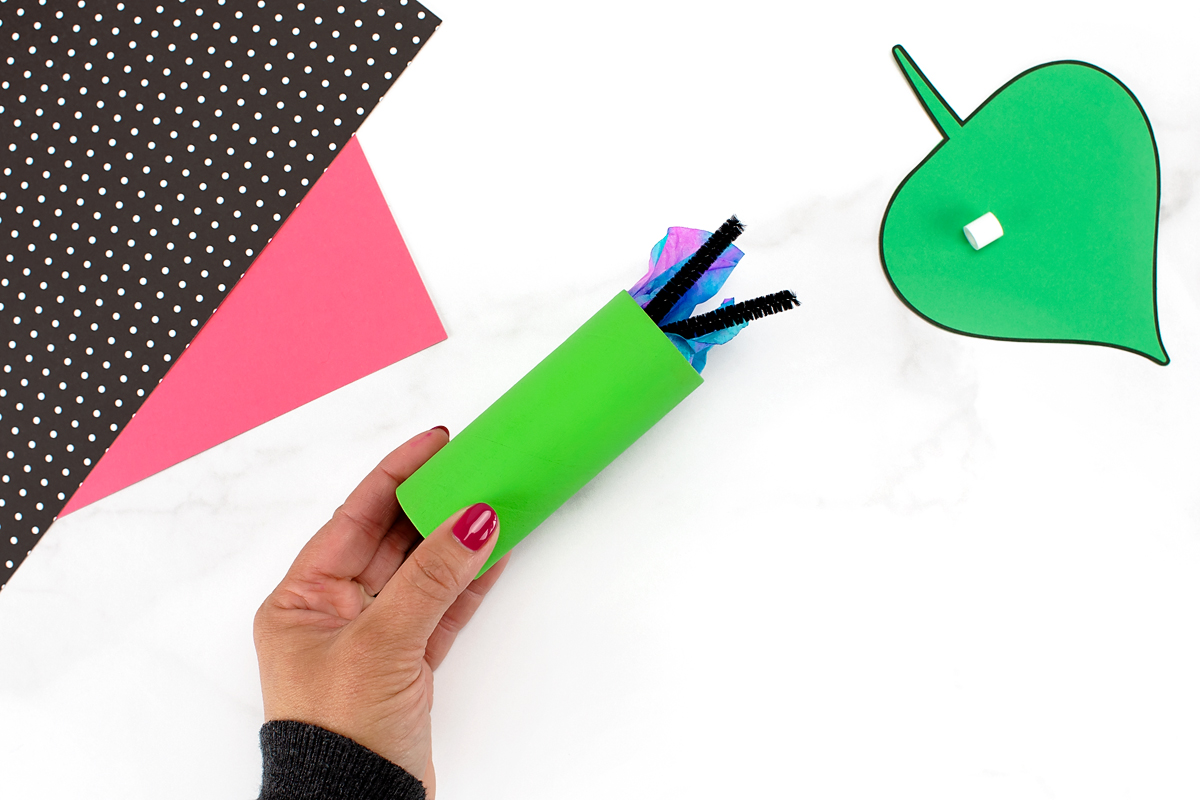
STEP 3: Paint the toiler paper roll. Invite your child to paint their toilet paper roll green. Set the roll aside to dry on a paper plate, then move onto step 4.
STEP 4: Make the caterpillar. Next, fold a black pipe cleaner in half to create the body of the caterpillar. Invite your child to string 8 Perler Biggie Beads onto both ends of the pipe cleaner.
Choose one more bead, squeeze a dab of white school glue inside of it, then string it onto the pipe cleaner. Each caterpillar should contain a total of 9 beads.
NOTE: We used Perler Biggie Beads. If you can’t find those, substitute pony beads. You may need more than 9.

STEP 5: Finish the caterpillar. Arrange the beads so the V is about 1.5 inches long. Fold the V up into the shape of the caterpillar’s antennae, then trim (or fold in) the excess pipe cleaner towards the back of the caterpillar. If desired, curl the antennae with your finger.
STEP 6: Dye the butterfly wings. Place a coffee filter on a plate, then use eye droppers to dye it with liquid watercolors. Set the coffee filter aside to dry.
STEP 7: Make the butterfly. When the coffee filter is dry, twist 1/2 of a black pipe cleaner around the center to form the shape of a butterfly.

STEP 8: Enjoy your craft! Your butterfly life cycle craft is complete! Continue reading for more playful learning ideas!
Teaching the Butterfly Life Cycle
To grow into an adult, a butterfly goes through four stages in a process called complete metamorphosis: egg, caterpillar, chrysalis (pupa), and adult.
After learning about butterflies, exploring a butterfly sensory bin, and making each part of the butterfly life cycle craft (including two leaves with eggs), it’s time to bring the life cycle to life with a little metamorphosis magic!
Begin by setting out one leaf with an egg for your child. (Keep the second leaf in a labeled bag for later.)
After a few days, secretly remove the egg from your child’s leaf and replace it with their beaded caterpillar—this little surprise adds to the excitement!
If you’d like, trim the edge of the leaf with pinking shears to make it look like the caterpillar has been munching on it.
Wait a few more days—or up to a week—then place the toilet paper tube chrysalis on the leaf and tuck the caterpillar inside.

Finally, after about a week, switch out the caterpillar for the butterfly. Your child will be thrilled to see the transformation is complete! Invite them to gently pull the butterfly from the chrysalis and flutter it in the air.
To wrap up the activity, hand out your child’s labeled baggie. Inside should be:
- a leaf with an egg
- the beaded caterpillar
- four arrows
Invite them to recreate the life cycle by arranging the four arrows and craft pieces in order on a tabletop.
More Butterfly Crafts for Kids
Looking for more fun activities? You might also enjoy:
- Stained Glass Butterfly Suncatchers with Free Butterfly Template
- Butterfly Suncatcher Craft
- Monarch Butterfly Stick Puppet
- Fluttering Paper Butterfly Craft
- Butterfly Glitter Jar
Save This Craft
Save this craft on Pinterest using the image below!


Want even more?
Make sure to follow on Facebook, Pinterest, and Instagram for more easy crafts, activities, recipes, and parenting tips. And don’t forget to subscribe to our emails.