

Bundle up and head outside for one of winter’s most magical science experiments! Making Frozen Bubbles is a simple yet mesmerizing activity that turns an ordinary cold day into an unforgettable learning experience. Watch as bubbles transform into crystalline orbs before your eyes, creating a winter wonderland right in your own backyard.
Perfect for educators planning outdoor science lessons and parents looking for screen-free winter fun, this activity requires just a few simple supplies and the right weather conditions.

What Temperature Do You Need to Make Frozen Bubbles?
Bubbles freeze when the temperature drops below 32°F (0°C). However, the most dramatic freezing effects happen when it’s much colder. We’ve found that temperatures between 9–20°F (-7 to -12°C) produce the best results, with bubbles freezing quickly and lasting longer before they shatter.
The colder the temperature, the faster and more completely bubbles will freeze. On extremely cold days (below 0°F), bubbles can freeze almost instantly as they leave the wand. Where I live, this typically happens in January.
What You Need to Make Frozen Bubbles
You only need a few simple items to get started with this winter science activity:
Basic supplies:
- Bubble solution
- Bubble wands (various sizes work great)
- Cold weather (ideally below 20°F)
- Warm winter clothing (mittens, coat, hat, boots)
Optional supplies for enhanced exploration:
- Paper or plastic straws for blowing bubble domes
- Cookie cutters
- Small bowl or plate for catching bubbles
- Camera for capturing the freezing process
- Magnifying glass for observing ice crystal patterns
Best Bubble Solution for Freezing
Finding bubble solution in winter can be tricky since most stores stock it seasonally. You can use store-bought bubble solution, but we recommend making a homemade bubble solution using our tested recipe:
- 1 cup warm distilled water
- 1/4 cup Dawn dish soap
- 2 tablespoons glycerin
- 1 teaspoon sugar
Glycerin creates stronger, longer-lasting bubbles, giving them more time to freeze before popping. Sugar helps enhance ice crystal formation. Mix gently to avoid creating foam, then let the solution rest for at least one hour (or overnight) before using for best results.
Watch the Video
Seeing frozen bubbles in action helps make the process clear and easy to understand. Watch the video below to see how quickly bubbles freeze, how ice crystals form, and which methods work best in real winter conditions.
How to Make Frozen Bubbles: Step-by-Step Instructions
Once you have the right weather and supplies, making frozen bubbles is easy. Follow these steps for the best results and the most magical freezing effects.
STEP 1: Check the weather. Before heading outside, make sure the temperature is below 20°F—the colder, the better. Calm mornings with little to no wind work best, since wind can pop bubbles before they freeze.
STEP 2: Bundle up properly. Here in upstate New York, we know dressing well makes all the difference. As the Norwegian saying goes, “There’s no such thing as bad weather, only bad clothes.” Wear insulated coats, warm hats that cover ears, waterproof mittens or gloves, snow boots, and warm pants (snow pants if possible).
STEP 3: Choose your bubble method. You can create frozen bubbles using three different techniques:
Method 1: Traditional Bubble Wands
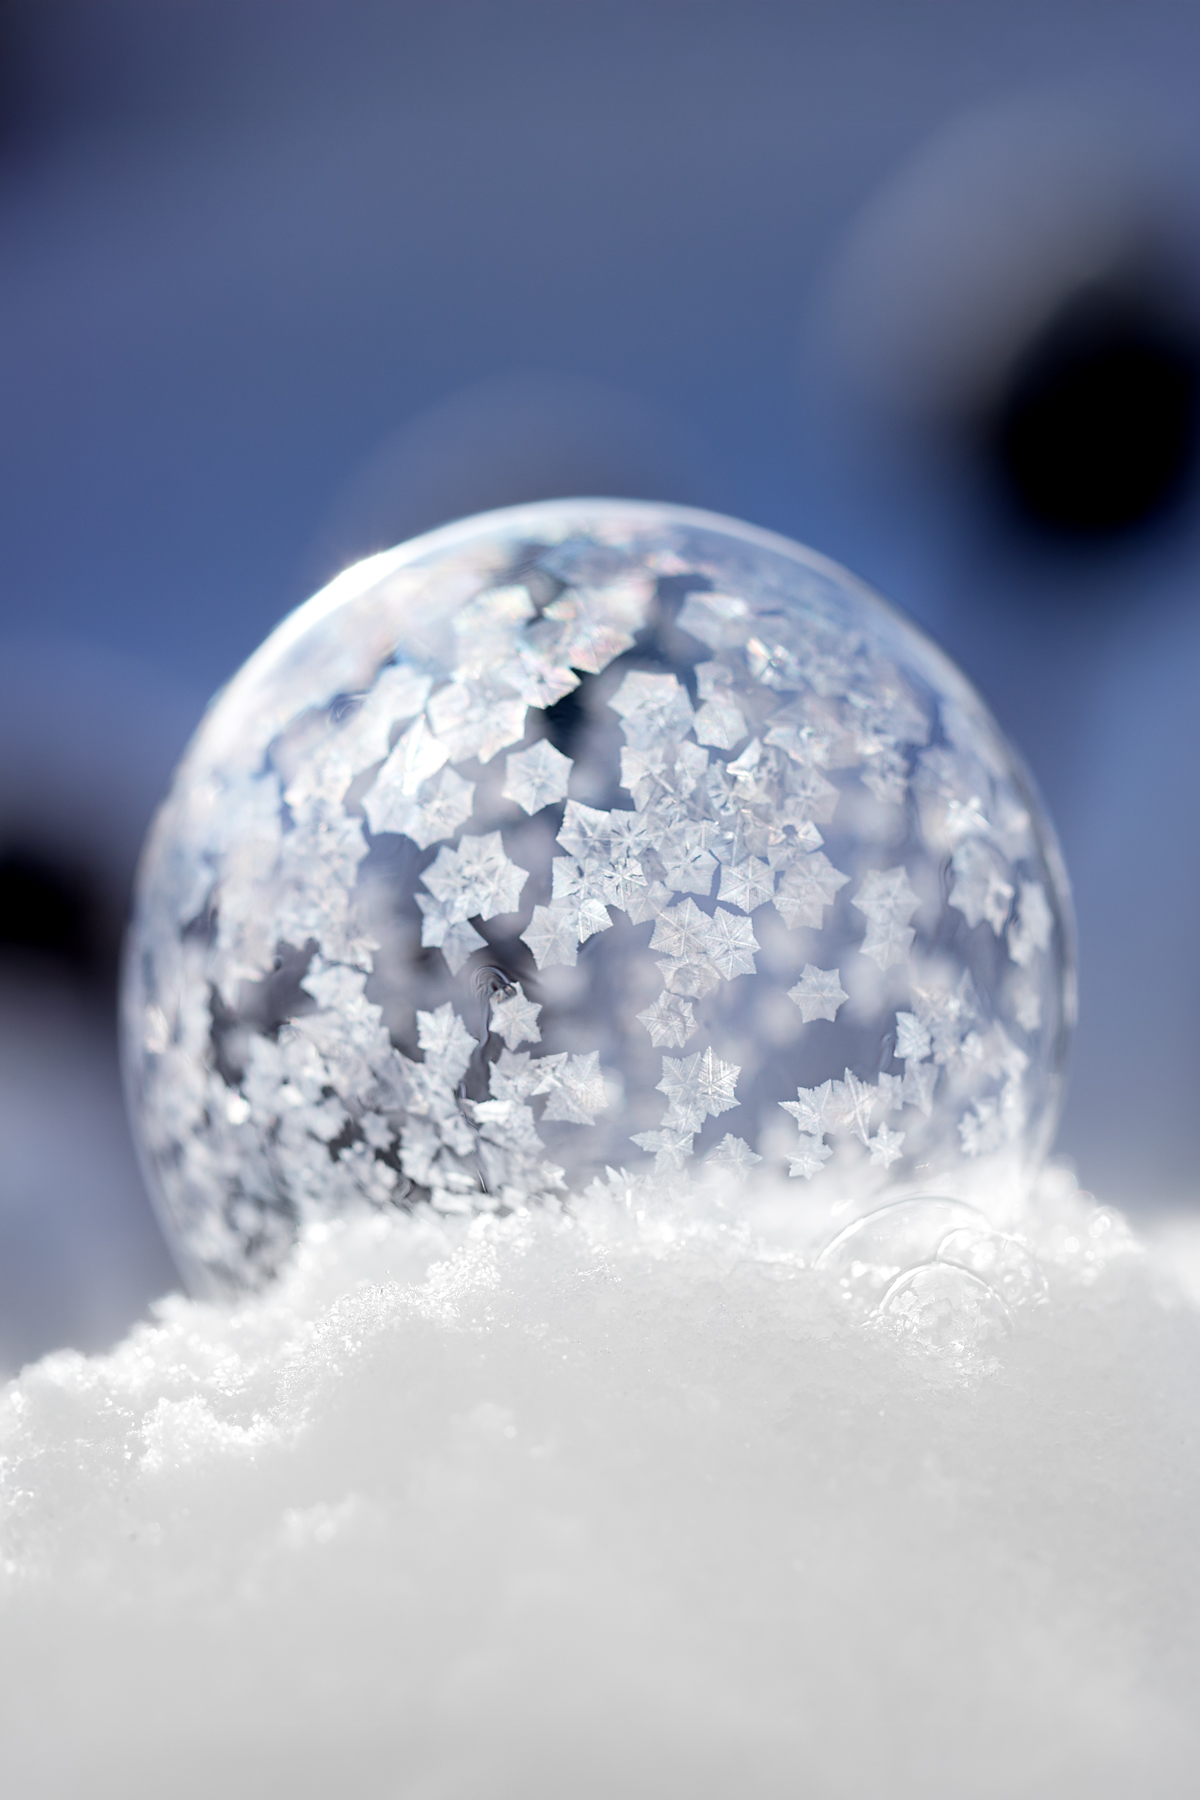
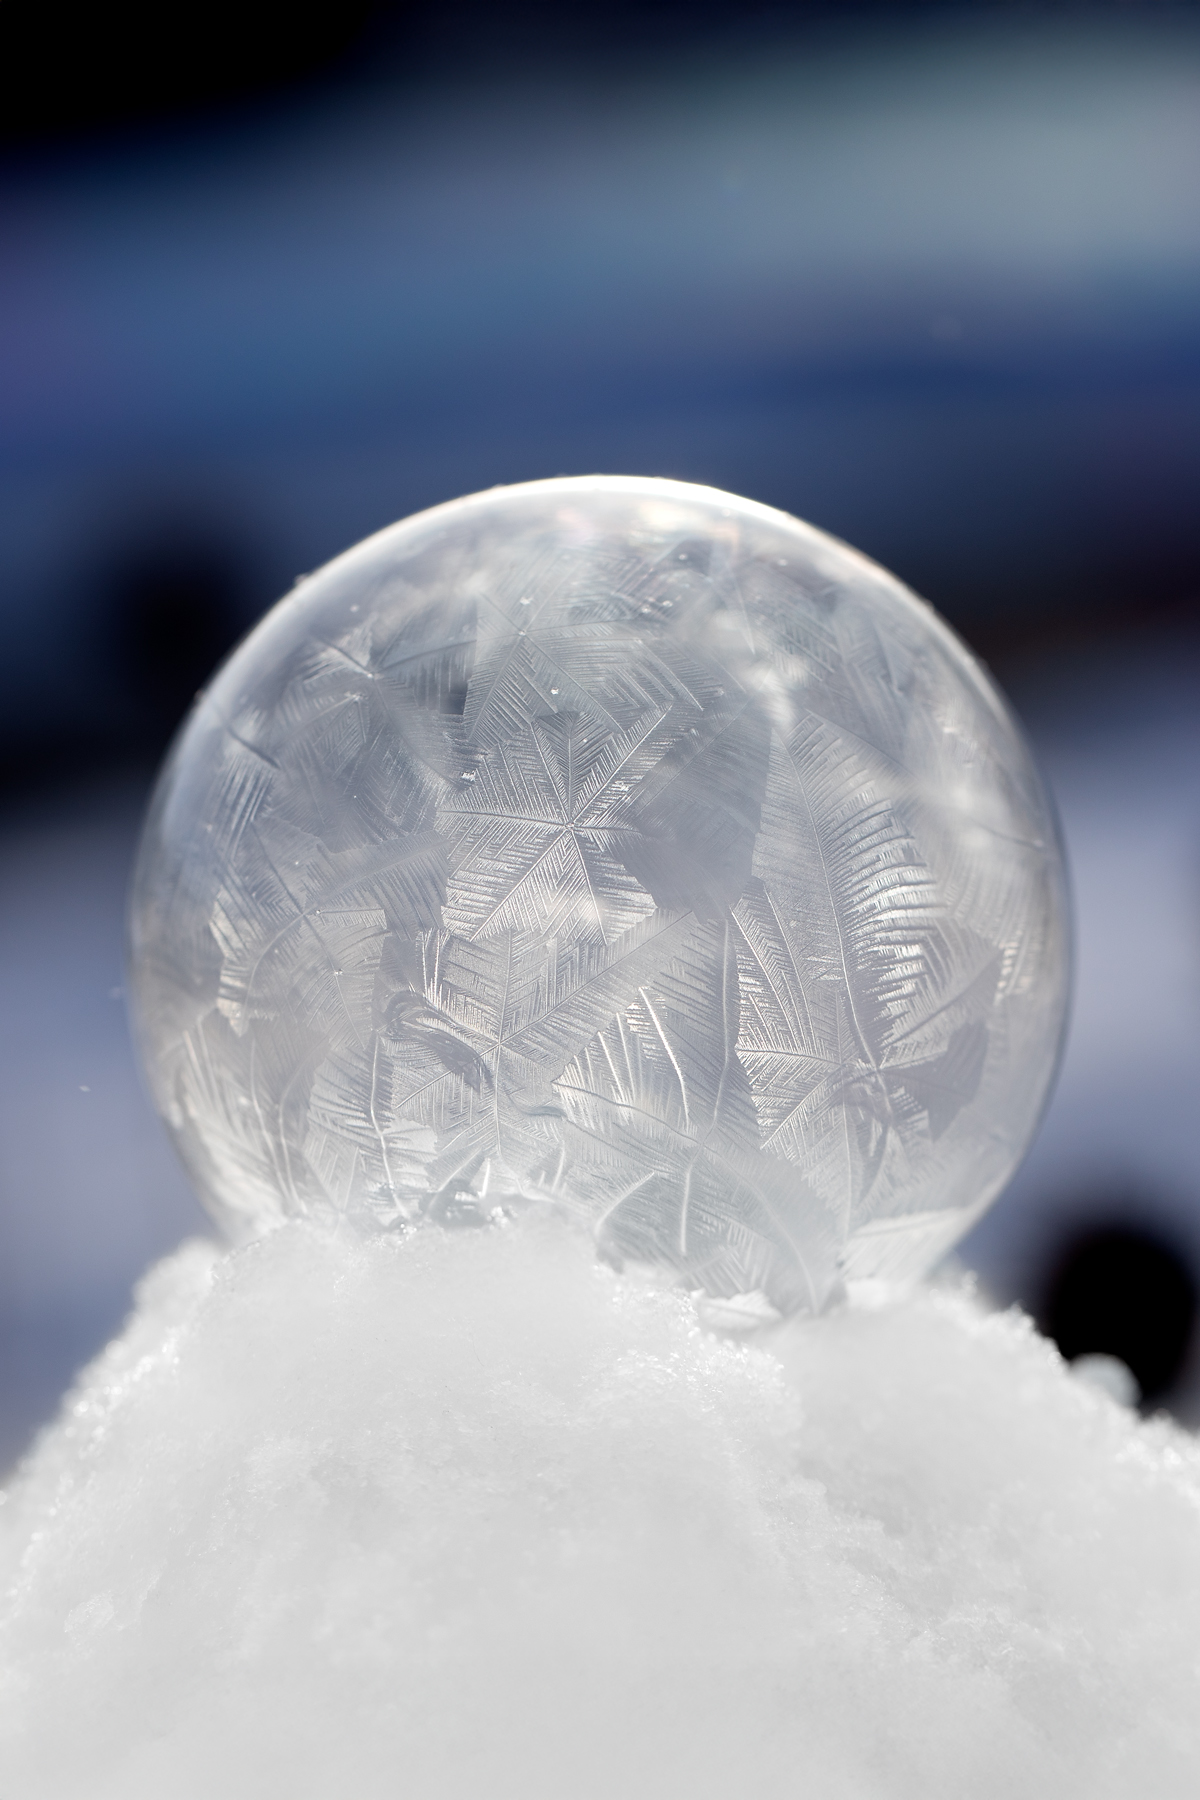
Dip the wand into the solution and blow gently. Watch bubbles freeze mid-air or land on snow and continue freezing. Some will shatter into shimmering fragments, while others freeze into full crystal orbs. This method is perfect for active play and dramatic results.
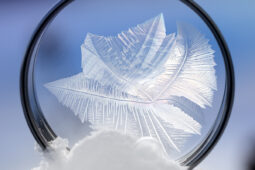
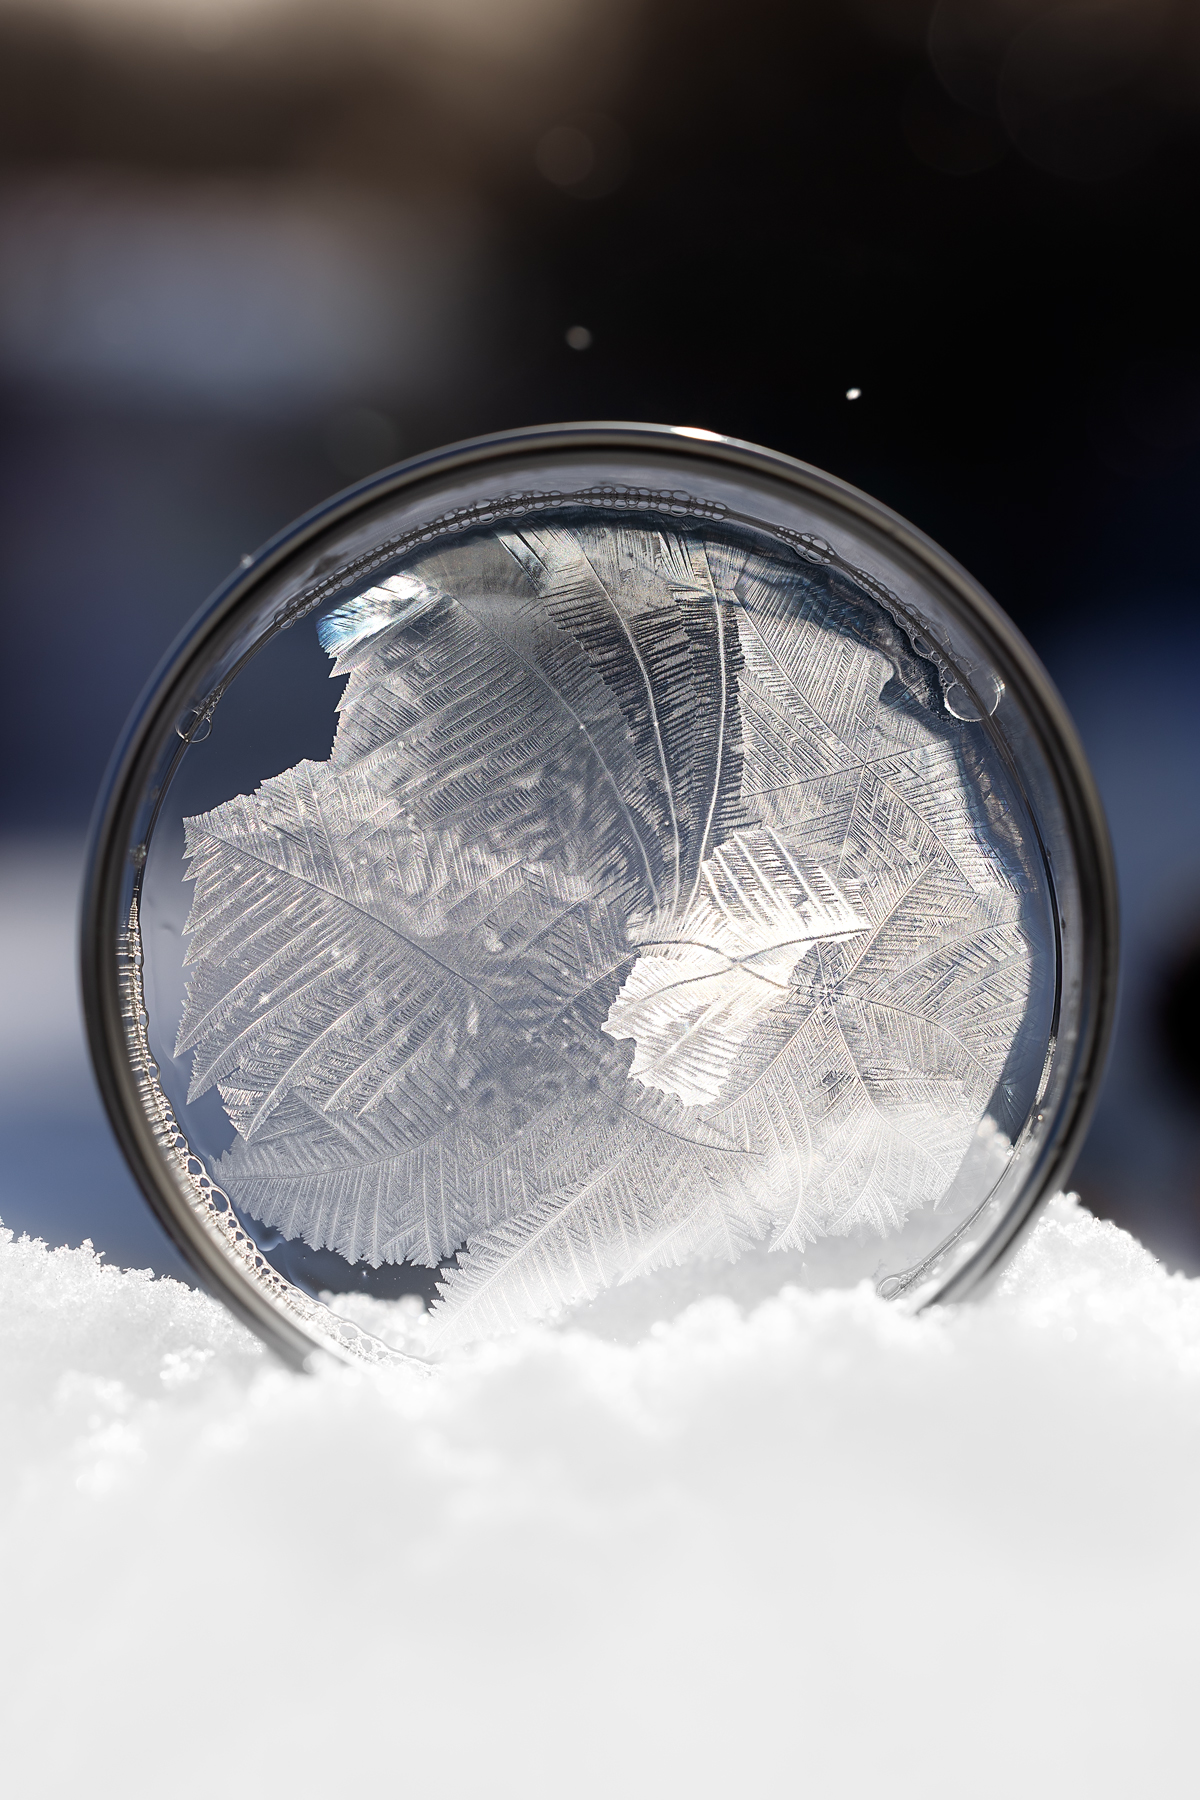
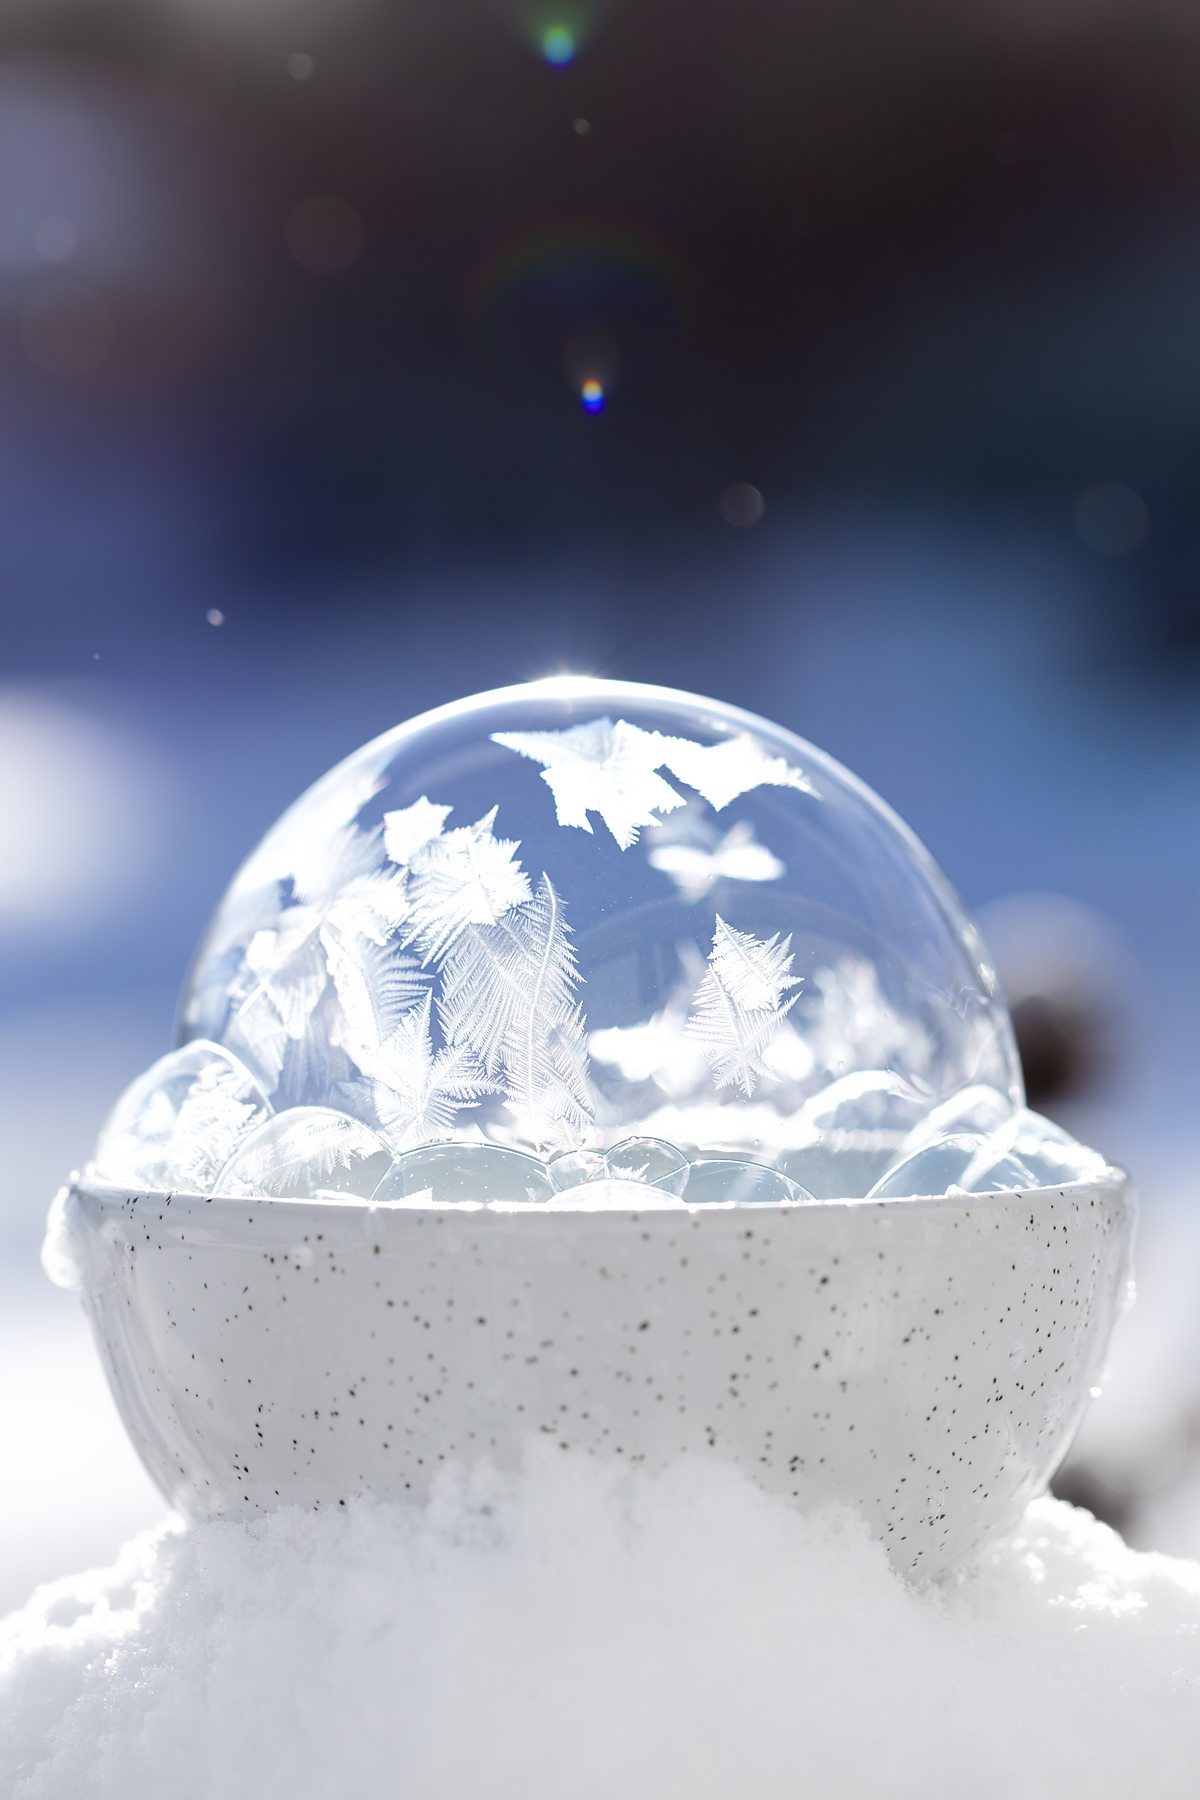
Method 2: Bowl and Straw
Pour a small amount of bubble solution into a bowl. Use a paper straw to gently blow bubble domes on the surface. These freeze more slowly, allowing kids to observe the crystallization process. You’ll see thin layers of ice slide across the bubble’s surface—this is our favorite method for watching the science happen and probably the easiest for small children.
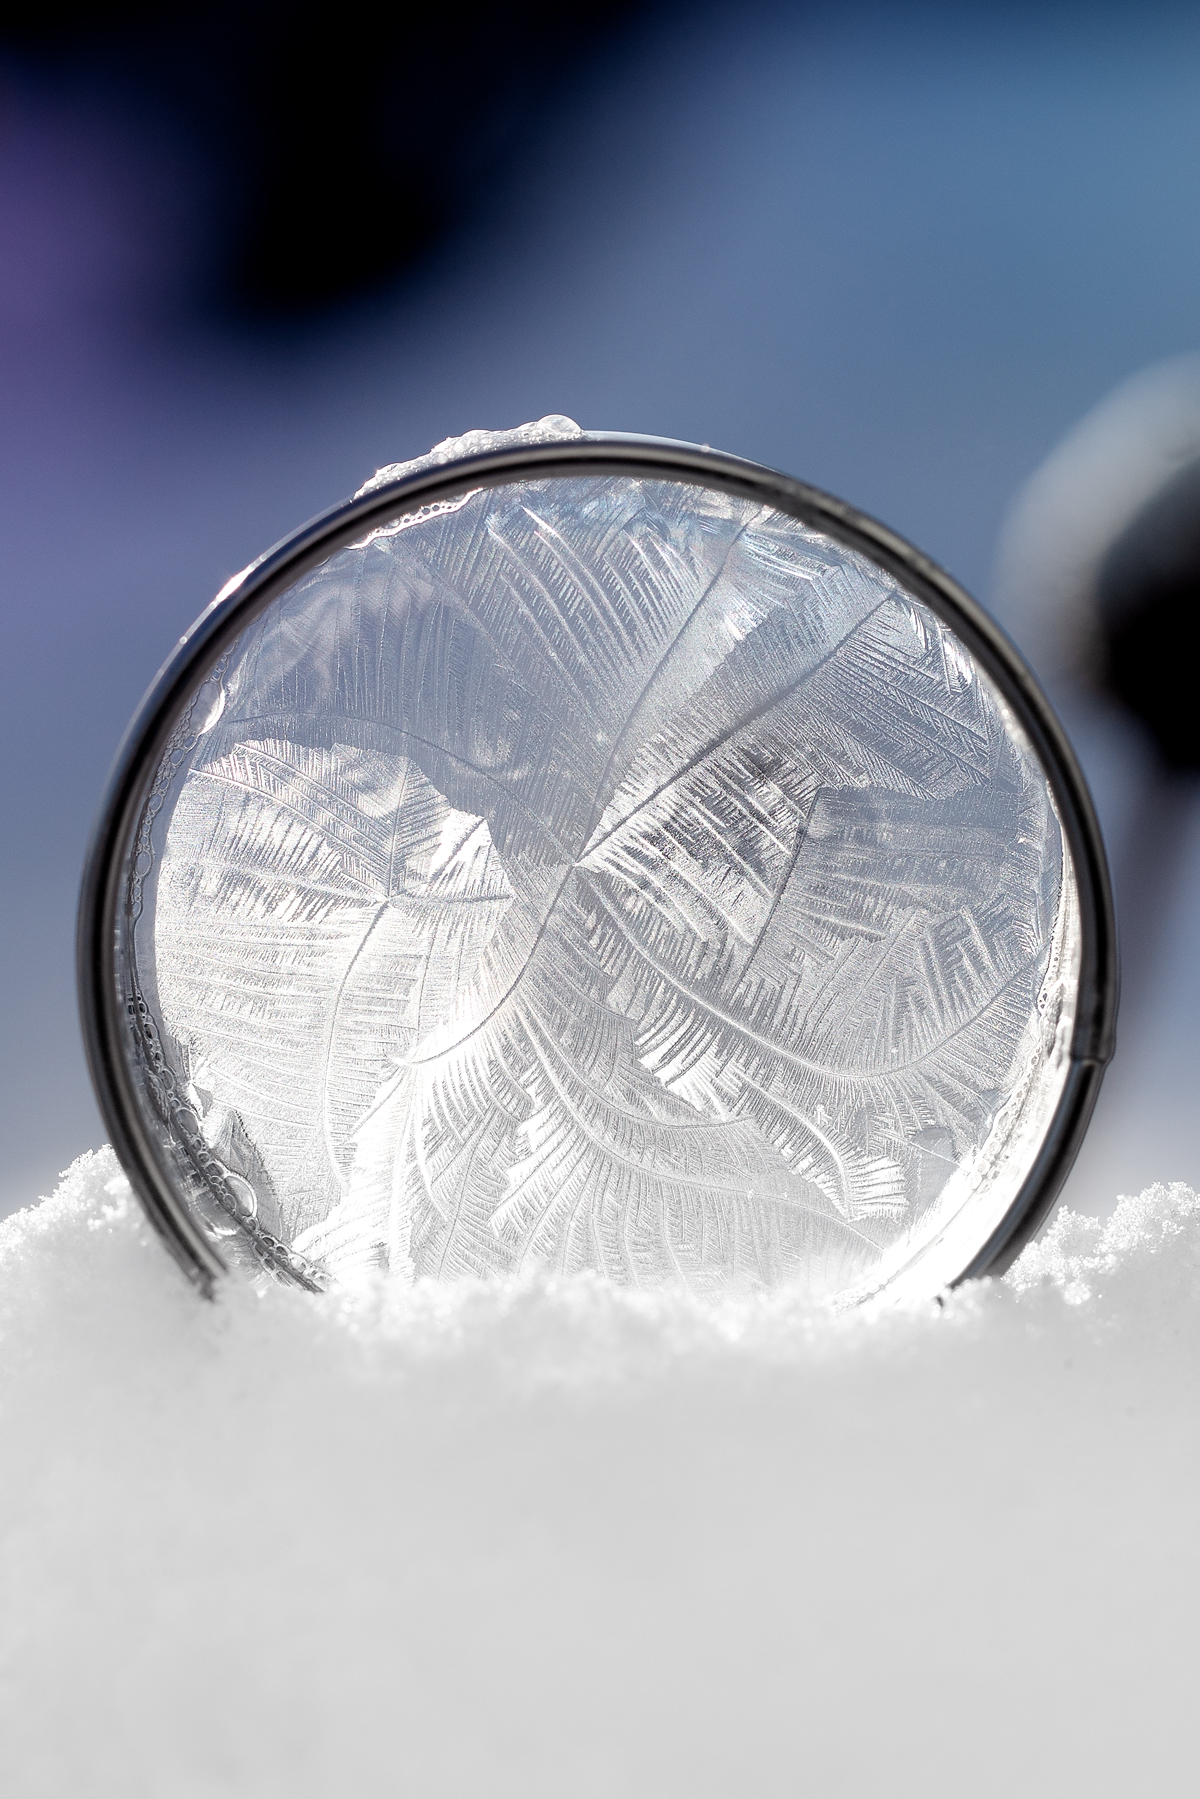
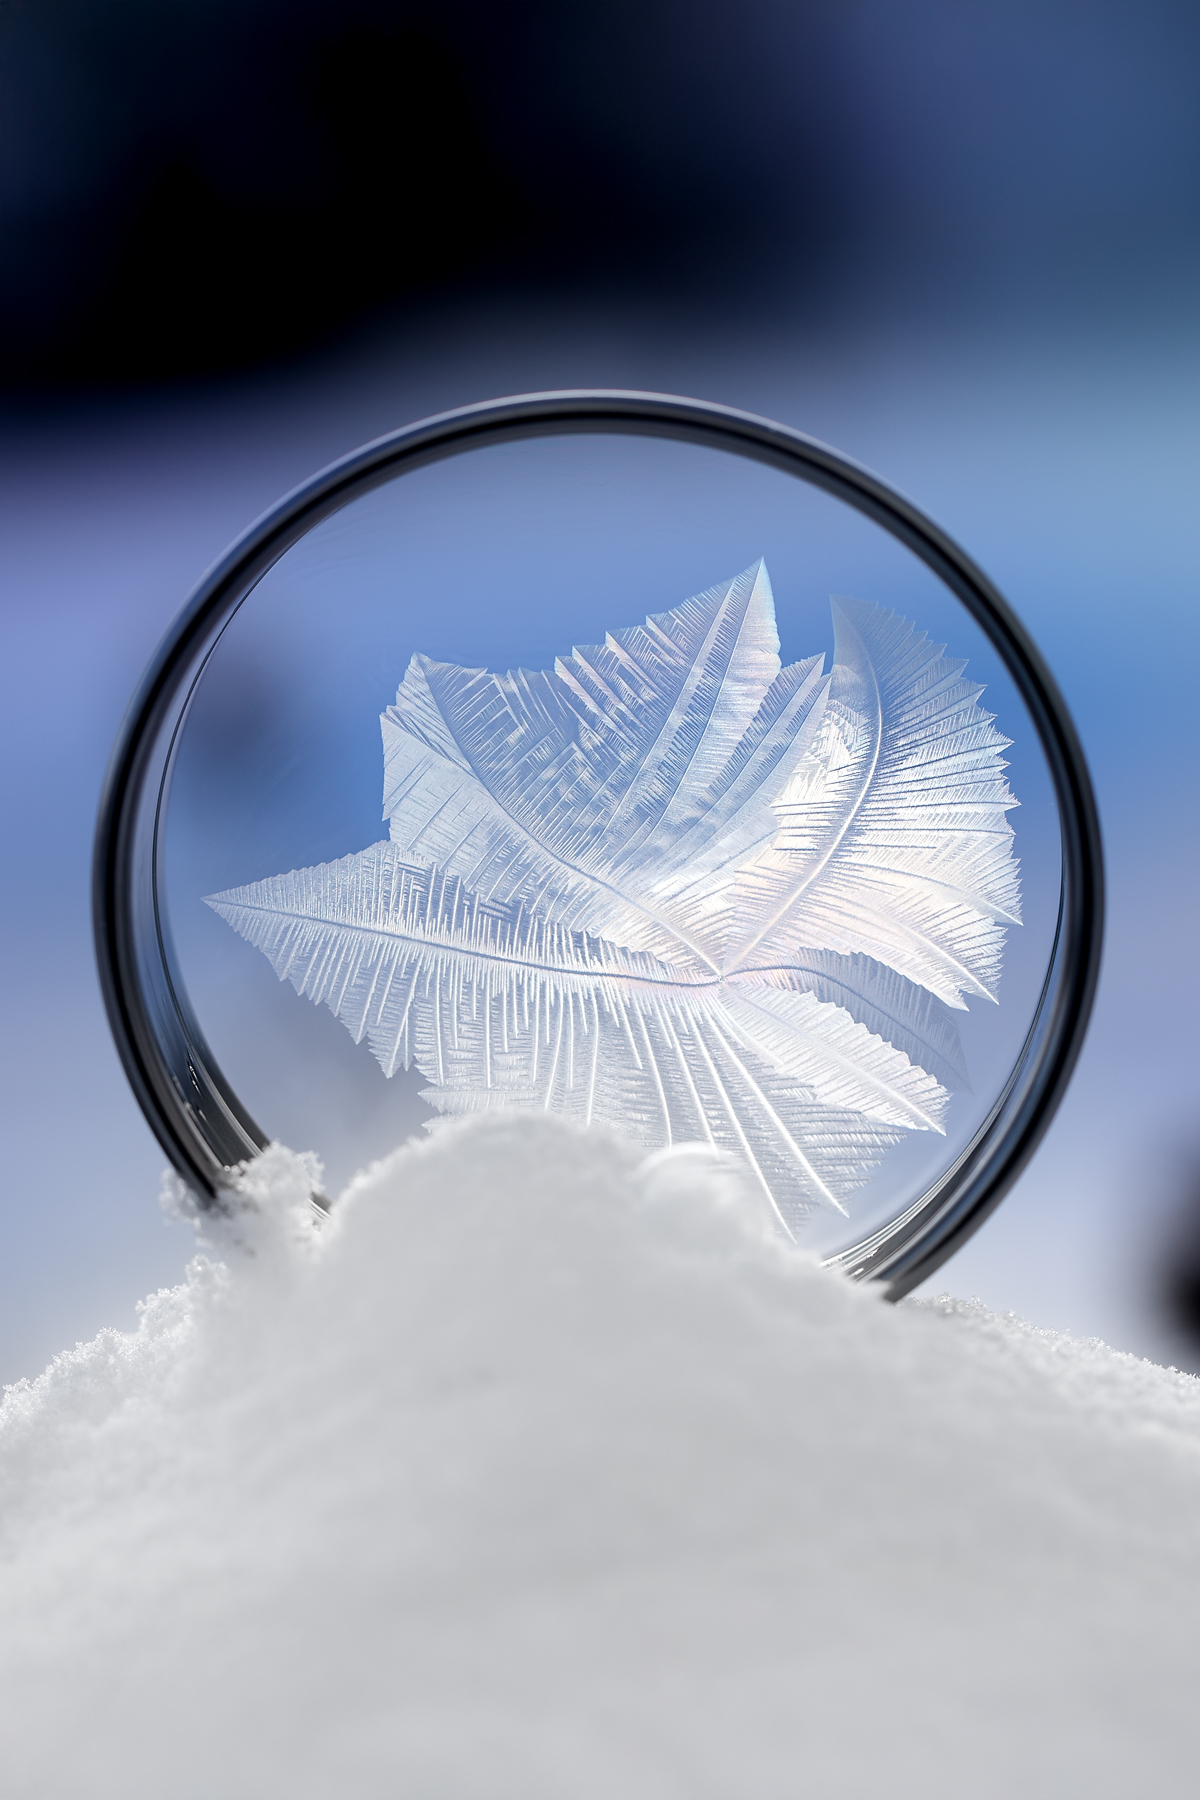
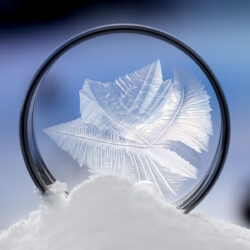
Method 3: Cookie Cutter Bubbles
Dip a cookie cutter into the solution and place it on a flat surface, such as a snow-covered table, frozen deck railing, or plate. A thin bubble film will form across the opening. Watch as delicate ice crystals spread in branching patterns. This method creates the longest-lasting frozen soap bubbles and offers the best view of crystal formation.
STEP 4: Observe the magic. As bubbles freeze, look for:
- Complete crystallization before the bubble collapses.
- Ice crystals spreading across the surface.
- Shimmering soap layers as they freeze.
- Bubbles bouncing along snow like balls.
- Frozen bubbles clinging to bushes or fences.
Tips for Success
A few small adjustments can make a big difference when making frozen bubbles. These tips will help you avoid common frustrations and get better results every time.
- Find a wind-protected area: Wind is the biggest challenge. Try blowing bubbles near a building, fence, parked cars, or a sheltered corner of the yard.
- Time it right: Early mornings just after sunrise, cold snaps, calm clear days, and fresh powdery snow all improve results.
- Experiment with surfaces: Try snow, frozen railings, ice-covered tables, or evergreen branches.
- Keep solution from freezing: If the solution starts to freeze, warm it indoors briefly or keep it in a pocket between uses.
The Science Behind Frozen Bubbles
Frozen bubbles aren’t just beautiful—they’re a hands-on science lesson. When temperatures drop below freezing, water molecules in the bubble slow down and form ice crystals. These crystals usually start at one point and spread across the surface in branching patterns.
The soap forms a thin membrane. As ice crystals grow, this membrane becomes brittle, which is why frozen bubbles shatter instead of popping like summer bubbles.
Discussion questions for kids:
- Why do bubbles freeze faster on colder days?
- What shapes do you notice in the ice crystals?
- Why do some bubbles freeze completely while others pop first?
- How is this different from blowing bubbles in warm weather?
Frequently Asked Questions About Frozen Bubbles
These are the questions we hear most often when families try frozen bubbles for the first time. Use this section to quickly troubleshoot and refine your setup.
Bubbles can freeze at 32°F, but the process is slower and less dramatic. For clear ice crystals, aim for temperatures below 20°F. I took the photos for this blog post when it was 4°F outside!
Mix 1 cup warm water, 1/4 cup Dawn dish soap, 2 tablespoons glycerin, and 1 teaspoon sugar. Stir gently and let rest for at least one hour (overnight is best).
Common causes include warmer temperatures, wind, thin bubble solution, or rough surfaces. Use a sheltered area and the glycerin-based recipe.
Each method has its strengths! Bubble wands are great for active play and watching bubbles freeze mid-air. The bowl and straw method is perfect for younger kids and close observation. Cookie cutter bubbles create the most stunning crystal patterns and last the longest, making them ideal for photography and really studying how ice forms. We recommend trying all three to see which your family enjoys most!
In temperatures below 10°F, bubbles can last several minutes. Near 32°F, they may only last 10–30 seconds. Cookie cutter bubbles tend to last the longest.
Yes. Corn syrup can help strengthen bubbles, but glycerin produces longer-lasting bubbles and better ice crystal formation. Use 1–2 tablespoons of corn syrup per cup of water if needed.
Distilled water doesn’t contain minerals or additives that can interfere with bubble strength. Tap water varies by location and may weaken bubbles or cause them to pop more easily. Using distilled water helps create smoother, stronger bubbles that last longer and freeze more evenly, especially in very cold temperatures.
More Winter Science and Nature Activities
Once you’ve mastered frozen bubbles, try these other magical cold-weather activities:
- Make Birdseed Ornaments – Create simple birdseed ornaments that help feed backyard birds during winter while teaching kids about wildlife and nature.
- Build a Snowman Bird Feeder – Create a winter critter snowman that feeds your backyard birds while doubling as winter yard art.
- Make Tissue Paper Art with Snow – Use bleeding tissue paper and snow to create beautiful winter artwork that kids will love.
- Explore Winter Nature – Bundle up for a winter nature hike followed by hot chocolate to warm up.
- Create Ice Jewels – Make colorful frozen treasures using balloons, water, and food coloring for outdoor winter decorations.
Save This Activity for Later
📌 Pin this frozen bubble activity on Pinterest to save for the next cold snap!
Frozen Bubbles
Ingredients
- 1 cup distilled water warm
- 1/4 cup Dawn dish soap
- 2 tbsp glycerin corn syrup may be substituted
- 1 tsp sugar
Instructions
- Combine ingredients in a clean container. Stir gently to avoid creating foam.
- Let the solution rest for at least 1 hour (overnight is even better) to allow ingredients to bond.
- Use in your favorite bubble method: wand, bowl and straw, or cookie cutter bubbles.
- Store unused solution in a sealed container at room temperature. Bring inside briefly if it starts to freeze.
Notes
- Distilled water gives the most consistent, long-lasting bubbles.
- Glycerin creates stronger bubbles and better ice crystal formation; corn syrup can be used if needed.
- Sugar helps ice crystals form beautifully on frozen bubbles.
- Avoid shaking or foaming the solution—it works best smooth.
This post was originally published on January 5, 2014.


Emma says
I love the idea of doing it in the bowl. We tried it last year using those little bubble wands and it popped pretty quick. Still was beautiful though!
Juliana Lee says
Loved this post.
Nancy says
Do you think you could use dawn dish soap or bubble bath to blow bubbles or just bubble solution?
Melissa Lennig says
If you want to make homemade bubble solution, I have a great recipe here: https://www.firefliesandmudpies.com/play-with-bubbles/