

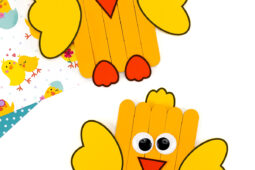
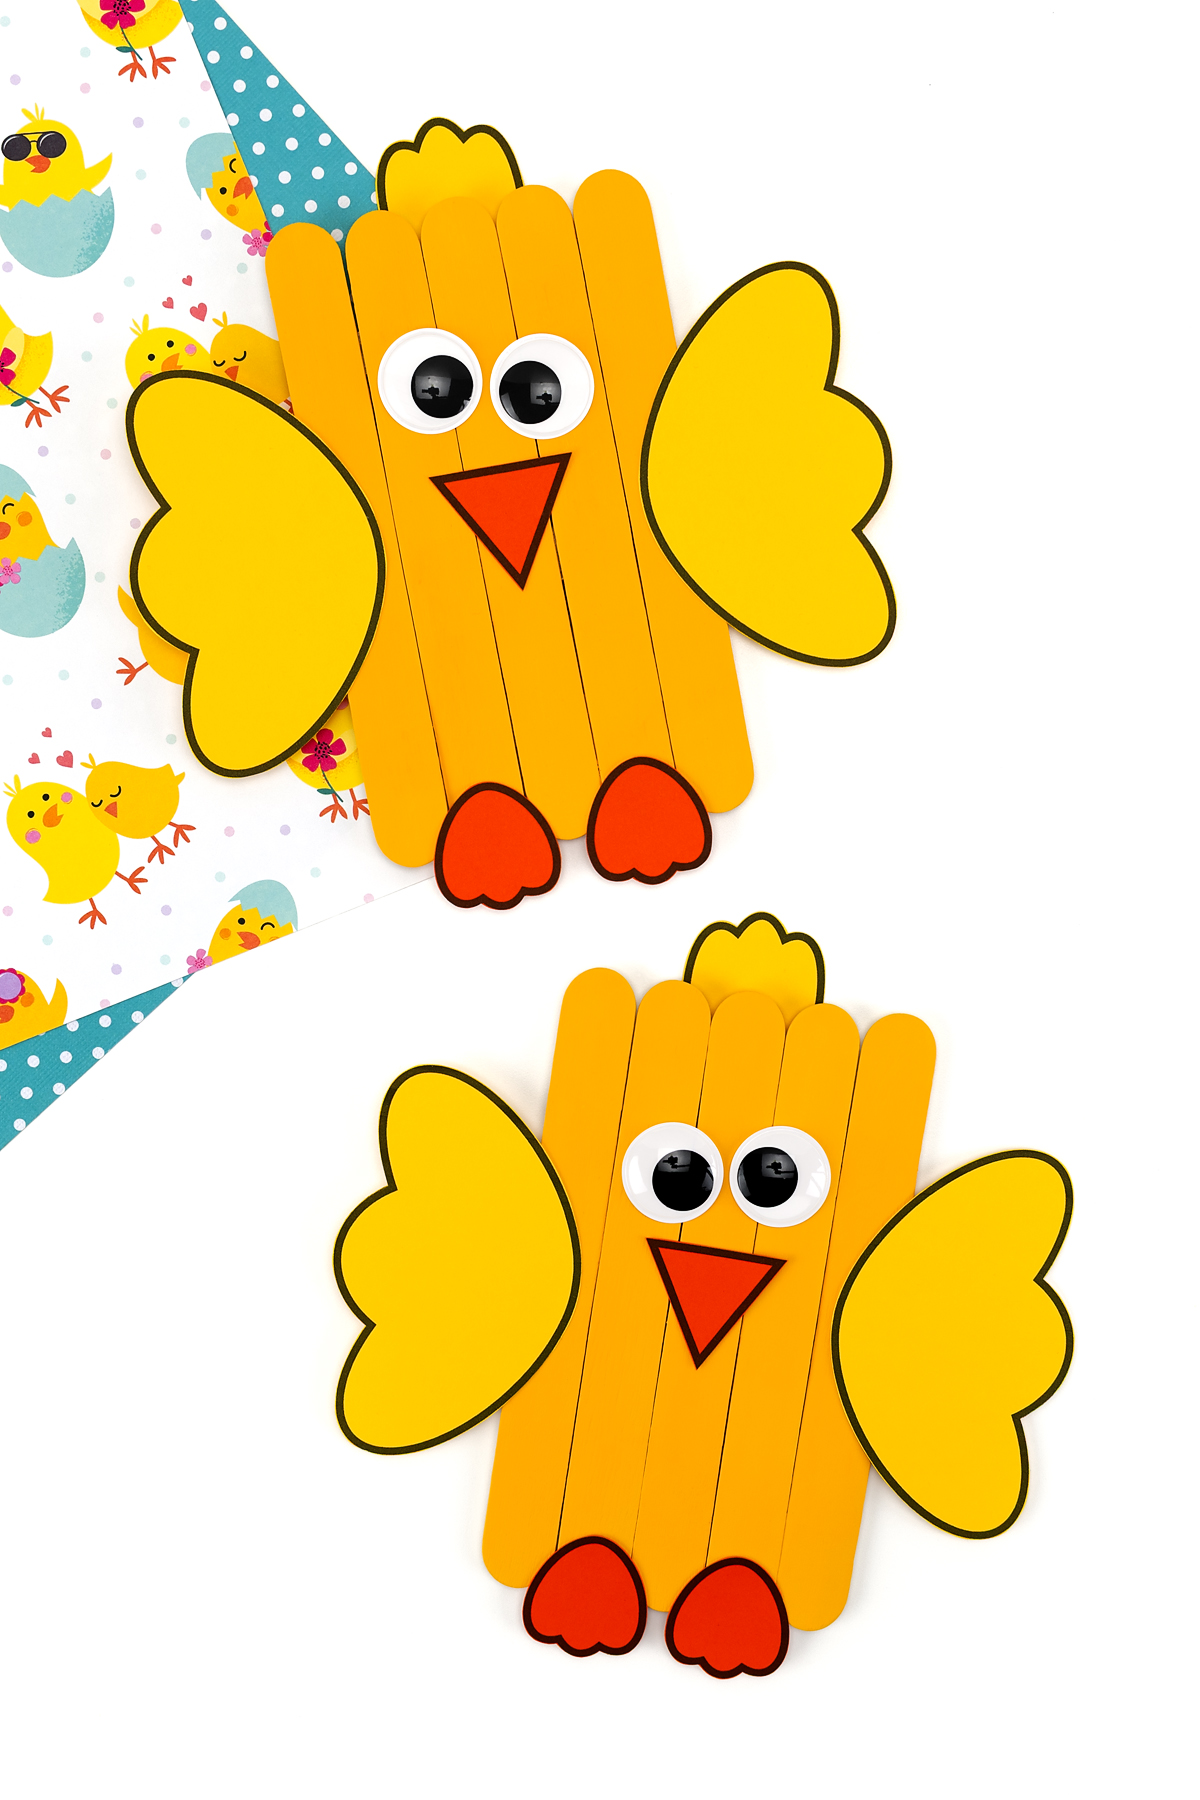
This Popsicle Stick Chick is a simple craft that turns out extra cute! Kids can paint, cut, and glue while making a sweet little chick they will be proud of. It works well for a wide range of ages, and the free printable template makes it easy for younger kids to add the details without frustration. You can set this up at the kitchen table, in a classroom, or for an Easter or farm-themed party. It is quick to prep and always a hit with kids!
You can pair this with our Popsicle Stick Bunny craft for even more springtime fun—kids will love making both adorable animals!
Why You’ll Love This Craft
There are plenty of reasons this one earns a spot in your Easter craft lineup:
- It uses simple supplies – Wide popsicle sticks and yellow paint are easy to find at any craft store, and you probably already have glue and scissors on hand.
- The free template does the hard part – The printable includes wings, feet, a beak, and a tuft of hair, so kids can focus on assembling and decorating rather than freehand cutting tricky shapes.
- It works for all ages – Younger kids can paint and glue with help; older elementary students can take on more steps independently.
- It’s plastic-free friendly – Wiggly eyes are fun, but the template includes eye cutouts so families and classrooms who prefer to skip plastic googly eyes have a built-in option.
- It makes a great keepsake – These little chicks are sturdy enough to display on a shelf, use as a card, or tuck into an Easter basket.
Craft Supplies Needed
You won’t need a long list of supplies for this craft. Here’s everything to have ready before you start:
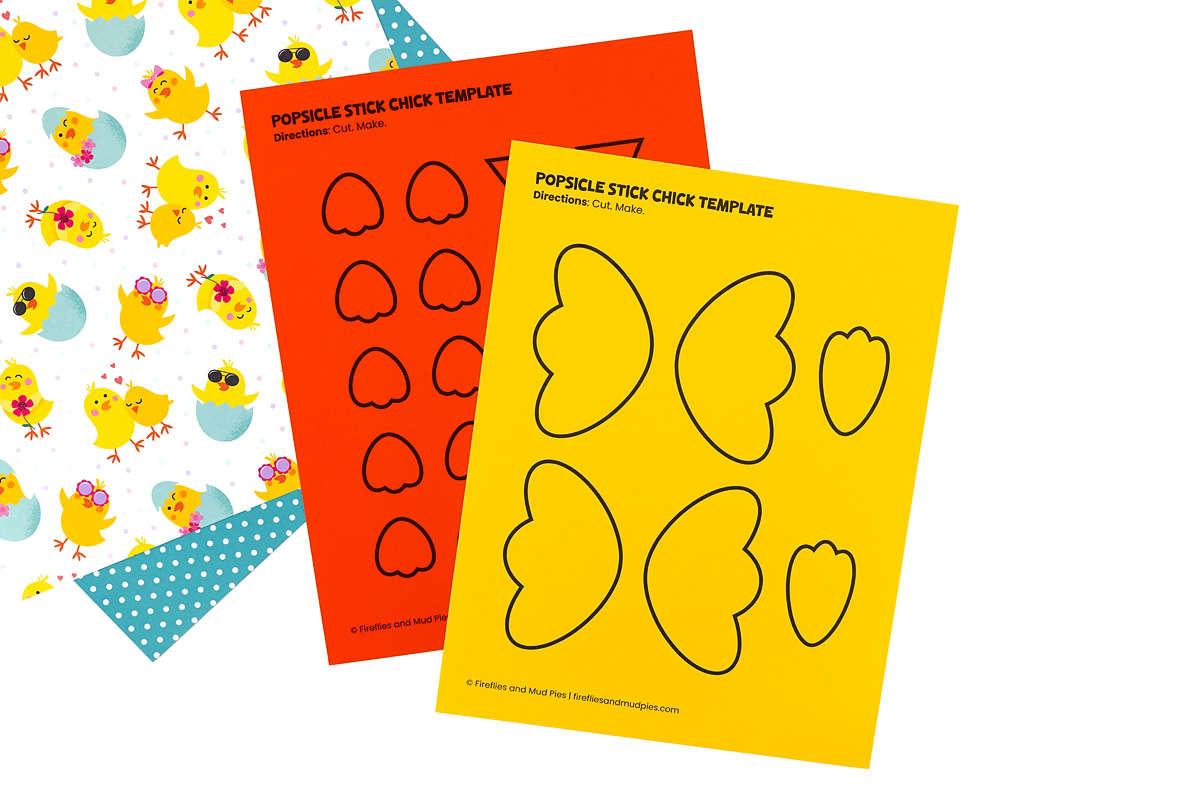
- Popsicle Stick Chick Template
- Yellow and orange cardstock
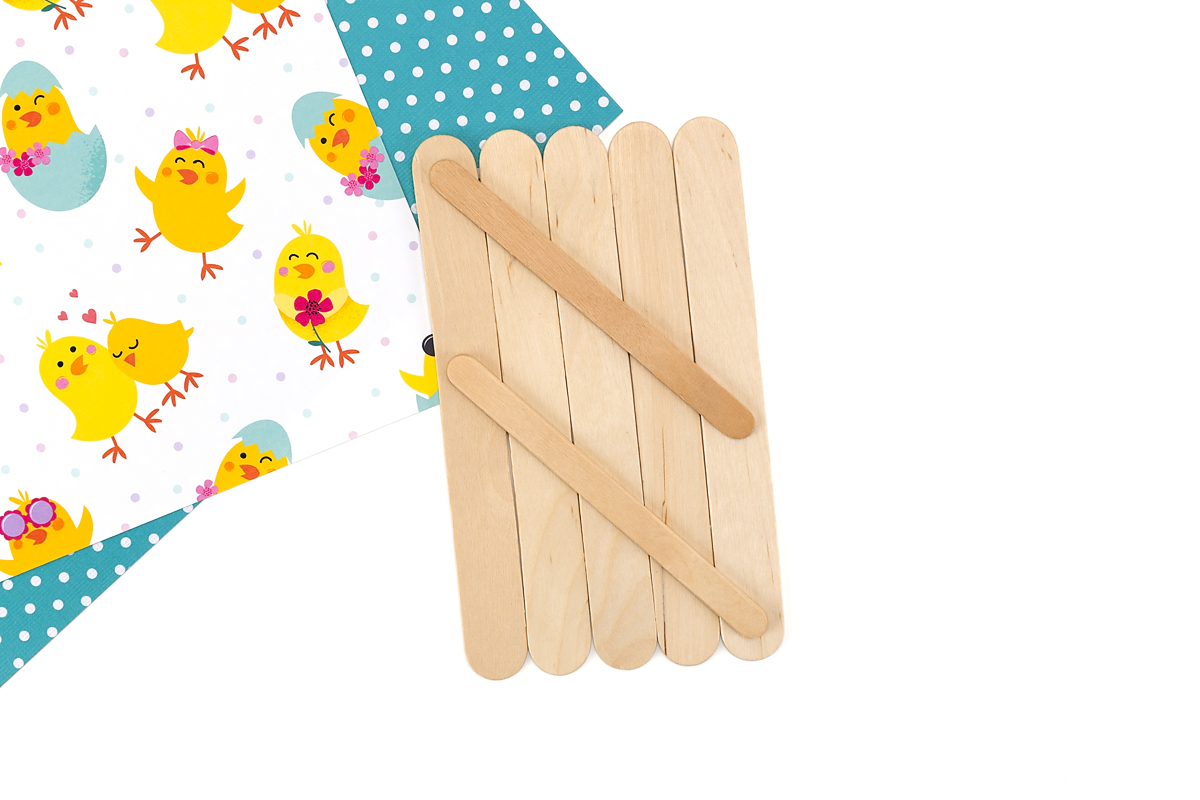
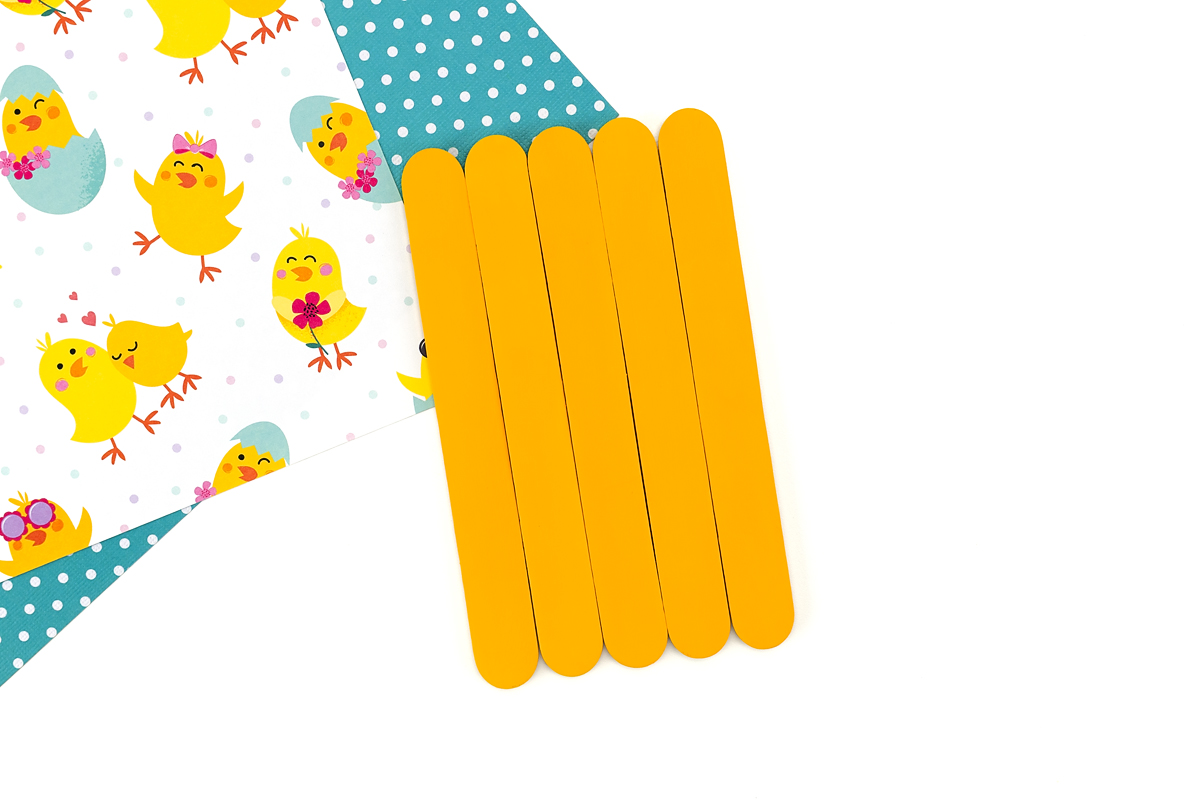
- Wide popsicle sticks (5)
- Standard popsicle sticks (2)
- Hot glue gun and glue sticks or tacky craft glue
- Scissors
- 24 mm wiggly eyes (optional)
How to Make Your Baby Chick Craft
Follow these steps and you’ll have a sweet little chick ready to display in no time:
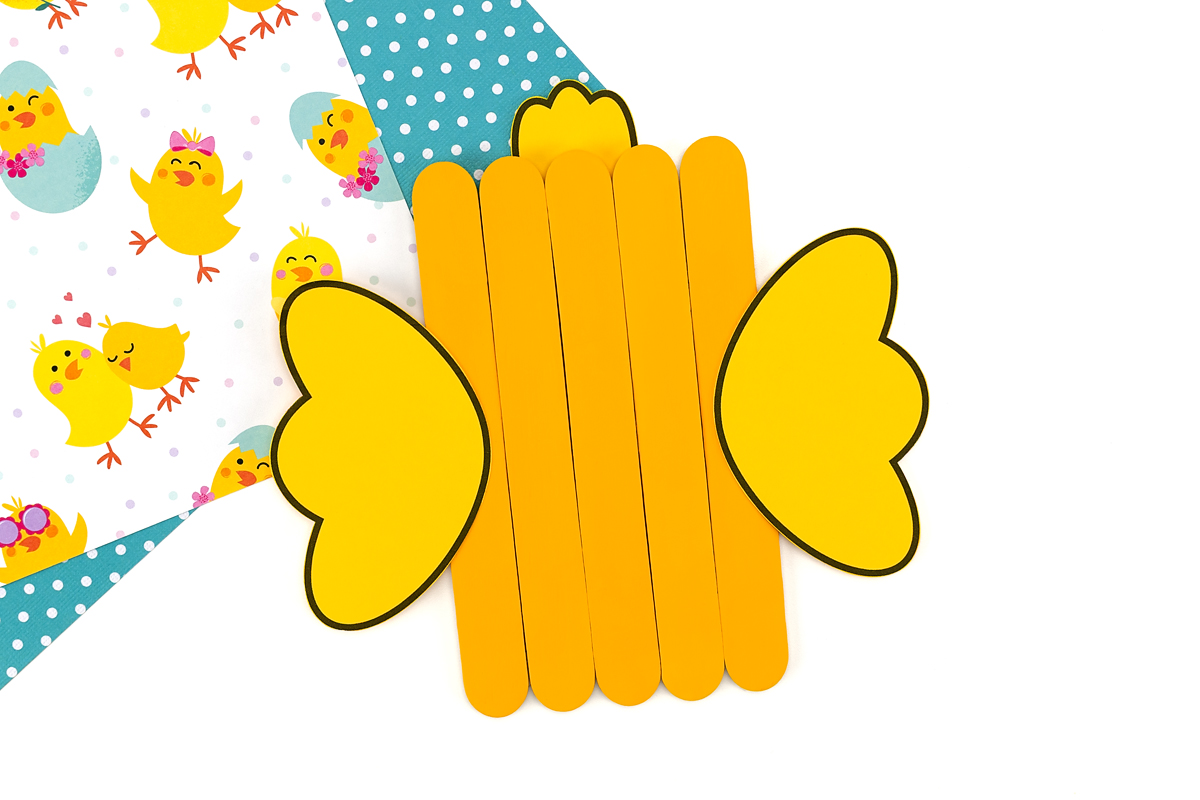
STEP 1: Print and cut the template. Print the free template on white cardstock. Cut out the wings, feet, beak, tuft of hair, and eyes (if you’re skipping wiggly eyes).
STEP 2: Build the chick’s body. Lay five wide popsicle sticks side by side. Glue two standard popsicle sticks horizontally across the back to hold them all together as one panel. Let the glue dry completely before moving on.
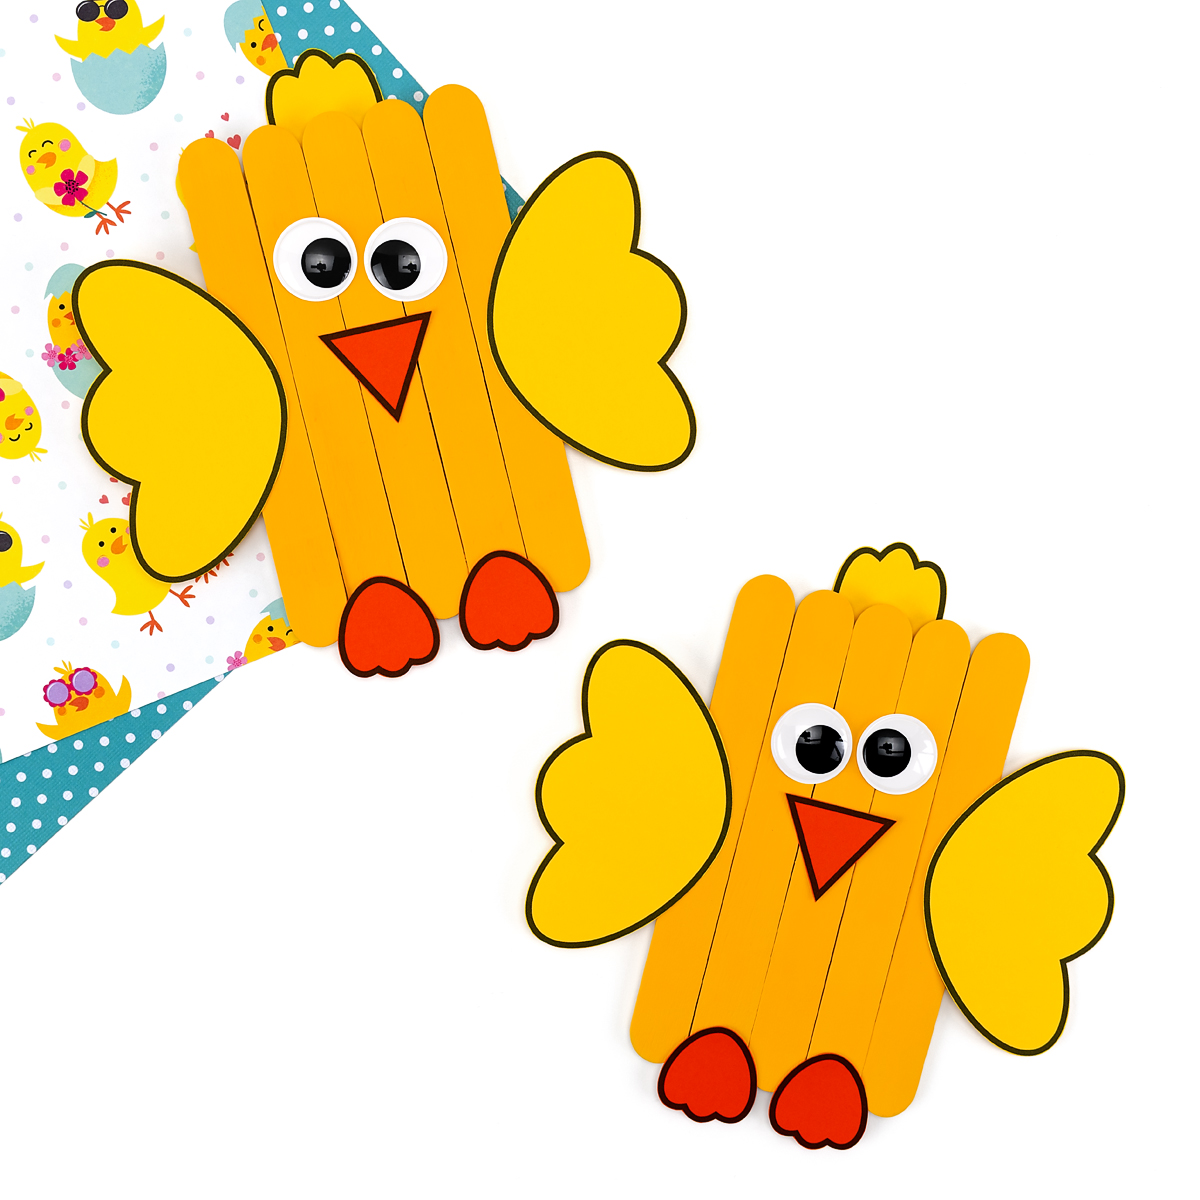
STEP 3: Paint the body yellow. Give the front of your popsicle stick panel a coat of yellow paint. Let it dry, then add a second coat for a nice, even finish. Now the chick’s body is ready to decorate!
STEP 4: Add the wings and hair. Once the paint is dry, glue the wings onto either side of the body and the tuft of hair (feathers) along the top.
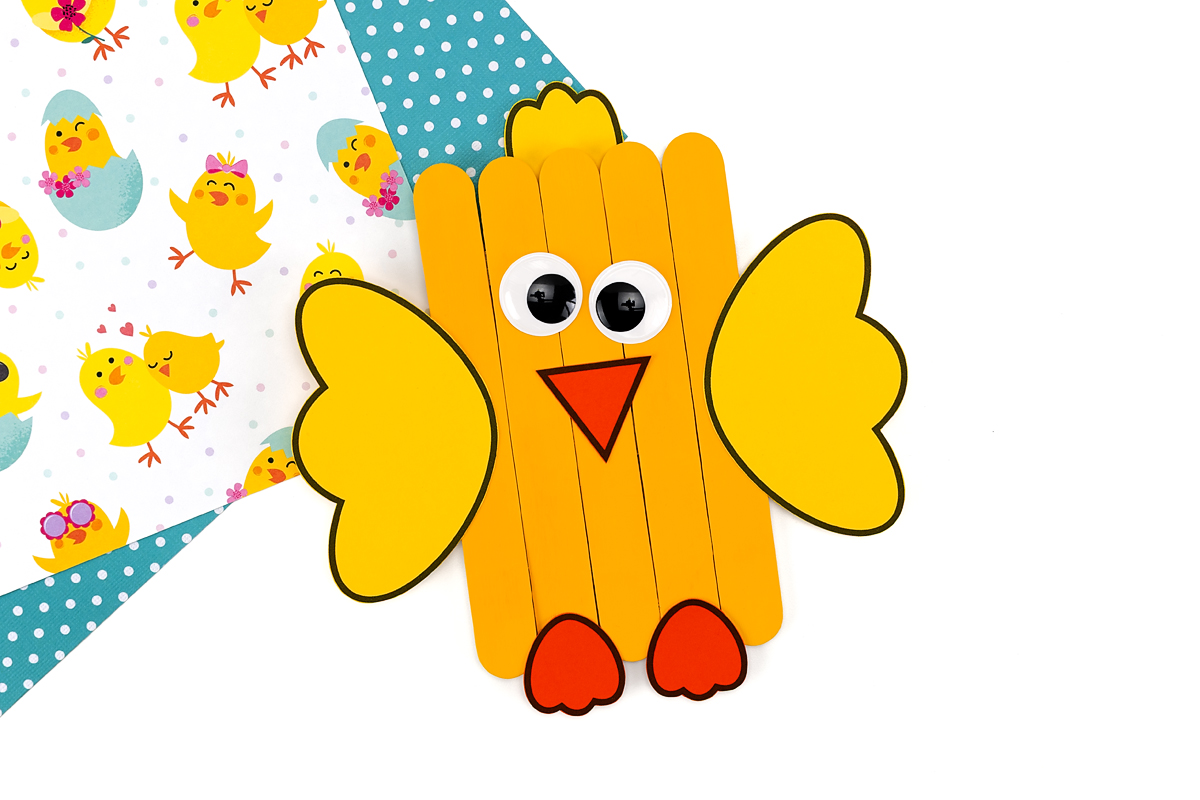
STEP 5: Finish the face and feet. Glue the beak and eyes (wiggly eyes or the printed version) onto the front, then attach the feet along the bottom edge. Let everything dry before handling.
Take It Further
Once your chick is complete, there are plenty of fun ways to keep the creativity going:
- Make it a card – Glue the finished chick to a folded piece of cardstock and write a message inside for a handmade Easter card!
- Add a name – Write a child’s name across the popsicle sticks in marker for a personalized Easter basket tag or place card for a holiday table.
- Decorate the template pieces – Before cutting, let kids color or decorate the wings and other pieces with crayons or markers for extra personality.
- Turn it into a magnet – Add a strip of magnetic tape to the back and stick it on the fridge.
- Use it in a sensory or writing activity – In a classroom setting, pair the chick craft with a “what’s inside the egg?” writing prompt or a spring-themed counting activity.
- Pair it with a great read-aloud – This Little Chick by John Lawrence is a sweet picture book that goes perfectly with this craft. Make it a full activity by reading together before or after you build your chick.
Frequently Asked Questions
Here are answers to some common questions about this craft:
Acrylic craft paint works well and dries quickly. Tempera paint is fine for younger kids but may not give as solid a finish. Two thin coats will always look better than one thick one.
With some help, yes. Painting the sticks is a great toddler job. Cutting and gluing the template pieces will need adult assistance for very young children, but they can still be involved in the assembly.
A low-temp glue gun gives the sturdiest results and speeds things up, but regular tacky craft glue works fine. Just allow a little extra drying time between steps.
The free template includes printed eyes, so you can skip the wiggly eyes entirely. Just cut them out and glue them on like any other template piece.
It’s a great classroom option. Pre-glue the sticks ahead of time to save drying time, and print enough templates for each student. The assembly goes quickly once the sticks are ready.
The template is available free for download in the craft supplies list.
More Easter Crafts for Kids
Looking for more easy Easter projects for kids? These fun crafts are perfect for home, school, or any spring celebration—and just right for little hands to make and enjoy.
- Easter Egg Template – Print and color these Easter egg templates, or use them for tracing and decorating. Simple, hands-on fun for home or the classroom.
- Popsicle Stick Easter Bonnet Craft – Build a cheerful Easter bonnet with popsicle sticks and paper. Kids can add bows, stickers, or pom-poms for a festive look.
- Paper Easter Egg Art – Turn plain paper eggs into bright, colorful creations. Paint, collage, or decorate with patterns for a spring craft that sparks creativity.
- Easter Suncatchers – Make egg-shaped suncatchers using tissue paper for a cheerful decoration that catches the sunlight.
- Easter Egg Wreath for Kids – Create a playful wreath from decorated egg templates. Hang it on doors or walls for an easy festive touch.
- Easter Hedgehog Craft – Craft a cute Easter hedgehog with paper and simple supplies. A fun, hands-on project for kids of all ages.
Save This Craft
Pin this simple Easter chick craft so you have it ready for March and April activities!


Want even more?
Make sure to follow on Facebook, Pinterest, and Instagram for more easy crafts, activities, recipes, and parenting tips. And don’t forget to subscribe to our emails.