

I’ve been making fairy gardens with my kids for 18 years! From tiny moss-covered mushroom cottages to woodsy gnome hideaways, we’ve used acorn caps and pebbles, miniature figurines, pressed flowers, and everything in between to build little worlds in our backyard and on our kitchen table. These projects have been a wonderful way to nurture creativity, spend unhurried time together, and bring a little magic to our everyday spaces.
In this post, I’m sharing everything I’ve learned about how to make a fairy garden, including the best plants, my favorite supplies, and creative ideas to make yours completely your own.
Looking for a smaller project? Our sweet little teacup fairy garden may be just what you need!
What is a Fairy Garden?
A fairy garden is a miniature garden featuring small plants, a fairy or gnome home, and natural elements like moss and pebbles. They can be built indoors or outdoors, in flower pots, garden beds, or repurposed containers like wooden boxes, birdbaths, or even a teacup. Rooted in folklore, fairy gardens stem from ancient beliefs that tiny fairies lived among nature, bringing luck and magic to those who welcomed them. Whether you lean into whimsical fairy themes or woodsy gnome aesthetics (like our gnome home), there’s no wrong way to build one.
Craft Supplies Needed
Before you begin, gather everything you need so the building process stays fun and unhurried:
- Basket or planter bowl with drainage holes – Pick one large enough to hold 3 small plants and a fairy house. Mossy baskets, terracotta bowls, and wooden crates all work beautifully.
- Potting soil – Choose the appropriate type for your plants (succulent mix, all-purpose, or moisture-retaining).
- Plants – Succulents and terrarium plants work especially well. Letting kids choose their own plants at the nursery is half the fun!
- Fairy house – I purchased mine at Michaels, but there are so many beautiful options here.
- Store-bought miniatures – Tiny mushrooms, animals, gems, marbles, bridges, signs, bird baths, and of course a fairy or a gnome! A great place to look for these is the dollhouse section of your local craft store.
- Natural materials – Sand, pebbles, acorns, bark, rocks, pine cones, twigs, shells—whatever catches your eye on a nature walk!
- Measuring cups – Handy for scooping and placing soil without making a mess.
Watch the Video Tutorial
Learn how to make your own fairy garden by watching our step-by-step video.
How to Make a Fairy Garden
Creating a fairy garden is as much about the process as the finished product. Follow these steps and let your imagination guide you!
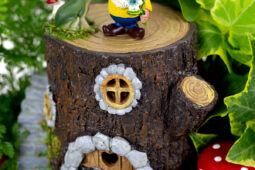
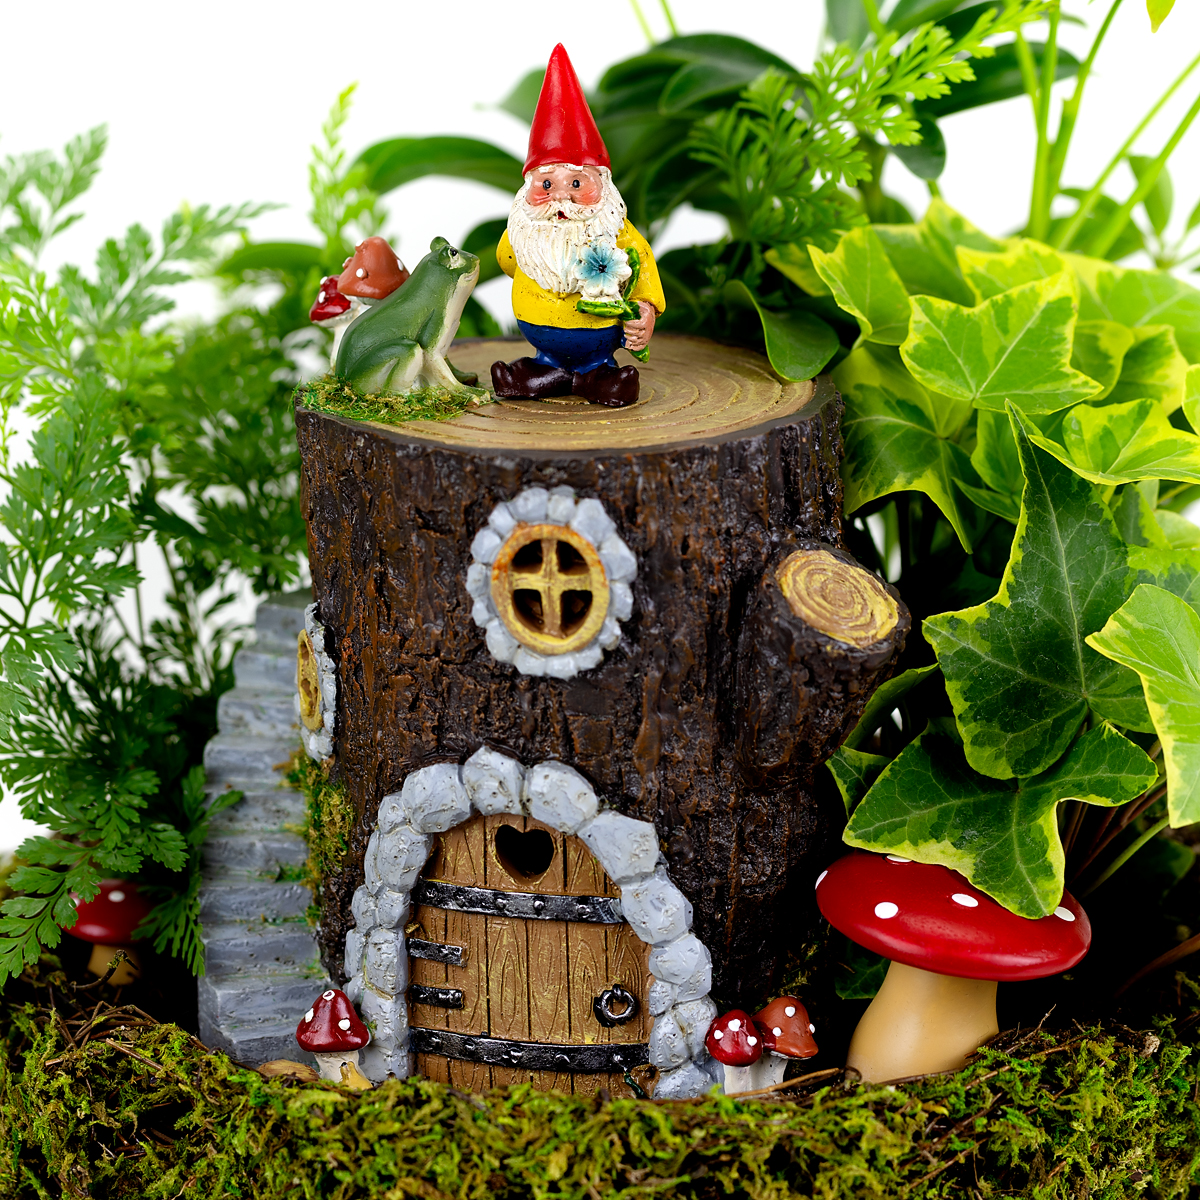
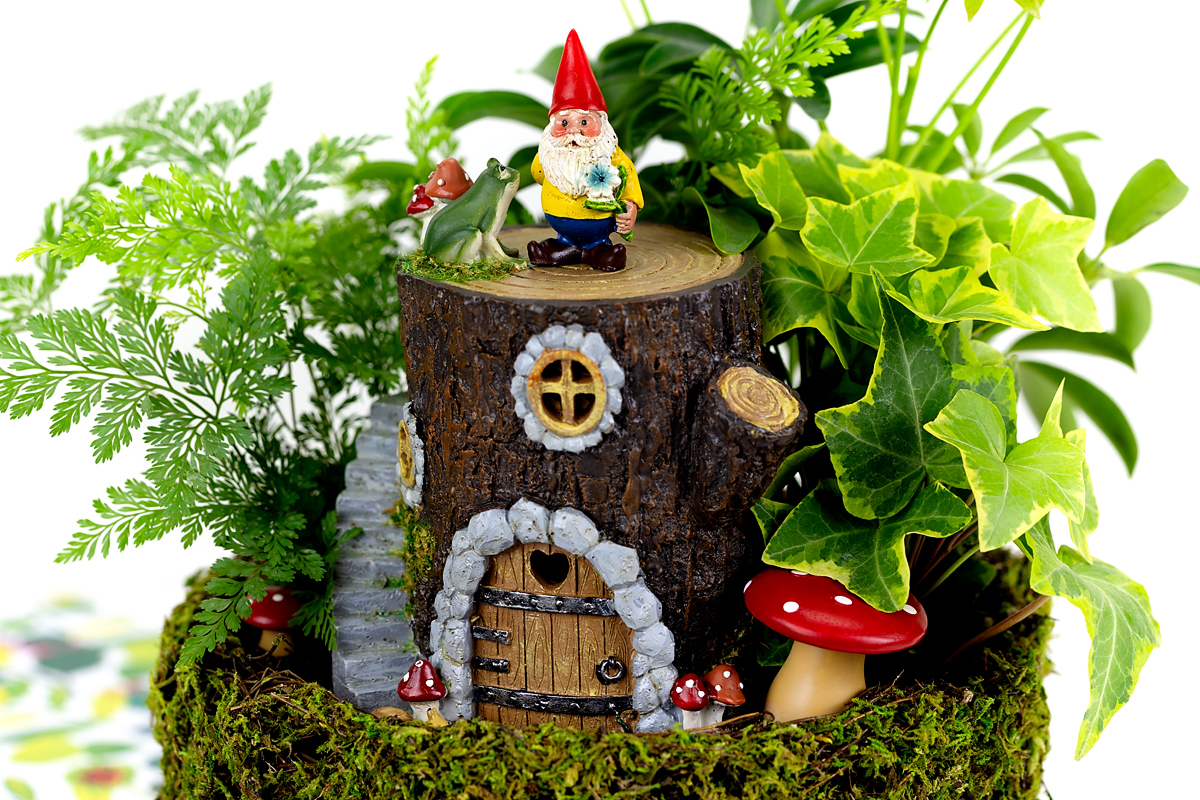
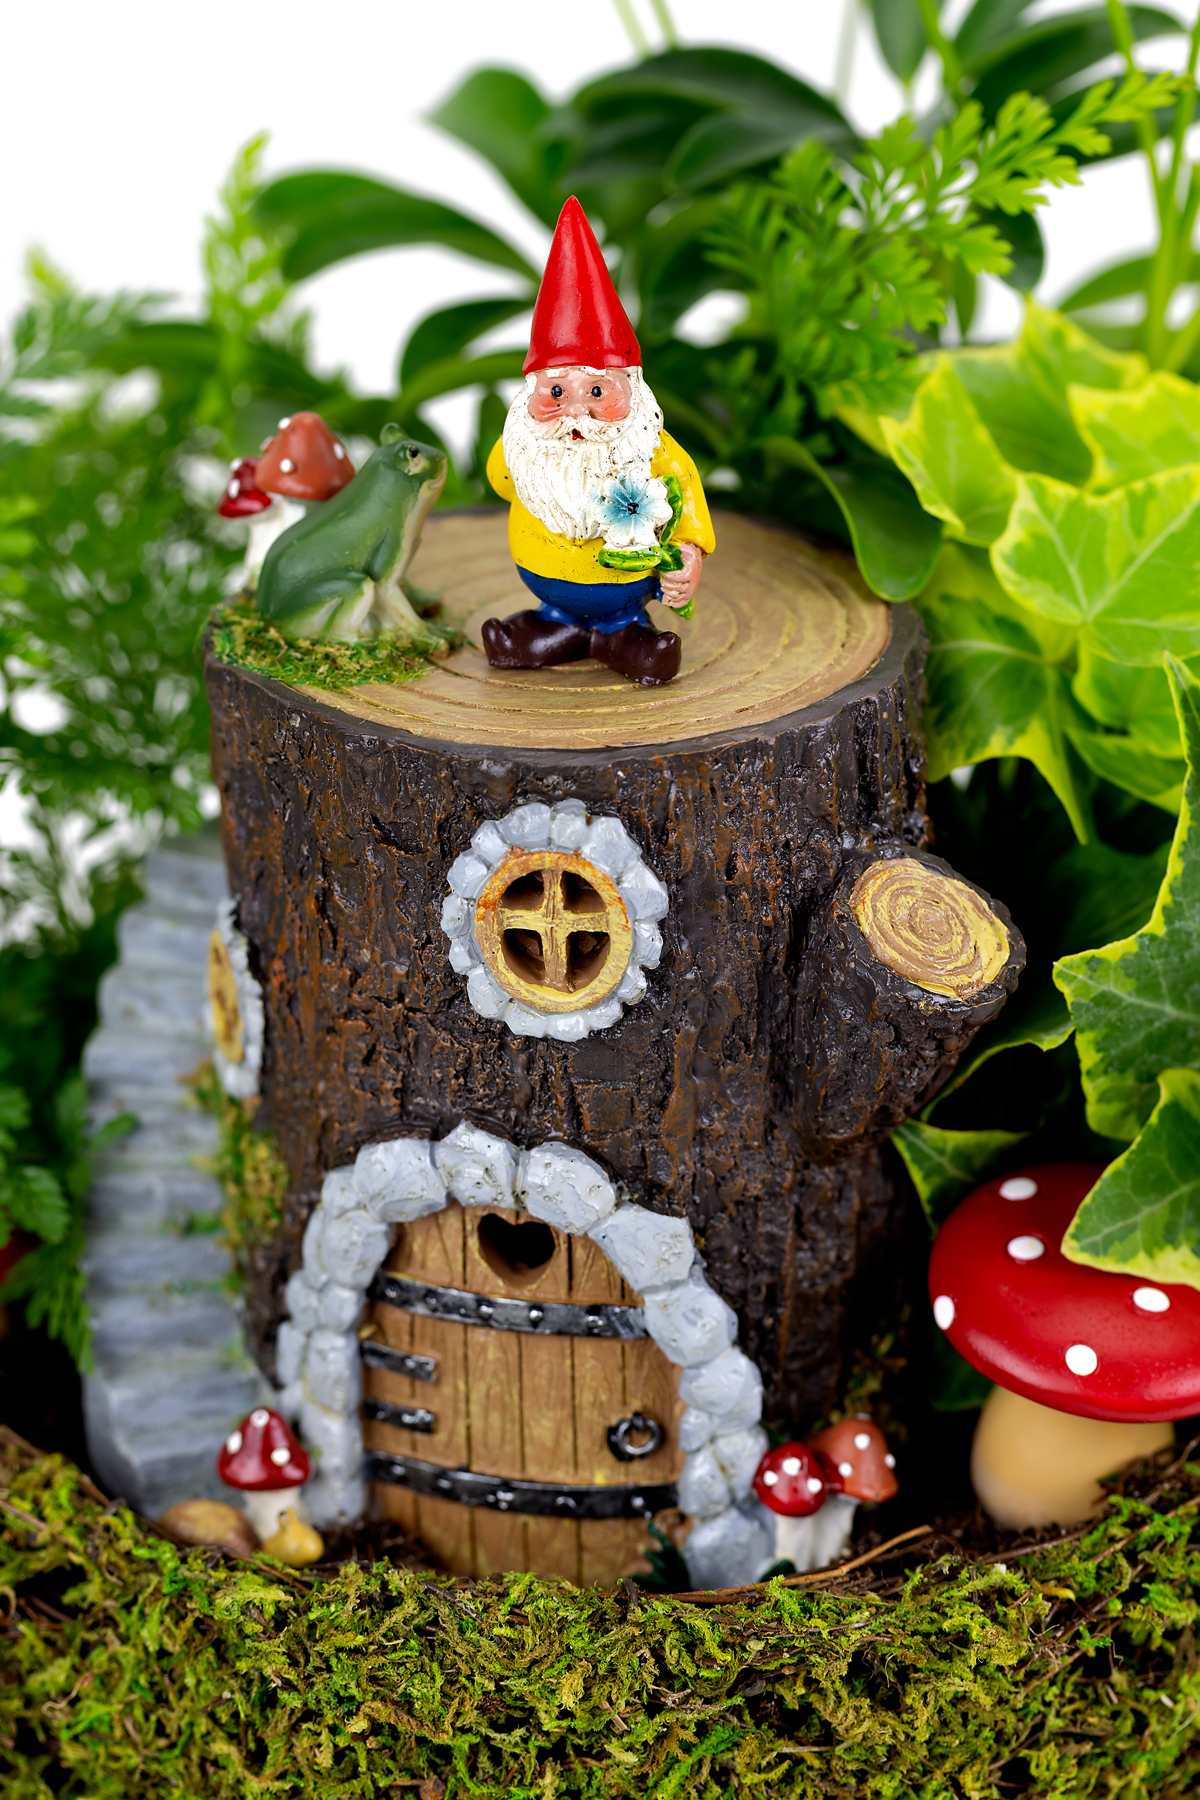
STEP 1: Pick your fairy garden accessories. Head to your favorite craft or garden store to find miniature decorations. I selected a mossy basket as my base, along with a tiny gnome, a rustic log home, and two charming red and white mushrooms.
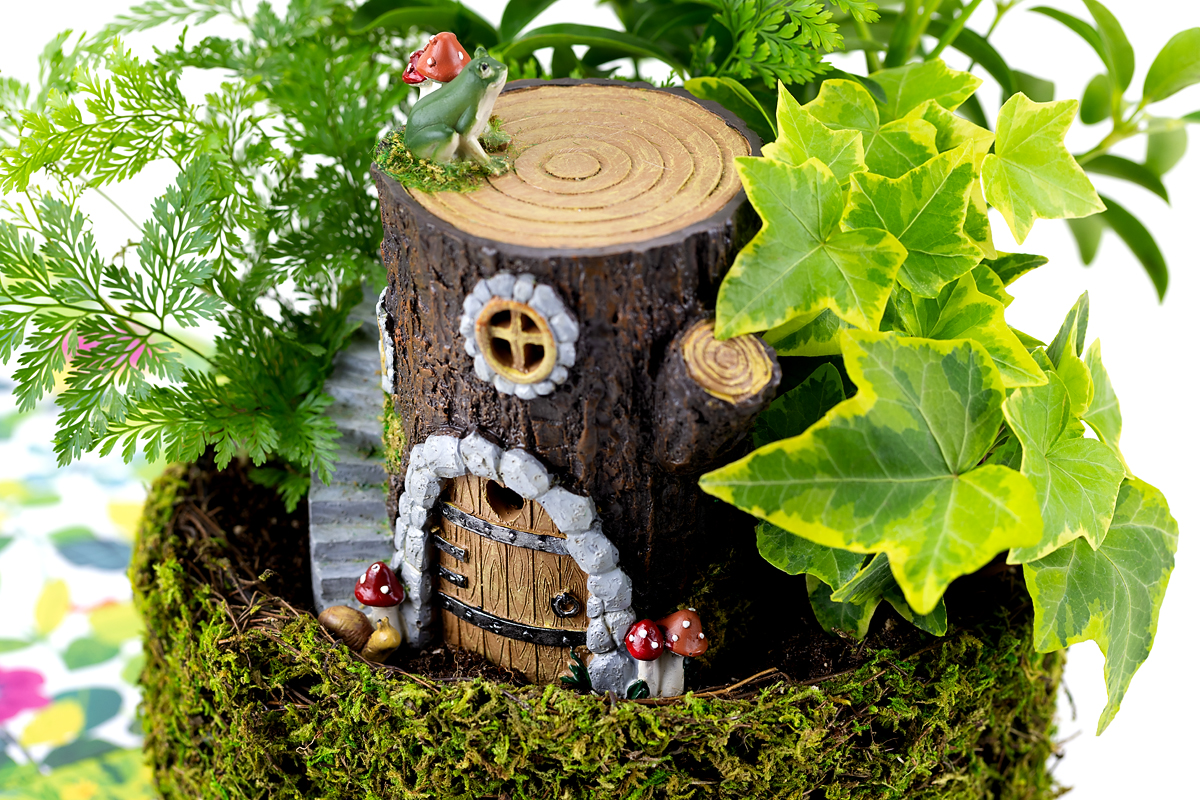
STEP 2: Select your plants. Visit your local nursery to browse a variety of compact plants. Since I wanted to create a woodland scene, I chose Black Rabbit’s Foot Fern, Gold Baby Ivy, and a small Umbrella Plant. These plants will add height, texture, and visual interest to my little garden.
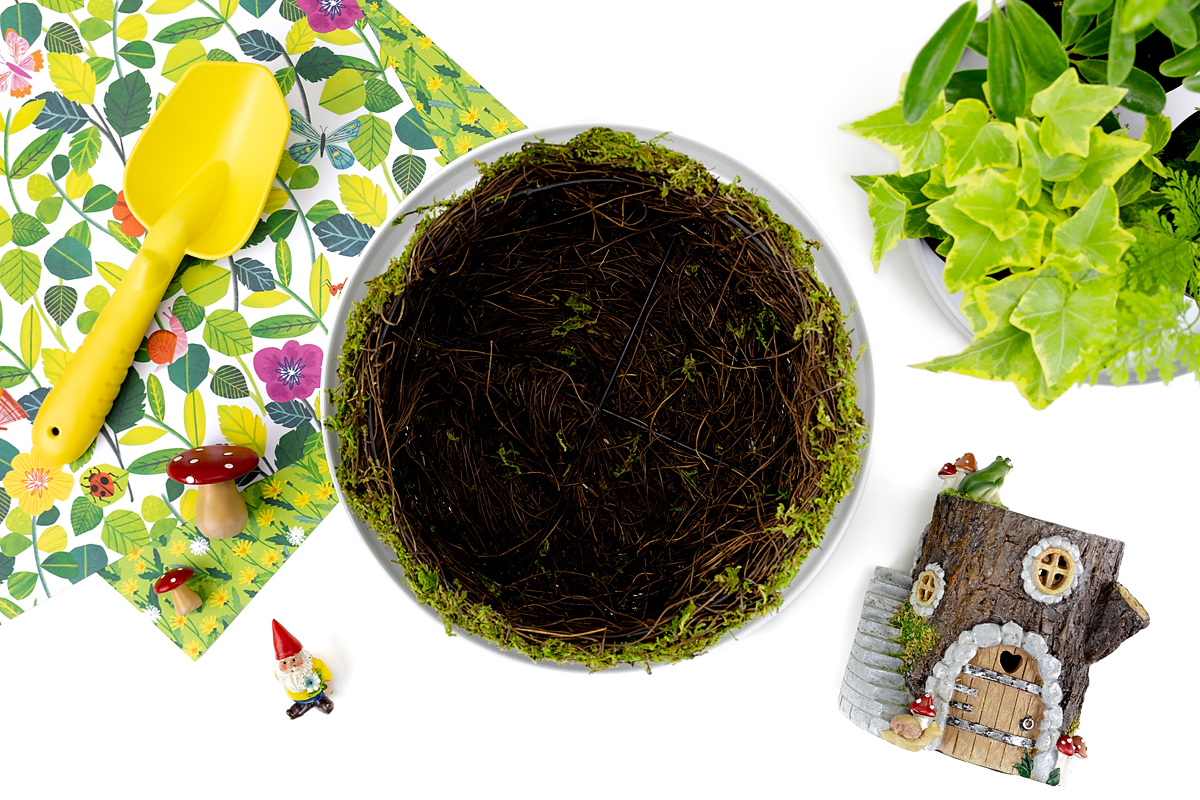
STEP 3: Arrange your plants. Add a layer of potting soil to your container, choosing one that suits your plants. Arrange your plants thoughtfully—placing taller ones toward the back and smaller ones in the front—and don’t forget to gently untangle the roots. Be sure to leave space for fairy homes and decorations!
When you are finished planting, be sure to water!

STEP 4: Add decorations. Place your fairy or gnome home in the garden and arrange decorative elements around it. Position tiny mushrooms, bridges, or other accessories to create a charming scene. Use pebbles, small stepping stones, or sand to design pathways. Twigs, bark, pine cones, or tiny fences are an extra fun touch!
STEP 5: Enjoy your fairy garden! Your garden is complete! Place it in a cozy corner of your home, garden, or patio where you can appreciate it daily. I placed this one in the center of our kitchen table. My kids love how the log house lights up at night!
Best Plants for DIY Fairy Gardens
The best plants for fairy gardens are compact, low-maintenance, and suited to the conditions where your garden will live. Shade-loving plants work well indoors; sun-lovers thrive near bright windows or outdoors. Mixing different heights and textures gives the garden a natural, layered look.
Here are some tried-and-true options organized by type:
- Ground Cover: Irish Moss, Scotch Moss, Creeping Thyme, Micro Clover, or other fine-leafed low growers.
- Flowers: Alyssum, Miniature Roses, Pansies, Violas, and Miniature Daisies.
- Foliage: Black Rabbit’s Foot Fern, Dwarf Hosta, Ivy, Miniature Umbrella Plant, Spider Plant, Dwarf Mexican Heather, Dwarf Conifers, Baby Tears, and Baby Pothos.
- Succulents: Sedum, Hens and Chicks, String of Pearls, Elephant Bush, Ice Plant, Echeveria, and Jade Plant.
- Herbs: Rosemary, Thyme, Oregano, Chives, Dwarf Basil, Parsley, and Sage. Herbs are especially fun because you can keep the garden in your kitchen and actually cook with it!
Fairy Garden Ideas
Once you’ve made one fairy garden, you’ll want to make more. Here are some of our favorite ways to take the project further:
- Add lighting – Tiny LED fairy lights tucked into the plants make the whole garden feel magical after dark.
- Build twig furniture – Tiny chairs and tables made from sticks and twine are a great nature craft on their own.
- Create a seasonal garden – Swap out accessories to match the time of year—tiny pumpkins and leaf confetti for fall, pastel flowers and eggs for spring, miniature snowflakes and evergreen sprigs for winter. Our Fall Teacup Garden and Halloween Teacup Garden are fun examples of this idea!
- Carve a pumpkin into a fairy garden – Plant soil and tiny plants inside a carved pumpkin shell for a Halloween version that lasts through the season.
- Place one near your mailbox – An outdoor fairy garden at the end of your driveway becomes a tiny gift for neighbors and kids passing by on walks.
- Make it a gift – A planted fairy garden in a teacup or small pot is one of the most charming handmade gifts for Mother’s Day or a birthday.
- Invite your child to leave offerings – Tiny jingle bells, bottle caps, or acorn caps left near the door make the fairy feel real for little ones.
Fairy Garden FAQ
Here are answers to some of the most common questions about making and maintaining a fairy garden.
Yes! A garden made with moss, pebbles, and decorative elements (but no live plants) is sometimes called a “dry fairy garden” and works great indoors. Just keep in mind that live plants add so much life and freshness to the finished look.
Water your fairy garden according to the needs of your specific plants. Most fairy garden plants prefer to dry out slightly between waterings. Keep it in appropriate light, and remove any dead leaves or debris regularly to keep it looking tidy.
Kids especially love fairy houses that light up, tiny animals, stepping stone paths, and personalized touches like a sign with their name. Let them lead—the most memorable gardens are the ones they built themselves.
More Garden Crafts for Kids
If you loved this project, you might also enjoy building a Garden Sensory Bin for younger kids, making Acorn Bells to hang near your fairy home, or crafting Flower Suncatchers to hang in the window nearby. And if you want to go full fairy habitat, our Jolly Christmas Teacup Garden shows how fun it is to build a miniature seasonal world in any container.
Save This Craft
Save this craft on Pinterest using the image below.


Want even more?
Make sure to follow on Facebook, Pinterest, and Instagram for more easy crafts, activities, recipes, and parenting tips. And don’t forget to subscribe to our emails.