

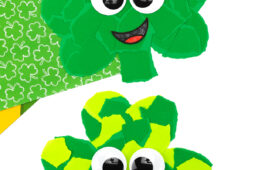
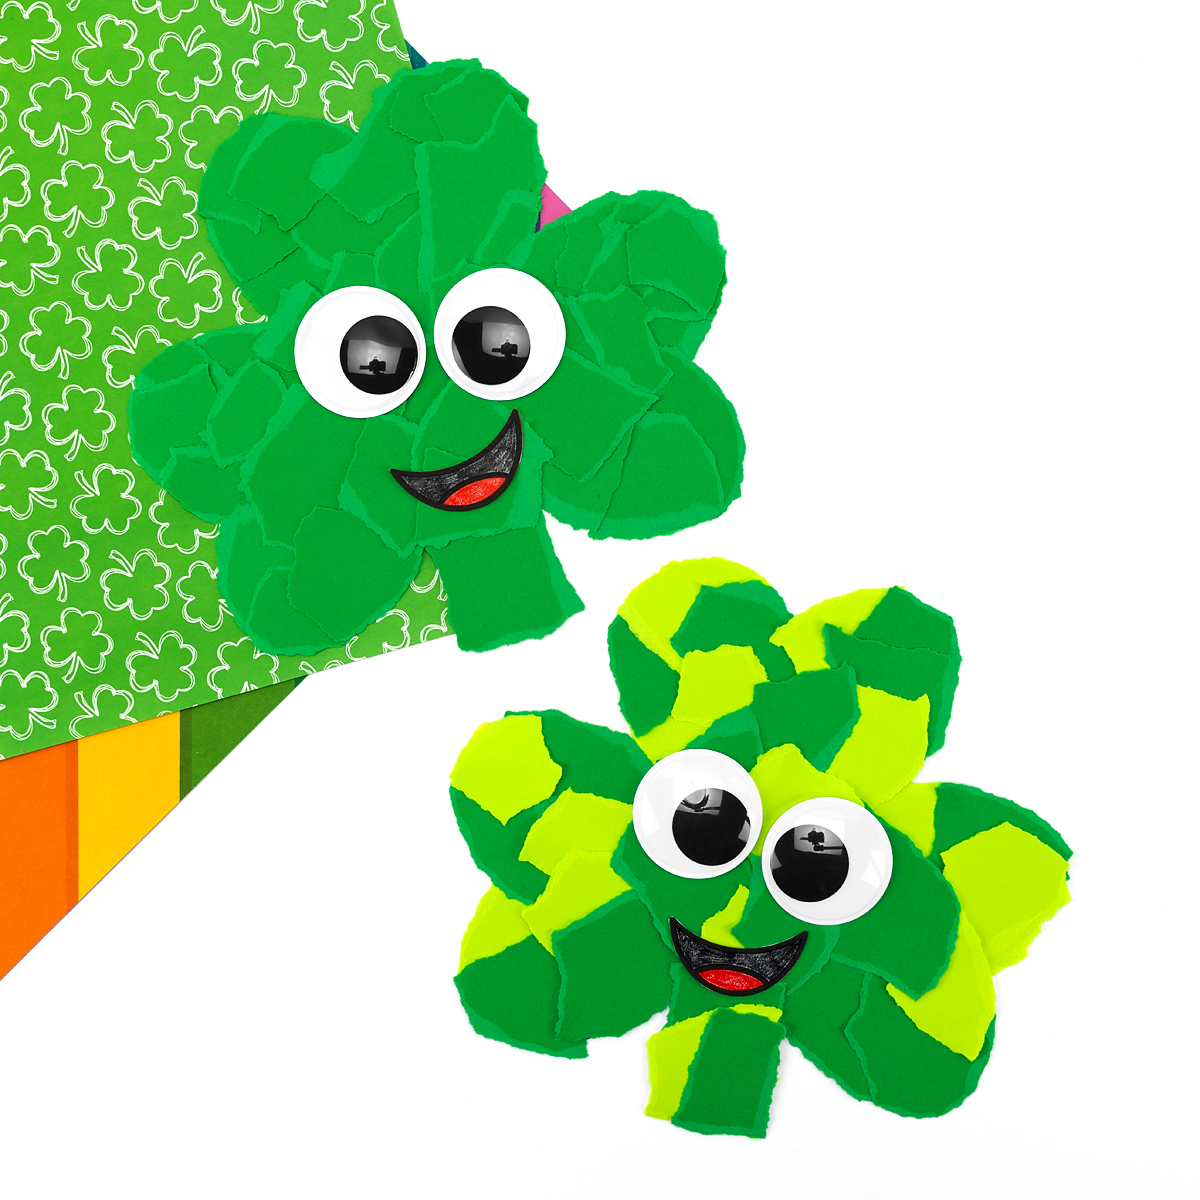
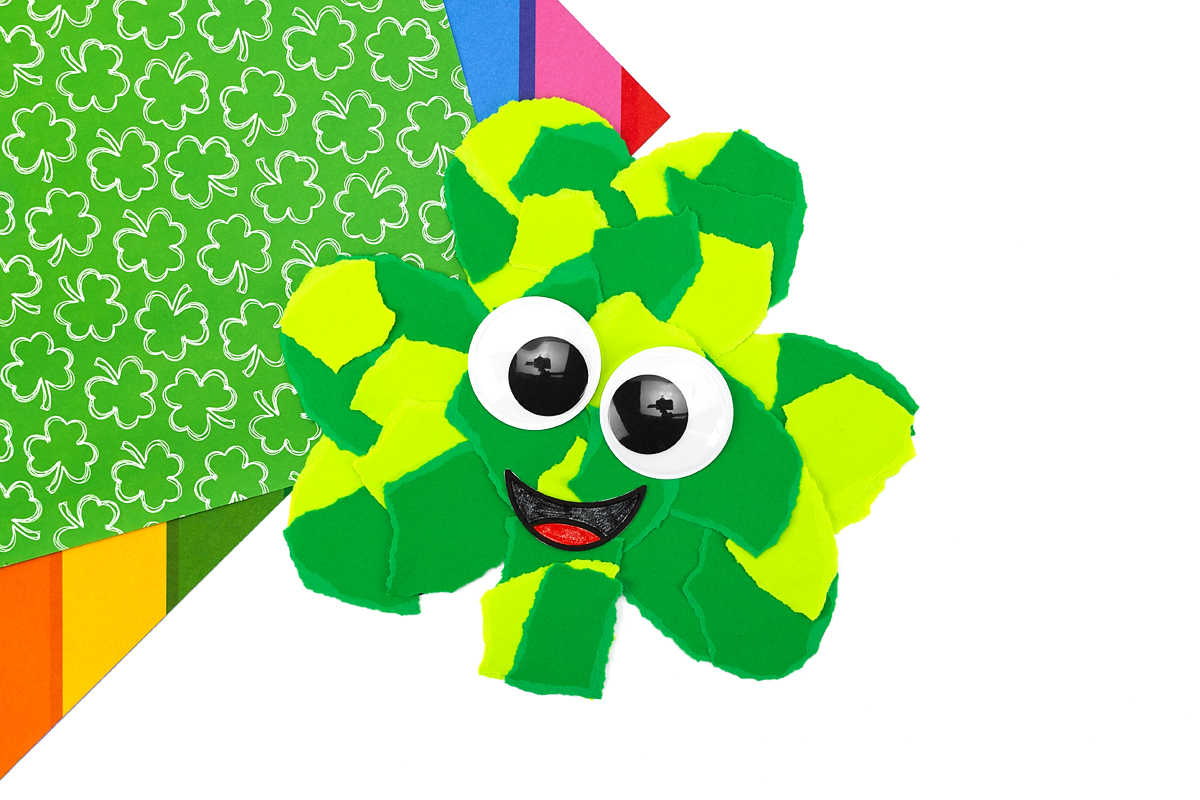
This Torn Paper Shamrock Craft is a simple, hands-on St. Patrick’s Day activity that builds fine motor skills while creating a bright, textured shamrock. Kids print the free shamrock template, cut it out, and fill the shape with torn pieces of green construction paper. Add wiggly eyes and a smile for a little personality, and you have an adorable March bulletin board display!
This craft works well for preschool, kindergarten, and early elementary classrooms. It’s low prep, affordable, and easy to adapt for different ages.
This craft pairs beautifully with our Torn Paper Rainbow Craft!
Why You’ll Love This Craft
This shamrock craft is simple to set up, fun to make, and a keeper when it’s done. Here’s why it works so well:
- Fine motor practice – Tearing paper is a fantastic workout for little hands, making this a perfect pick for preschoolers and kindergarteners who are still building hand strength.
- Kid-led and independent – No precise cutting required means kids of almost any age can do most of the work themselves.
- No drawing skills required – The free printable template provides the shape, so all kids have to do is cut, tear, glue, and get creative.
- Quick to complete – The whole project comes together in one short sitting, making it ideal for busy afternoons or classroom activity time.
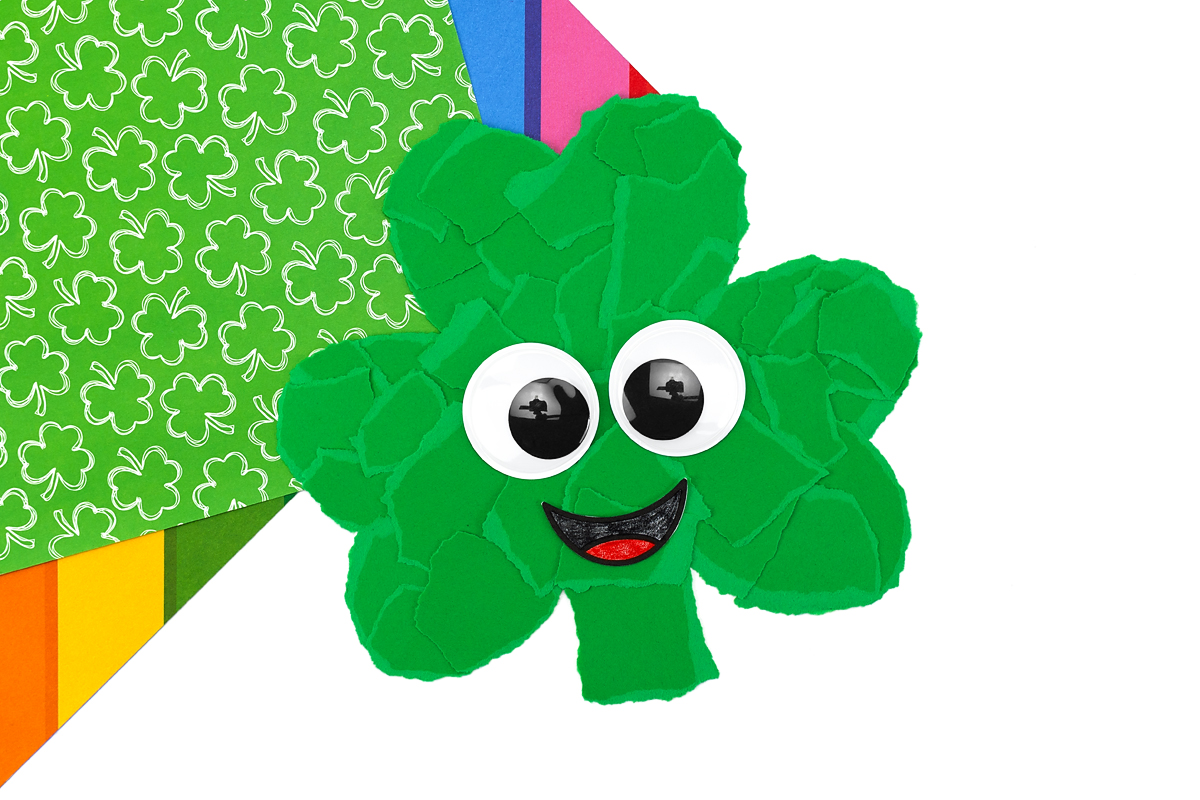
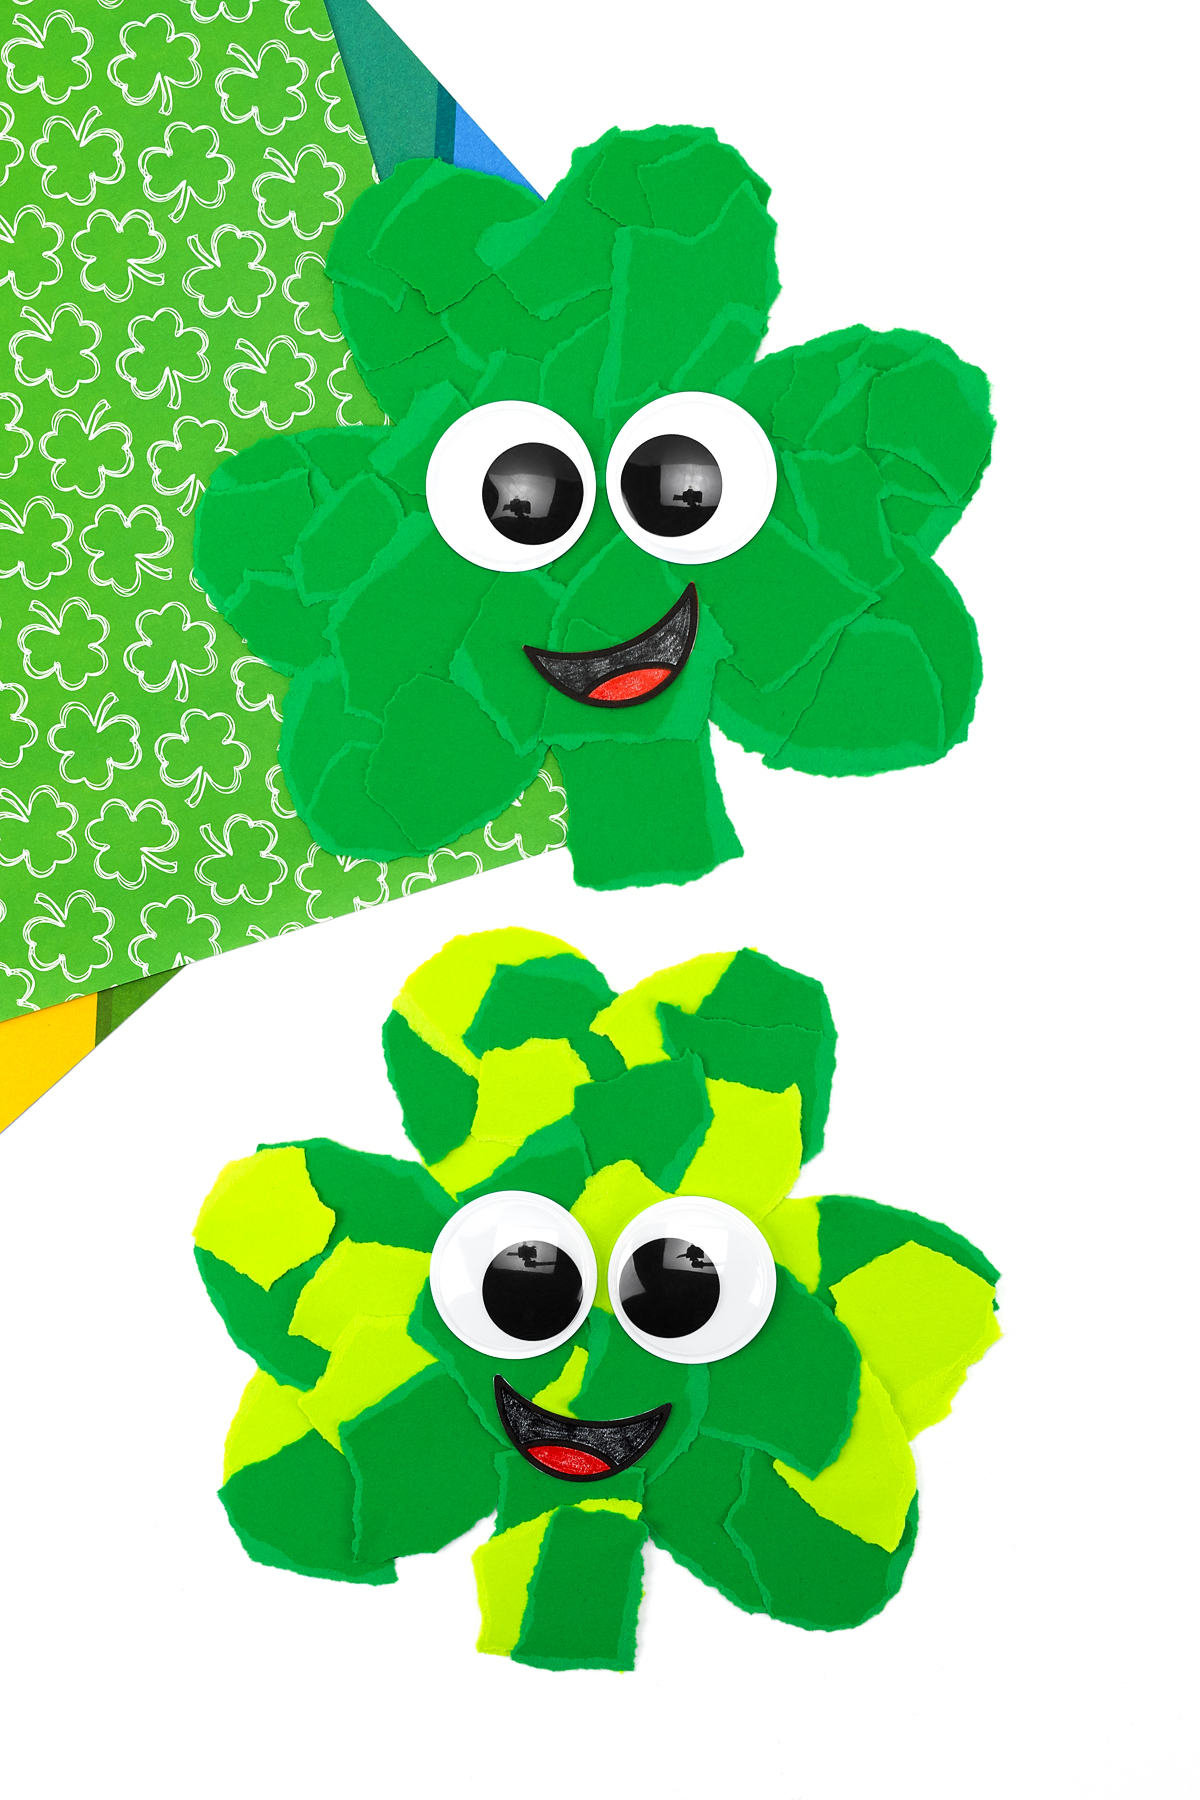
- Too cute to toss – The wiggly eyes and hand-drawn mouth give this shamrock a goofy personality kids love. It makes a cheerful piece of seasonal art worthy of the fridge, a window, or a bulletin board.
Craft Supplies Needed
This craft uses simple supplies you likely already have on hand.
- Torn Paper Shamrock Template
- Scissors
- Green construction paper (various shades if possible)
- Glue sticks or white school glue
- Wiggly eyes (40mm)
- Black and red colored pencils, crayons, or markers
Torn Paper Shamrock DIY
This easy shamrock craft is perfect for little hands. Here’s how to make it step by step for a fun St. Patrick’s Day activity:
STEP 1: Download and print the shamrock template. Print the free shamrock printable on white cardstock or regular printer paper.
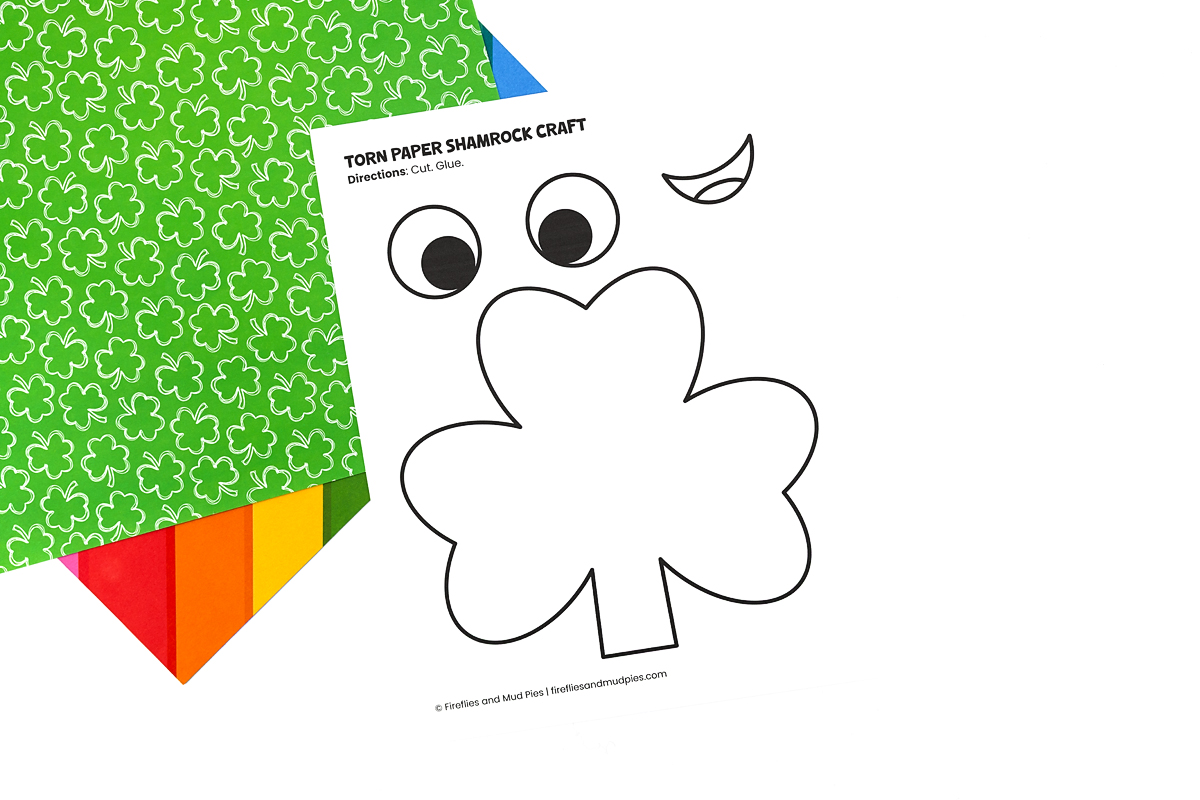
STEP 2: Cut out the shamrock shape. Have children carefully cut along the bold outline. Younger students may need assistance, while older children can practice cutting independently.

STEP 3: Tear the green construction paper. Provide green construction paper in one or several shades. Encourage kids to tear the paper into small pieces using their fingers. The irregular shapes add texture and make each shamrock unique.
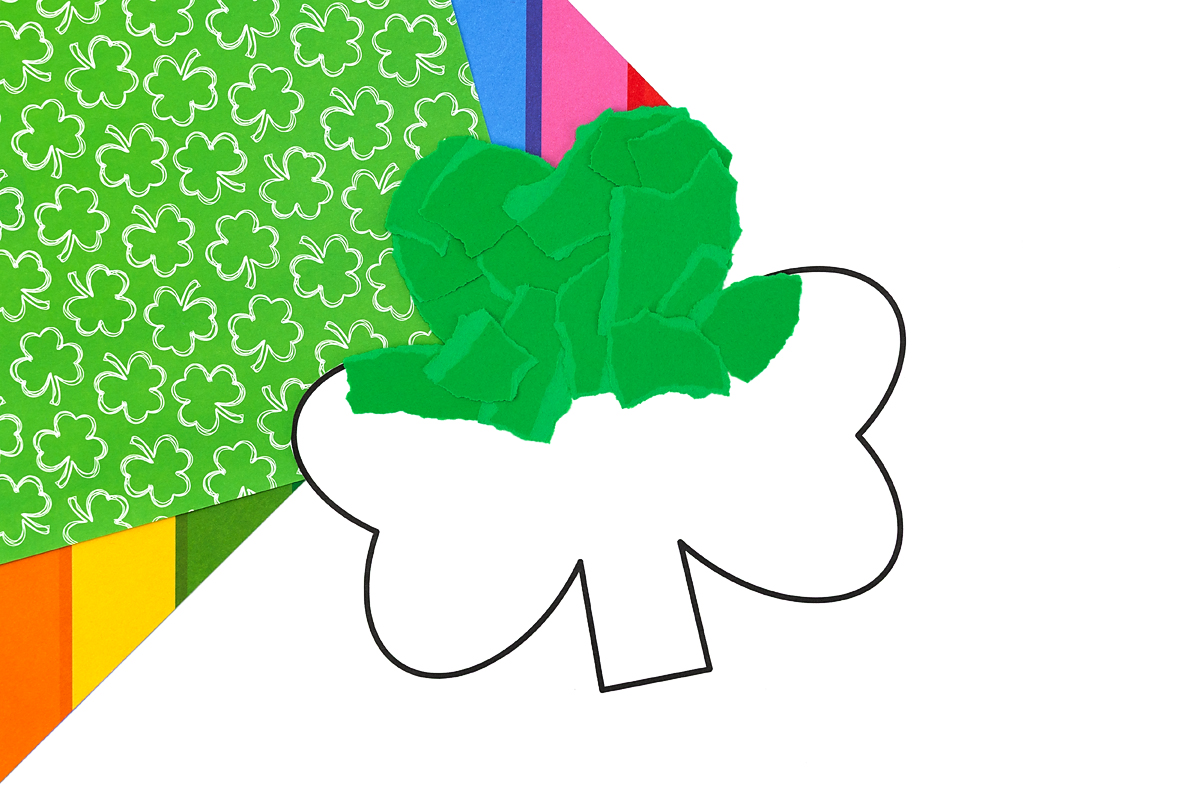
STEP 4: Glue the torn paper inside the shamrock. Spread glue inside the shamrock outline and press the torn pieces down until the entire shape is covered.
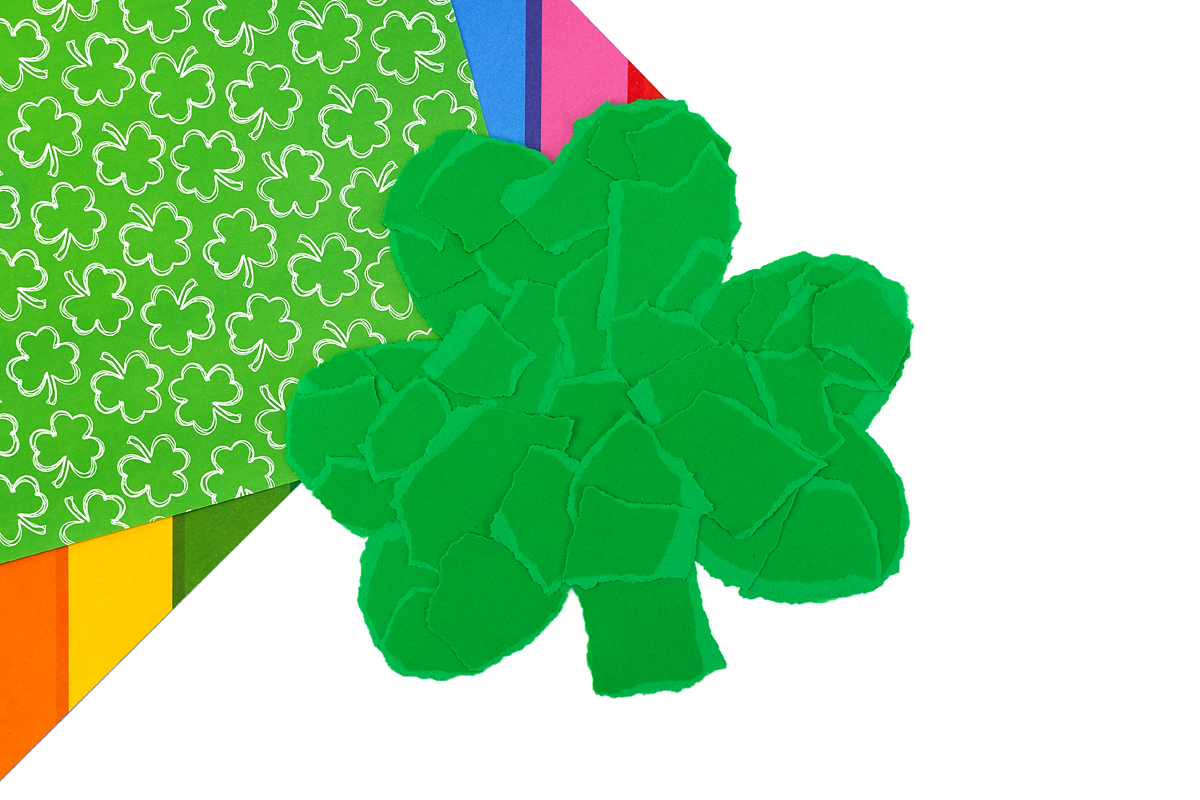
STEP 5: Add the face. Glue on the googly eyes and color the smiling mouth included on the template. Once the face is complete, your torn paper shamrock craft is finished and ready to display!
Take It Further
Once your paper shamrock is complete, you can easily extend the activity into other learning areas. These simple ideas help turn a quick art project into a meaningful St. Patrick’s Day lesson:
- Add a writing prompt – Attach a sentence strip that says, “I feel lucky because…” and let kids finish the sentence. Hang them together for an easy bulletin board display.
- Use different shades of green – Offer light and dark green paper. Talk about the different shades and let kids mix them as they glue.
- Count the pieces – Ask students to count or estimate how many torn pieces they used. You can make a simple class chart to compare numbers.
- Try new textures – Add tissue paper or crepe paper for a softer look.
- Make a class display – Hang the shamrocks under a sign that says “Lucky to Be in Our Class.” It makes a bright and happy March display!
- Build extra hand strength – Put out tweezers and let kids pick up small pieces that way. It adds a fun fine motor challenge.
Frequently Asked Questions
Here are a few common questions about this Torn Paper Shamrock Craft:
The tearing and gluing steps are great for kids ages 3 and up. Toddlers may need a little help spreading the glue, but the tearing is something even very young children enjoy. Older kids can take on more independence, including cutting out the template themselves.
Cardstock makes the finished shamrock sturdier and easier to display, but it’s not required. Regular printer paper works just fine, especially if you’re gluing it onto a backing sheet at the end.
A glue stick works well for most kids because it’s less messy and dries faster. Liquid craft glue or a school glue like Elmer’s also works great and gives a slightly stronger hold, but it does take longer to dry.
Yes! If you want to reuse it as a decoration year after year or make it more durable for a classroom display, laminating is a great option. Just make sure the glue is completely dry first.
Absolutely. This craft works beautifully for classrooms, library programs, homeschool co-ops, or party activities. Pre-cut the templates ahead of time, set out shared bowls of torn paper pieces, and kids can work at their own pace. It’s a great low-mess, high-engagement option for a group setting.
More St. Patrick’s Day Crafts for Kids
If you’re planning more March activities, here are a few more easy St. Patrick’s Day Crafts for kids that pair perfectly with this shamrock project:
- Preschool Shamrock Craft
- Easy Tissue Paper Shamrock Craft
- Popsicle Stick Leprechaun Hat
- Pot of Gold Craft
- Leprechaun Card Craft
- Shamrock Suncatcher Craft
- Shamrock Wreath Craft
- Green Pepper Shamrock Stamping
Save This Craft
📌 Save this Torn Paper Shamrock Craft on Pinterest so you have an easy and festive St. Patrick’s Day activity ready to go when March arrives.

Torn Paper Shamrock Craft
Ingredients
- Torn Paper Shamrock Template
- Scissors
- Green construction paper
- Glue sticks or white school glue
- Wiggly eyes 40mm
- Black and red colored pencils, crayons, or markers
Instructions
- Download and print the template. Print the free shamrock template on white cardstock or printer paper.
- Cut out the shamrock. Carefully cut along the bold outline of the shamrock shape.
- Tear the paper. Tear green construction paper into small pieces. Use one shade or mix several greens for added texture.
- Glue the pieces inside the shamrock. Spread glue inside the shamrock outline and press the torn paper pieces down until the shape is fully covered.
- Add the face. Glue on googly eyes and color the smiling mouth included on the template. Let dry completely, and your shamrock craft is ready to display!


Natasha says
I’m looking for the downloadable shamrock template.
Melissa Lennig says
Templates are linked in the supplies list!