

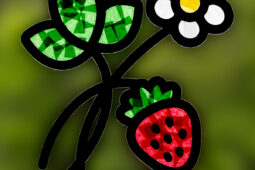
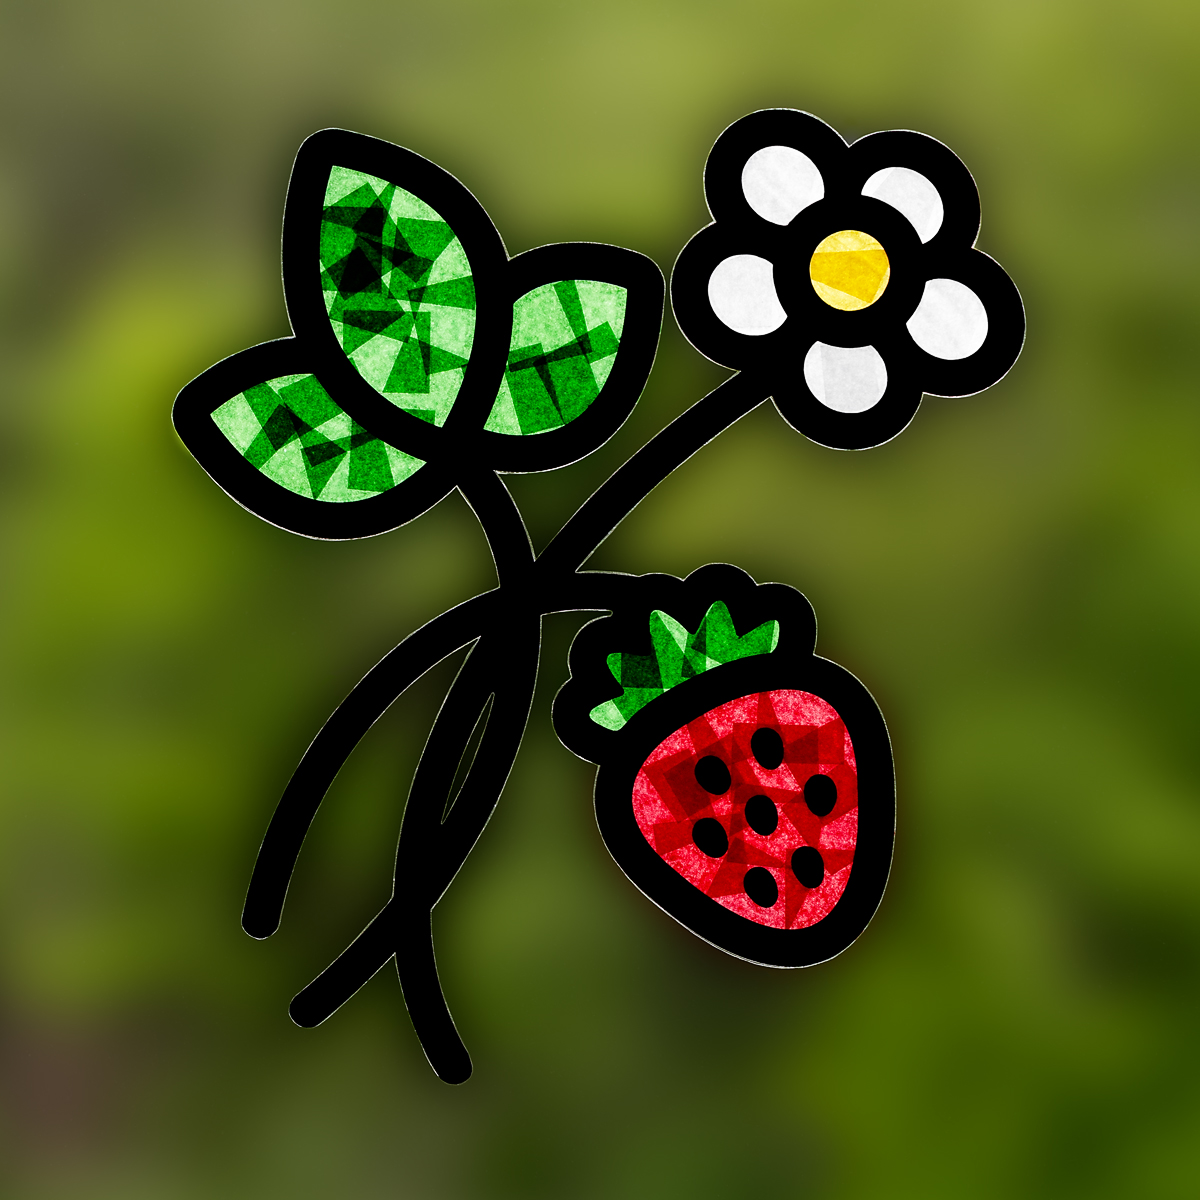
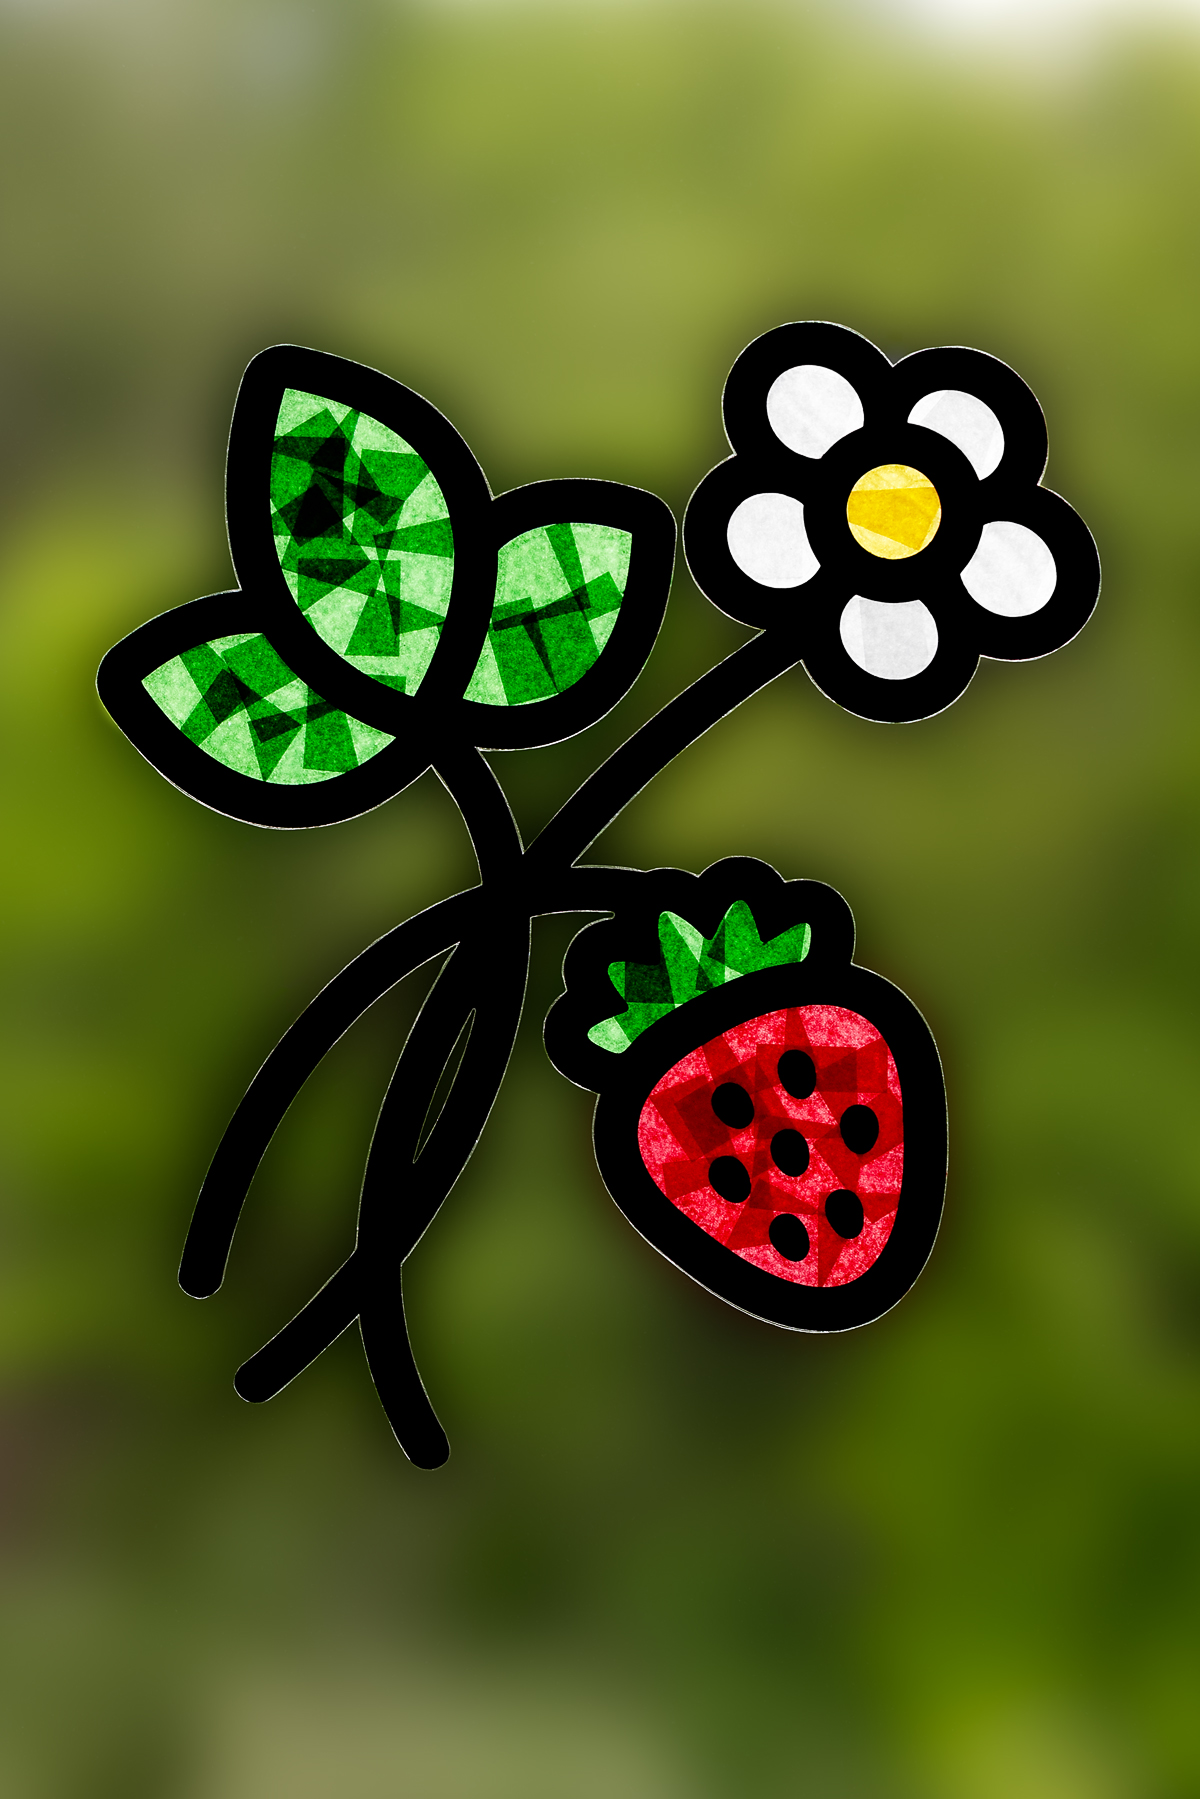
If you’re looking for a cheerful summer craft, this Strawberry Suncatcher is a fun one to try with kids! Made with just a few materials such as tissue paper and self-seal laminating sheets, it’s perfect for welcoming strawberry season and adding a pop of color to your windows.
Love making suncatchers? Check out all of our free suncatcher templates!
A Sweet Strawberry Craft for Kids
Suncatchers are always a hit with kids because they’re bright, colorful, and easy to personalize. This strawberry version is especially fun for summer or a strawberry-themed week at pres. It’s a low-mess activity that encourages creativity and fine motor skills, making it great for home, classrooms, or camp.
You may also enjoy our free printable Watermelon Suncatcher!
Craft Supplies Needed
Before you start this craft, make sure you have all the right supplies.
- Strawberry Suncatcher Template Printable (free with email subscription)
- Tissue paper squares
- Black cardstock
- White cardstock
- Scissors
- Contact paper or self-seal laminating sheets
- Double-sided tape
Watch the Video Tutorial
Watch the video below to see how we created our sweet homemade suncatchers.
Directions for the Strawberry Suncatcher Craft
Ready to get started? Follow the steps below to make your strawberry suncatcher.
STEP 1: Download and print the suncatcher template. Access the free printable strawberry template by clicking the link in the supplies list and subscribing to our weekly craft newsletter. After subscribing, visit the post in our Substack titled Strawberry Suncatcher Free Printable to find your download link. Next, print the template on white cardstock.
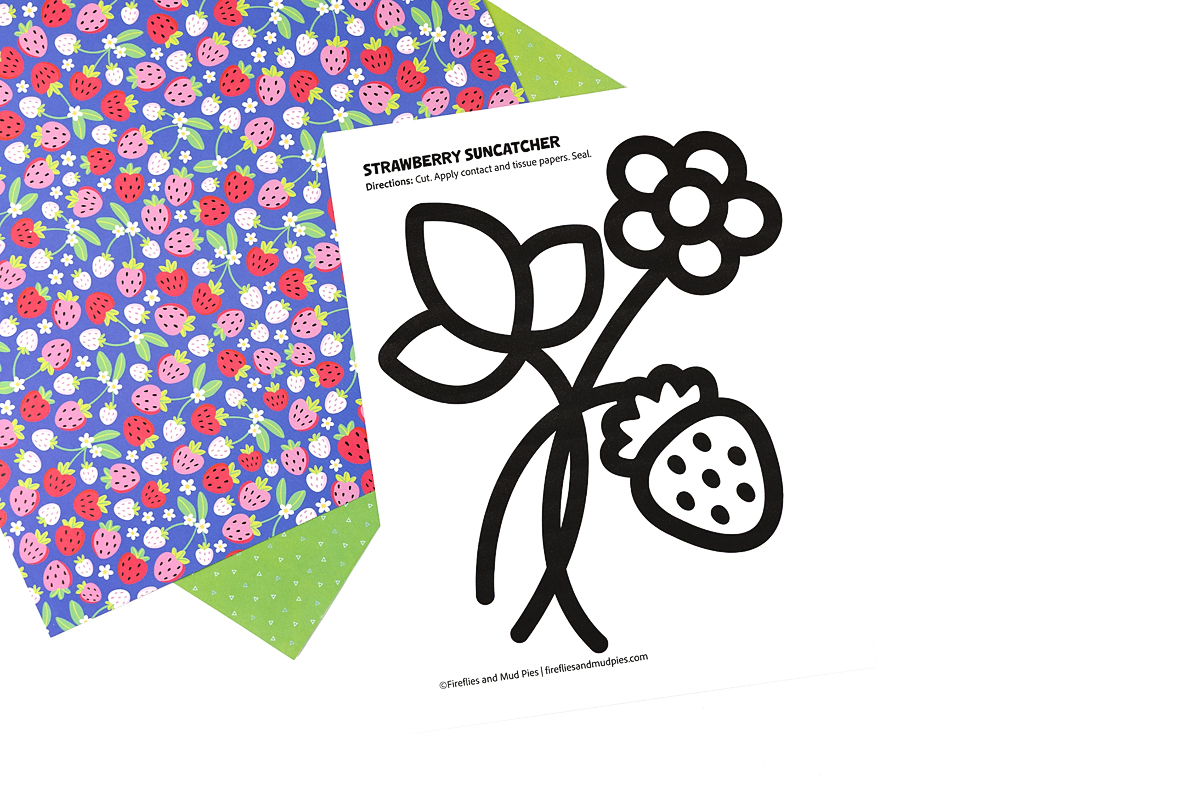
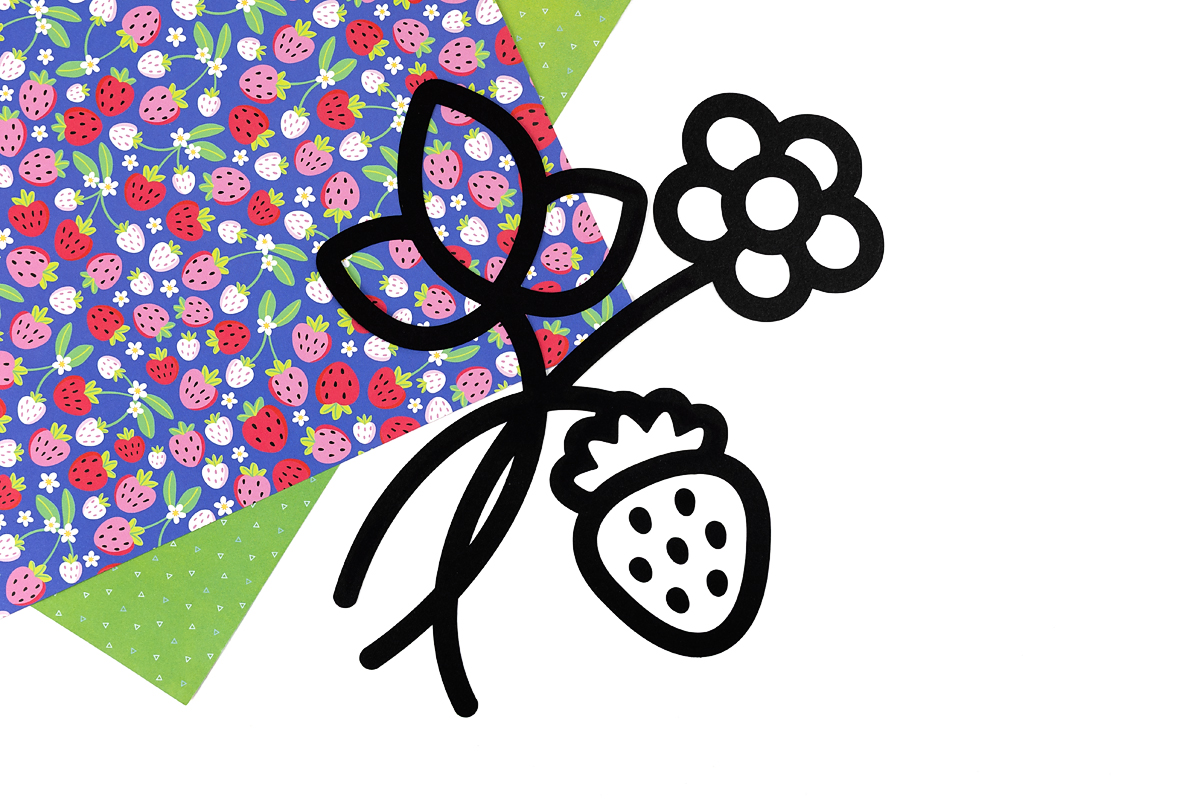
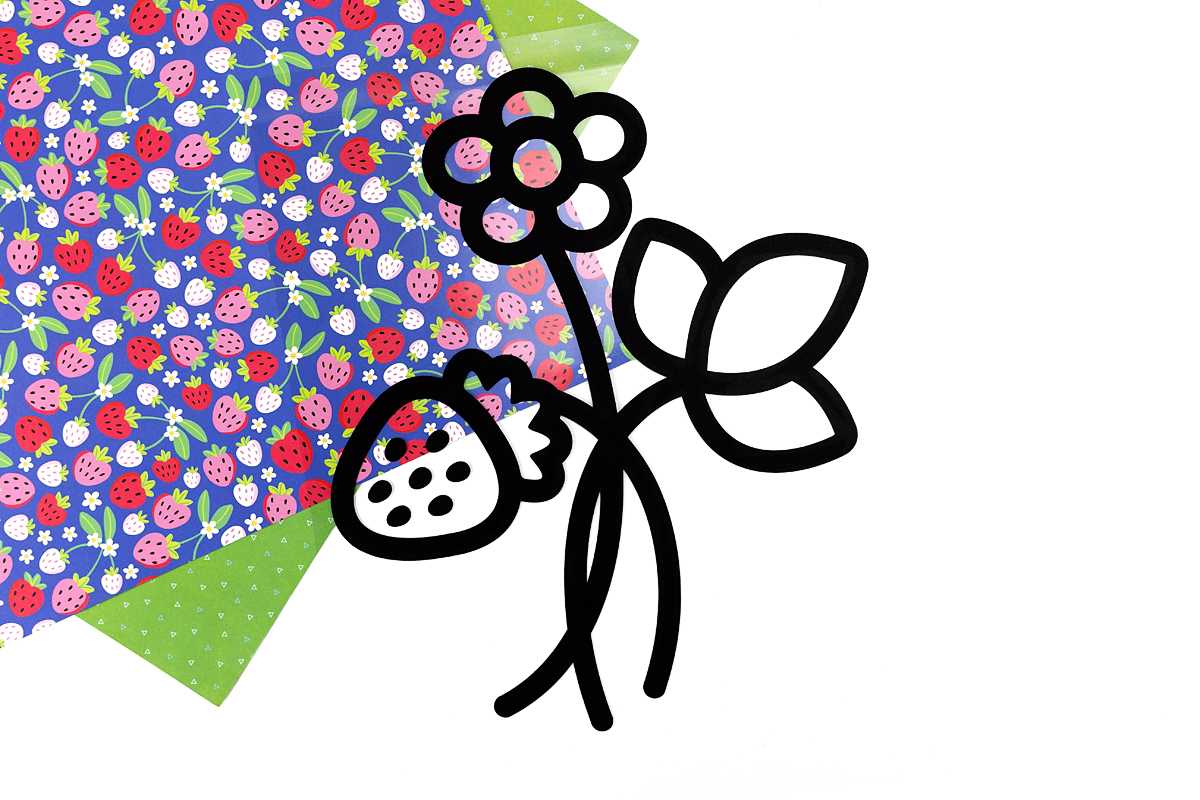
STEP 2: Cut out the frames. Carefully cut along the outlines of the strawberry plant with scissors. This is a very intricate suncatcher, so little hands may need extra help.
To create a solid black frame for the suncatcher, try one of these methods:
- Place black cardstock behind the printed template, staple them together, and cut through both layers at the same time.
- Using a cutting machine? You can grab the SVG file from our shop for a quick and precise cut.
- Cut out the template first, trace it onto black cardstock, and then cut along the traced lines.
Step 3: Add the strawberry outline. Place the strawberry pattern on the sticky side of the self-seal laminating sheet. If you’re using pieces cut from white cardstock, be sure to place them with the printed (black ink) side facing down.
Step 4: Add the tissue paper. Fill in the frame with pieces of tissue paper, trimming them as needed to fit smaller areas. Keep layering the tissue until the whole shape is covered and you have a colorful, stained-glass look.
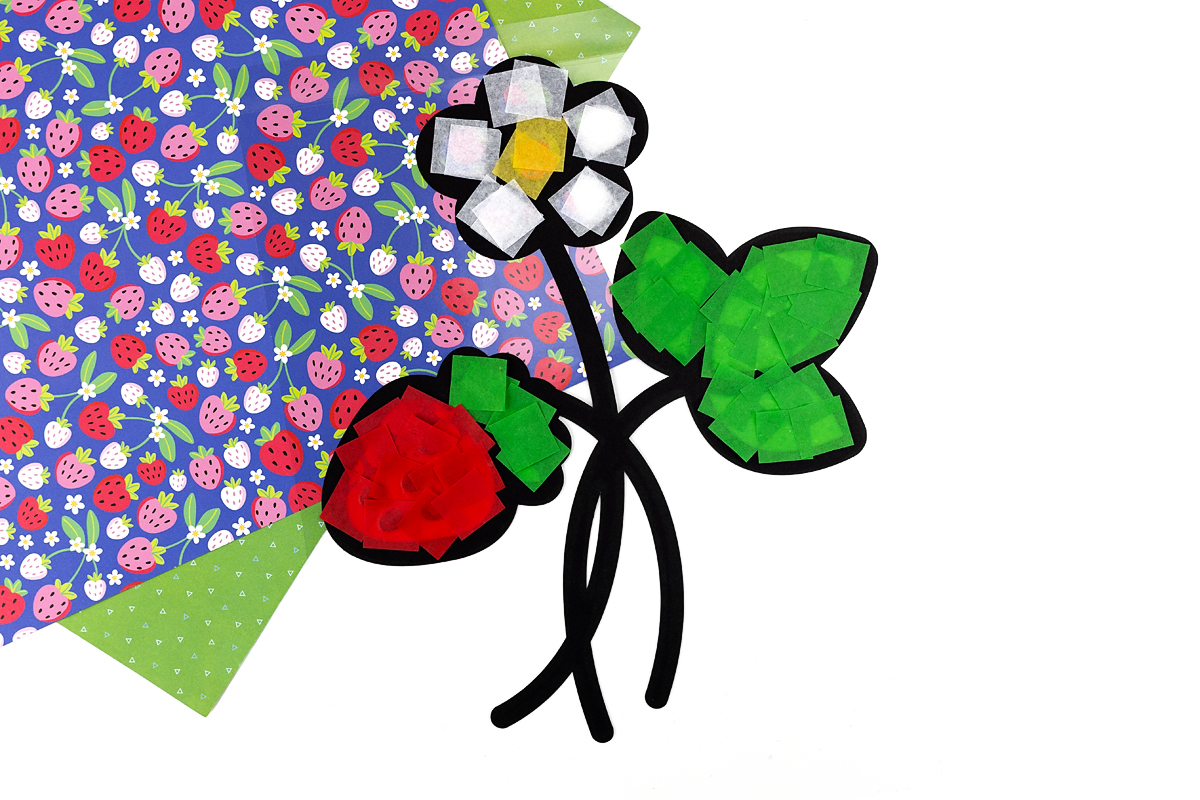
Step 5: Seal your design. After you’ve added all the tissue paper, place a second laminating sheet on top to seal it. Then, use scissors to carefully cut around the edges of the strawberry plant, then press the laminating sheet firmly for a strong seal.
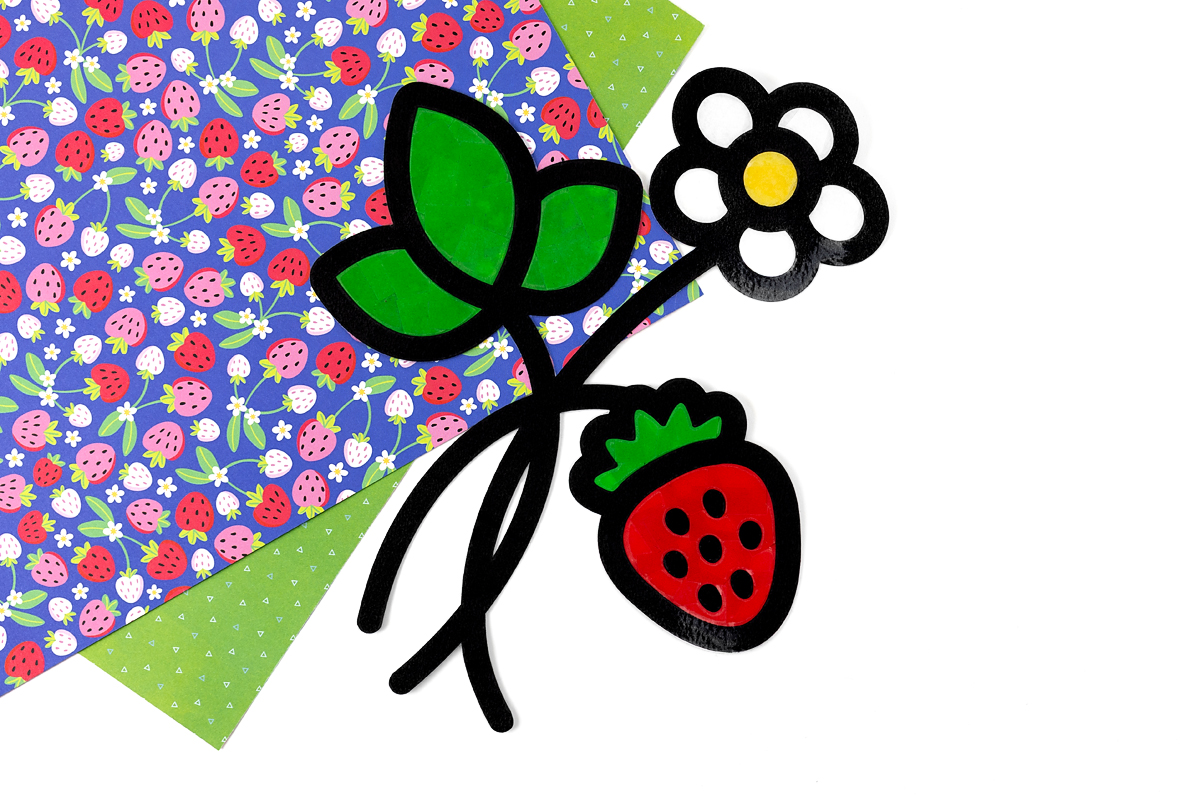
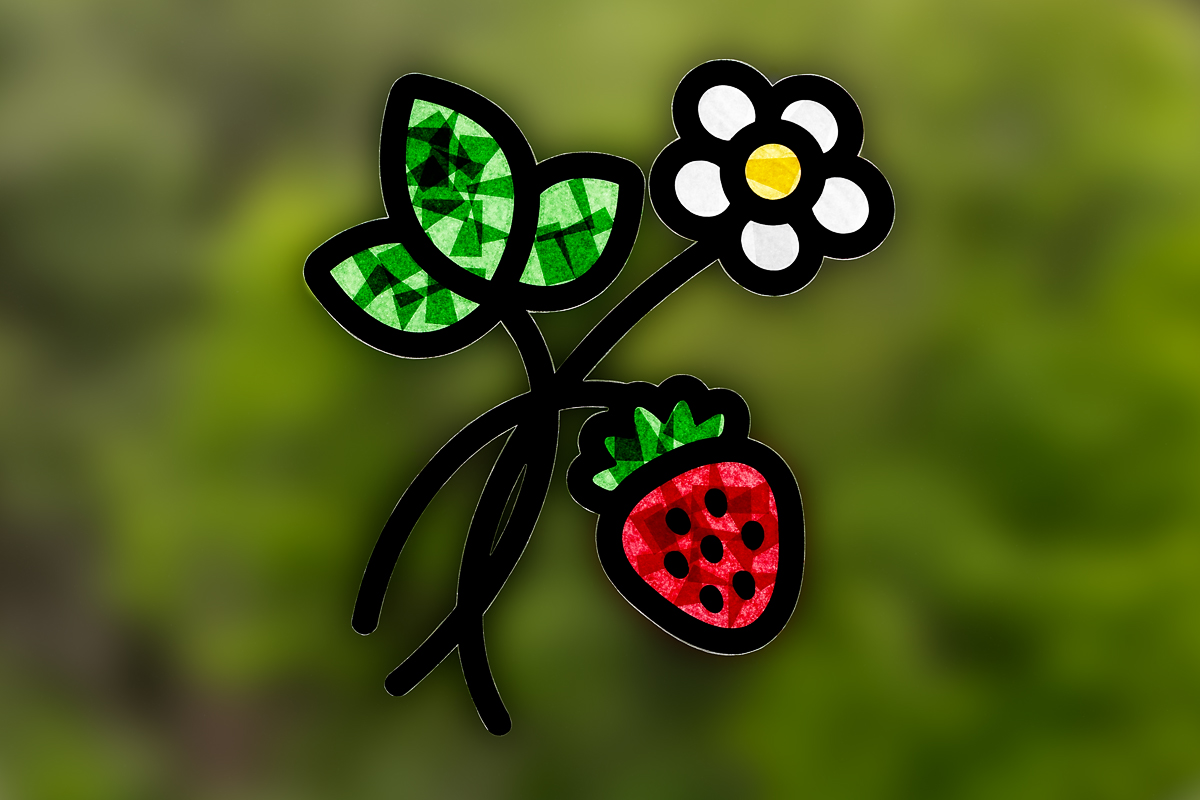
Step 6: Hang up your suncatcher! These happy suncatchers add a bright pop of color to any window—perfect for summer! Use double-sided tape or sticky tack to hang them in a sunny spot and enjoy the light shining through.
Take It Further
With its bright colors and easy steps, this craft is a fun project for kids of all ages. Want to keep the creativity going? Try some of these simple extension ideas:
- Explore the life cycle of a strawberry. Read a nonfiction book or watch a short video about how strawberries grow from seeds to fruit, then draw the stages.
- Taste local strawberries. Grow your own or visit a local farm to pick your own strawberries, then make Strawberry Lemonade!
- Make jam. Follow along with our easy, 3-ingredient Strawberry Preserves Recipe!
- Add scent! Rub a little strawberry-scented lip balm on the back of the suncatcher for a light, fruity smell.
- Incorporate writing. Have kids write a short story or descriptive paragraph about their strawberry, then display it next to their suncatcher.
- Create a strawberry-themed bulletin board. Display the suncatchers alongside strawberry facts or kids’ writing about their favorite summer fruits.
- Try different materials. Instead of tissue paper, try using colored cellophane or even bits of recycled magazine pages for a new texture.
- Bake with strawberries! Make this craft while your fresh Strawberry Crisp is baking in the oven.
More Strawberry Crafts for Kids
Looking for more fun activities? You might also enjoy:
- Tear and glue your way to a textured masterpiece with a Torn Paper Strawberry made from construction paper.
- Build a berry with popsicle sticks! Add a little paint and paper to turn craft sticks into a beautiful Strawberry Keepsake Craft!
- Create a cozy, quilt-inspired strawberry by gluing paper squares together to make your very own Quilted Strawberry Craft.
Save This Craft
Save this craft on Pinterest using the image below!


Want even more?
Make sure to follow on Facebook, Pinterest, and Instagram for more easy crafts, activities, recipes, and parenting tips. And don’t forget to subscribe to our emails.