

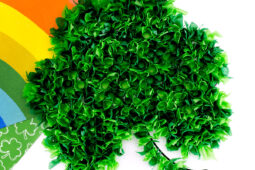
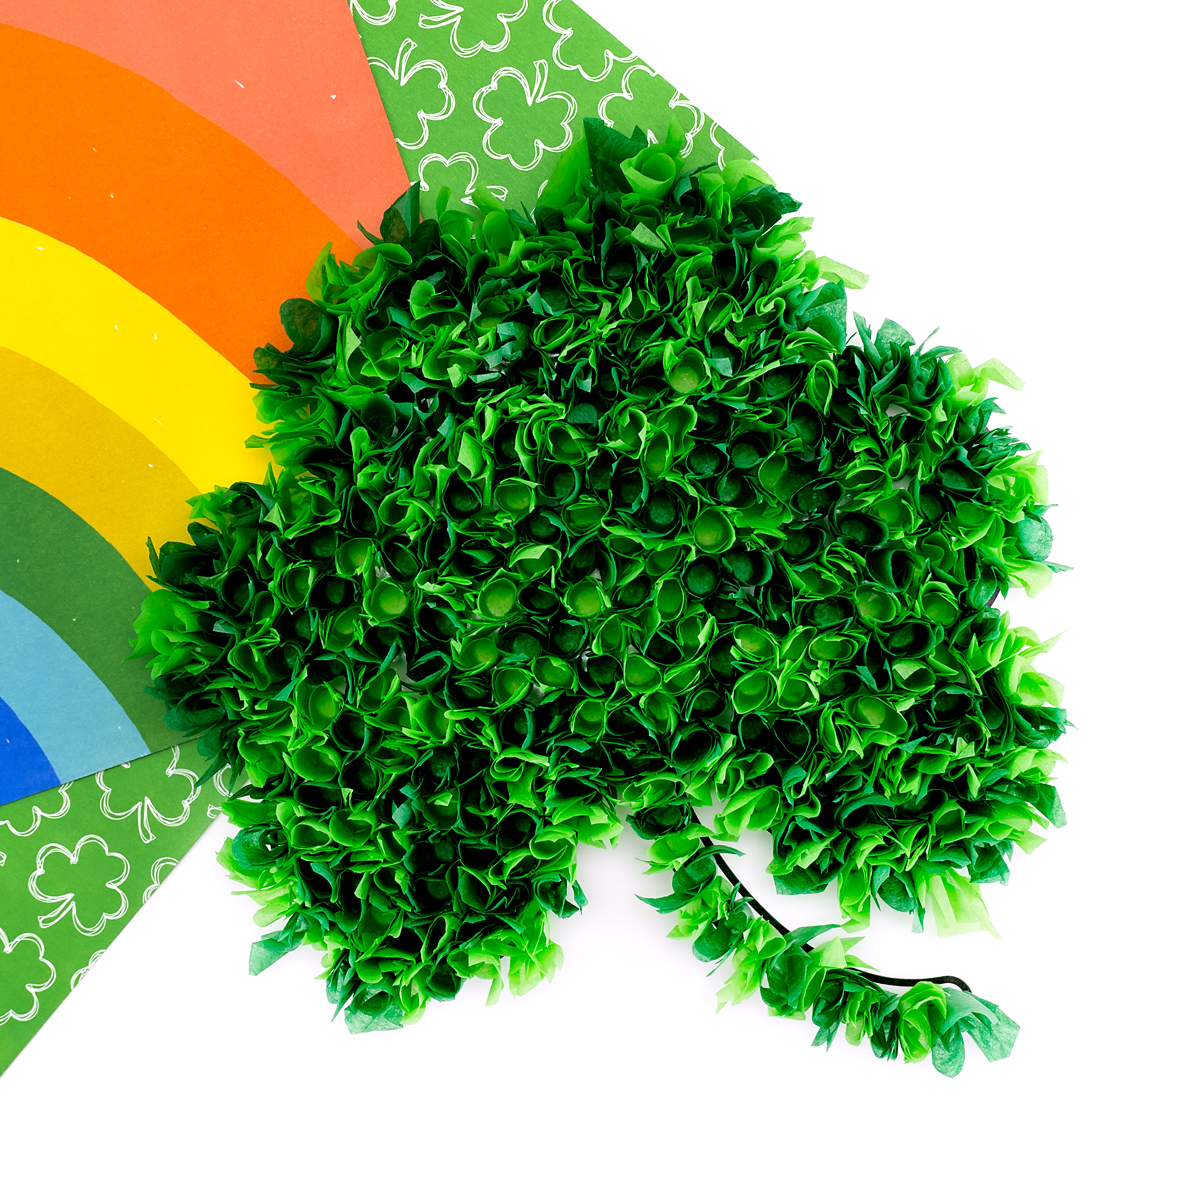
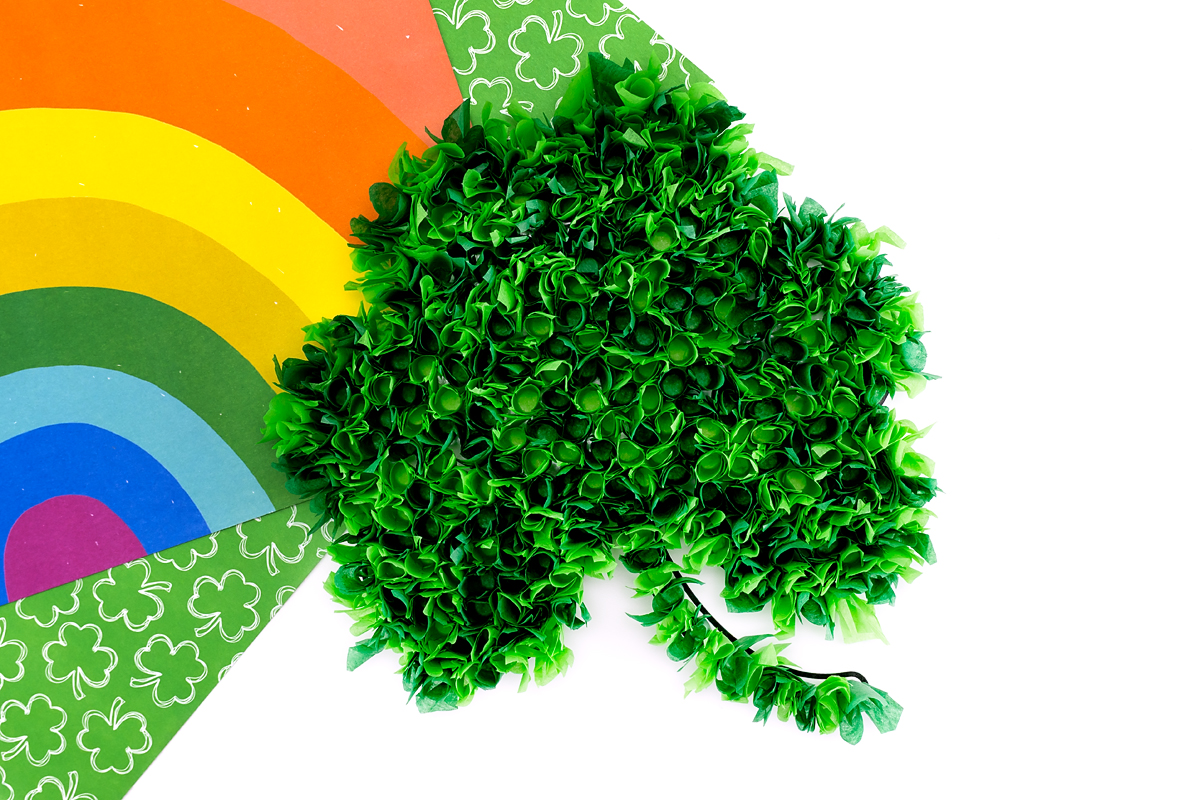
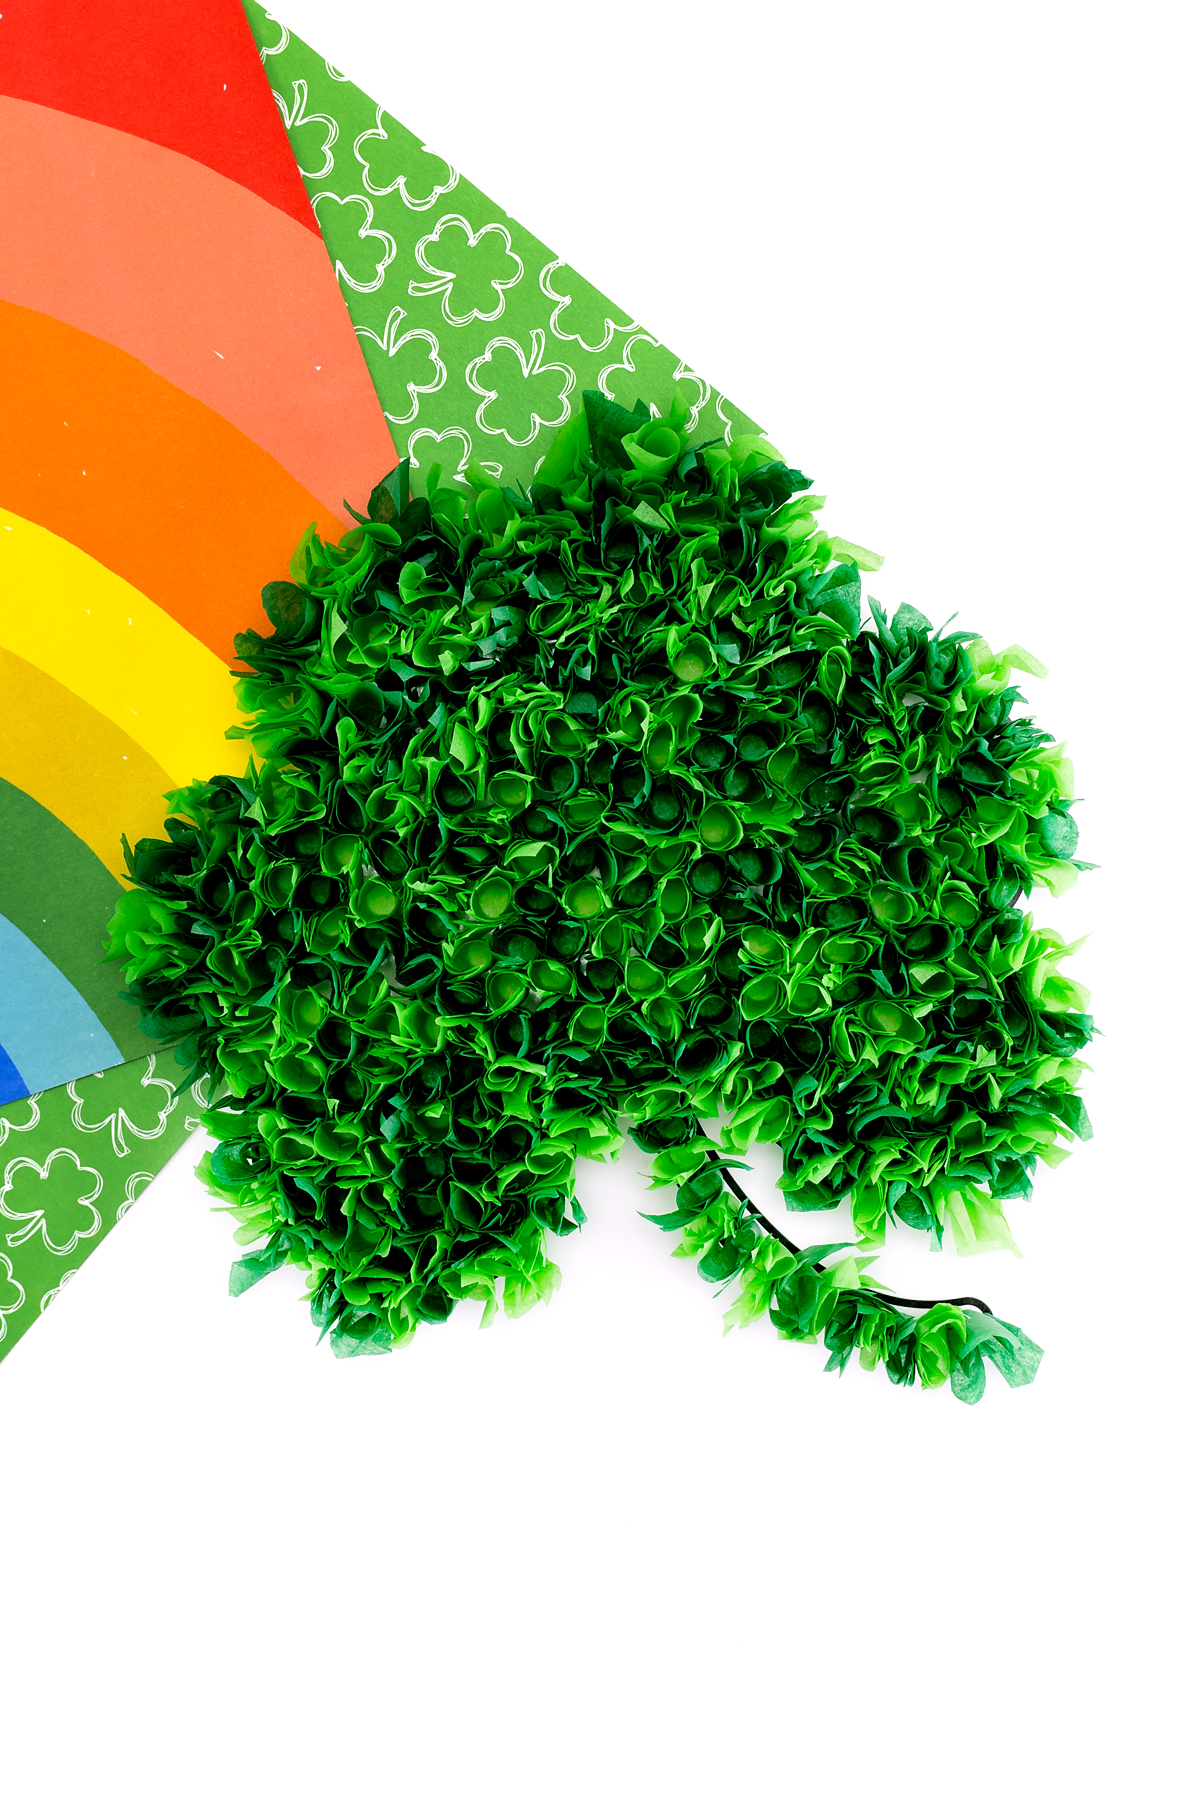
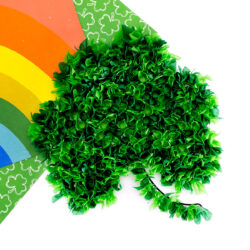
This fun Tissue Paper Shamrock craft is perfect for St. Patrick’s Day! Kids will love creating this scrunchy, textured shamrock using simple materials and the included free printable template.
Try our color and cut Shamrock Wreath Craft or our Preschool Tissue Paper Shamrock for more St. Patrick’s Day fun!
Why You’ll Love This Tissue Paper Shamrock Craft
There’s something special about introducing kids to crafts you loved as a child. This tissue paper shamrock craft brings back bright, happy memories of elementary school art projects from the 1980s. The scrunchy technique creates beautiful texture and is surprisingly engaging for little hands. This St. Patrick’s Day craft is perfect for home or the classroom, supports fine motor development, and looks adorable displayed on the refrigerator. Here are more reasons to love it:
- Fine motor skill development – Tearing, scrunching, and gluing tissue paper helps strengthen hand muscles and hand-eye coordination.
- Low-prep and budget-friendly – This activity uses simple supplies that are inexpensive and easy to find.
- Age-flexible activity – The craft can be adapted for toddlers, preschoolers, and early elementary students.
- Creative expression – Children can choose colors, textures, and placement to make each shamrock unique.
- Seasonal decor – Finished shamrocks make bright and cheerful St. Patrick’s Day displays.
Materials Needed for Your Tissue Paper Shamrock
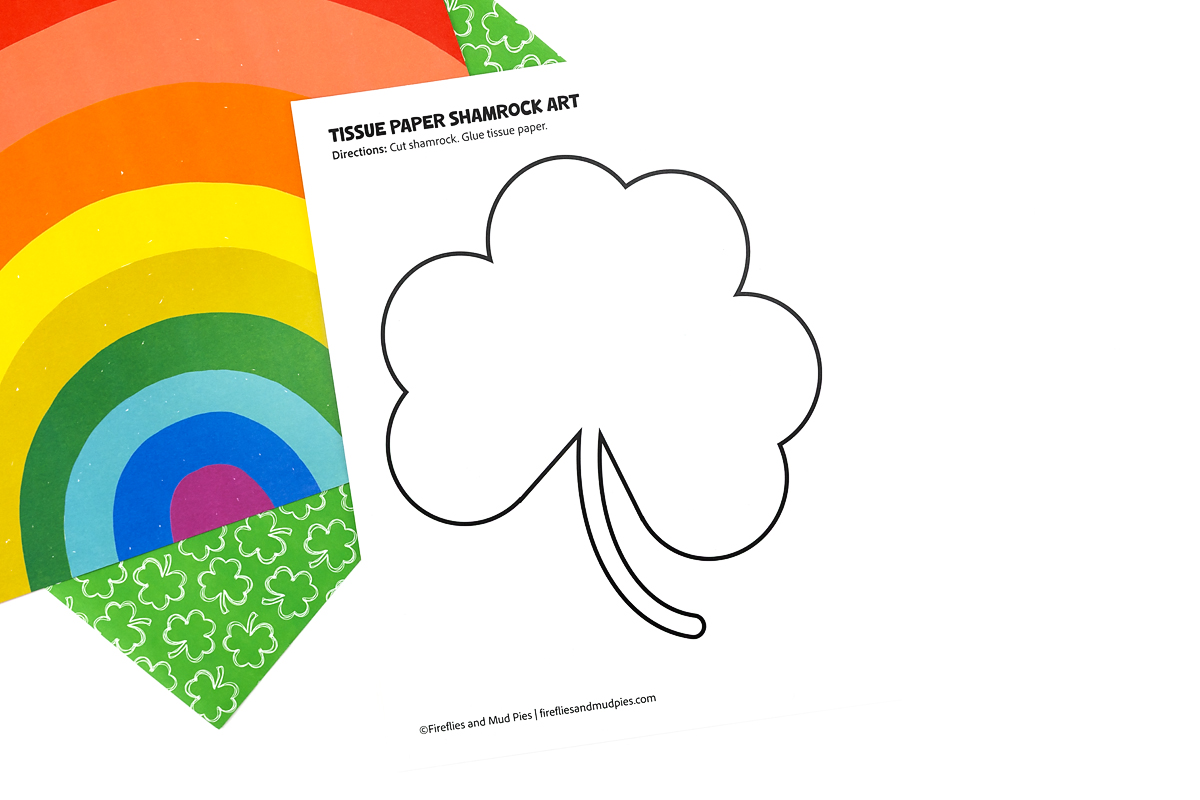
- Shamrock Template
- White cardstock
- Green tissue paper squares
- Scissors
- Tacky craft glue
- Pencil (with eraser)
How to Make a Tissue Paper Shamrock: Step-by-Step Instructions
These step-by-step directions make it easy to set up and complete this tissue paper shamrock craft with kids.
STEP 1: Prepare the shamrock template. After gathering your supplies, print our free printable shamrock outline or draw one onto cardstock. Larger shapes work best for younger children.
STEP 2: Cut out the shamrock. Carefully cut along the shamrock outline. Younger children may need help with this step, or you can pre-cut the shamrock ahead of time.

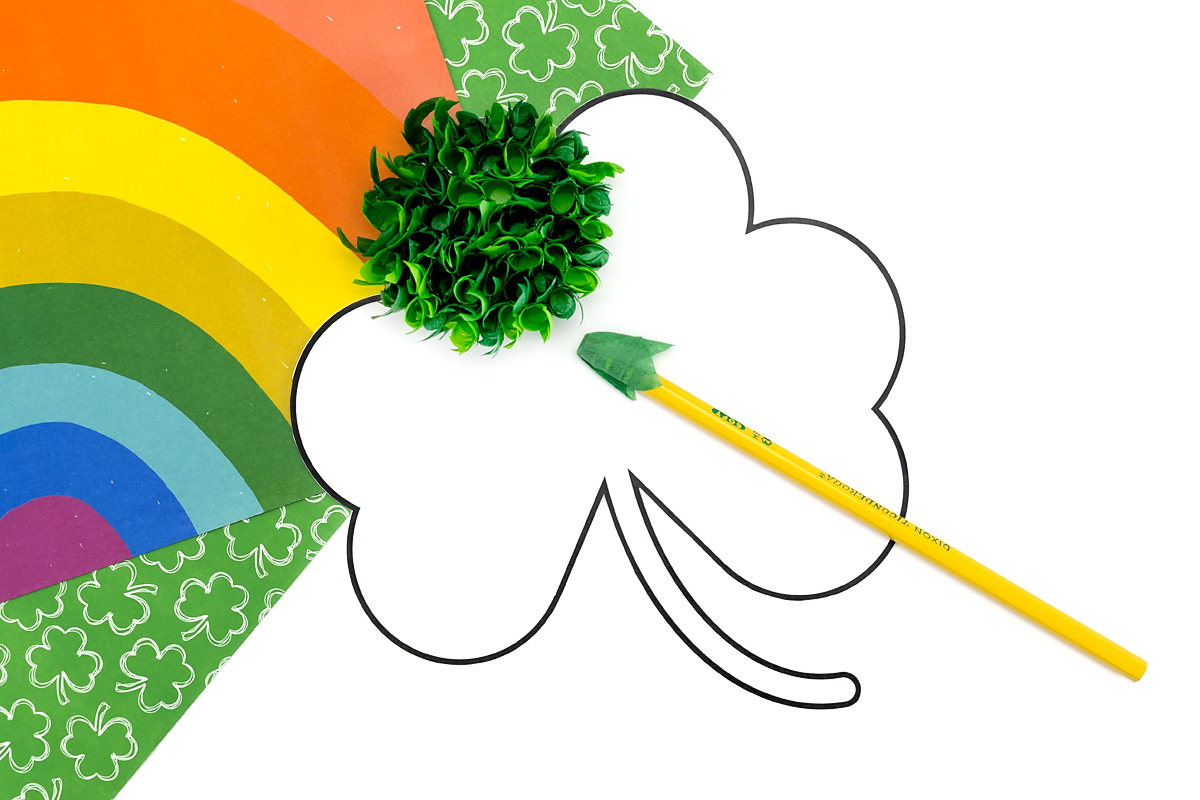
STEP 3: Apply the glue. Have children spread glue inside the shamrock shape, making sure to cover the area evenly.
STEP 4: Scrunch and add the tissue paper. Place a small piece of tissue paper over the eraser end of a pencil, gently scrunch it around the eraser, then press it onto the glued area. Repeat until the shamrock shape is filled.
STEP 5: Let the craft dry. Allow the tissue paper shamrock to dry completely on a flat surface.
STEP 6: Display the finished shamrock. Hang the completed shamrocks on bulletin boards, windows, or refrigerators for St. Patrick’s Day decor.
Tips for Success
These simple tips help ensure this tissue paper shamrock craft goes smoothly with individuals or groups.
- Use multiple shades of green tissue paper for added depth.
- Pre‑cut templates for younger children.
- Cover tables with newspaper or placemats for easy cleanup.
- Demonstrate scrunching the tissue paper before starting.
Take It Further
This tissue paper shamrock craft can easily be extended into other learning areas, making it a great fit for classrooms, libraries, and home learning.
- Fine motor practice – Encourage children to tear, scrunch, and place the tissue paper pieces independently to build hand strength and coordination.
- Literacy connection – Pair the craft with a St. Patrick’s Day picture book and invite children to share something they learned or noticed about shamrocks.
- Social studies – Talk about shamrocks, Ireland, and why the shamrock is a symbol often used during St. Patrick’s Day celebrations.
- Math extension – Count the tissue paper pieces used or sort them by shade of green before gluing.
- Gifting idea – Turn finished shamrocks into greeting cards, hallway displays, or bulletin board decorations to share seasonal cheer.
Common Questions
These frequently asked questions help answer common setup and age-related questions about this tissue paper shamrock craft.
This craft works well for preschool through early elementary students. Younger children may need help with cutting, while older kids can complete most steps independently.
Yes. You can pre-cut the shamrock shapes and tissue paper pieces to make this a low-prep activity for classrooms or groups.
Regular school glue works well for this project. Glue sticks can also be used, but liquid glue helps the tissue paper stay in place more easily. You may also use tacky craft glue.
Absolutely! While green is traditional for shamrocks, kids love making rainbow versions or using their favorite colors.
More St. Patrick’s Day Crafts for Kids
Looking for more festive St. Patrick’s Day crafts? You may also enjoy making:
- Popsicle Stick Leprechaun Hats
- Pot of Gold Craft and Writing Activity
- Leprechaun Card Craft
- Shamrock Suncatcher Craft
- Torn Paper Shamrock Craft
Save This Craft
📌 Don’t forget to PIN this craft! Save this craft on Pinterest to your St. Patrick’s Day Crafts or Tissue Paper Crafts boards on Pinterest so you can find it later!
Tissue Paper Shamrock
Ingredients
- Shamrock Template
- White cardstock
- Green tissue paper squares
- Scissors
- Tacky craft glue
- Pencil (with eraser)
Instructions
- Prepare the shamrock. Print or draw a shamrock outline on cardstock and cut it out. Pre-cut if needed for younger children.
- Prepare the tissue paper. Cut or tear green tissue paper into small pieces. If you have precut tissue paper, you may skip this step.
- Apply glue. Spread glue over a small section of the shamrock shape.
- Scrunch the tissue paper. Place a piece of tissue paper over the eraser end of a pencil. Gently scrunch it around the eraser, then press it onto the glue.
- Fill the shamrock. Repeat the scrunching process until the entire shamrock is covered.
- Let it dry. Allow the shamrock to dry completely before displaying.
Originally published February 7, 2015.


ChristyM says
How fun to be able to share what you love with your kids. I should try this with mine.
Fireflies and Mud Pies says
It’s fun and they love to hear stories about when I was a kid.
maryanne @ mama smiles says
I love tissue paper art! This one is lovely.
Fireflies and Mud Pies says
Thank you, Mary Anne!
Nicole Schwarz says
I remember doing this as a kid too! I’ve got to introduce it to my girls. And those bottles of glue are the perfect size!
Sara Reimers says
This is such a cute craft! I wasn’t even thinking about St. Patrick’s Day but now I want to do this with my daughter. Thanks for the inspiration!
Shannon says
This is beautiful! Thank you for letting me share your post in my St. Patrick’s Day Roundup