

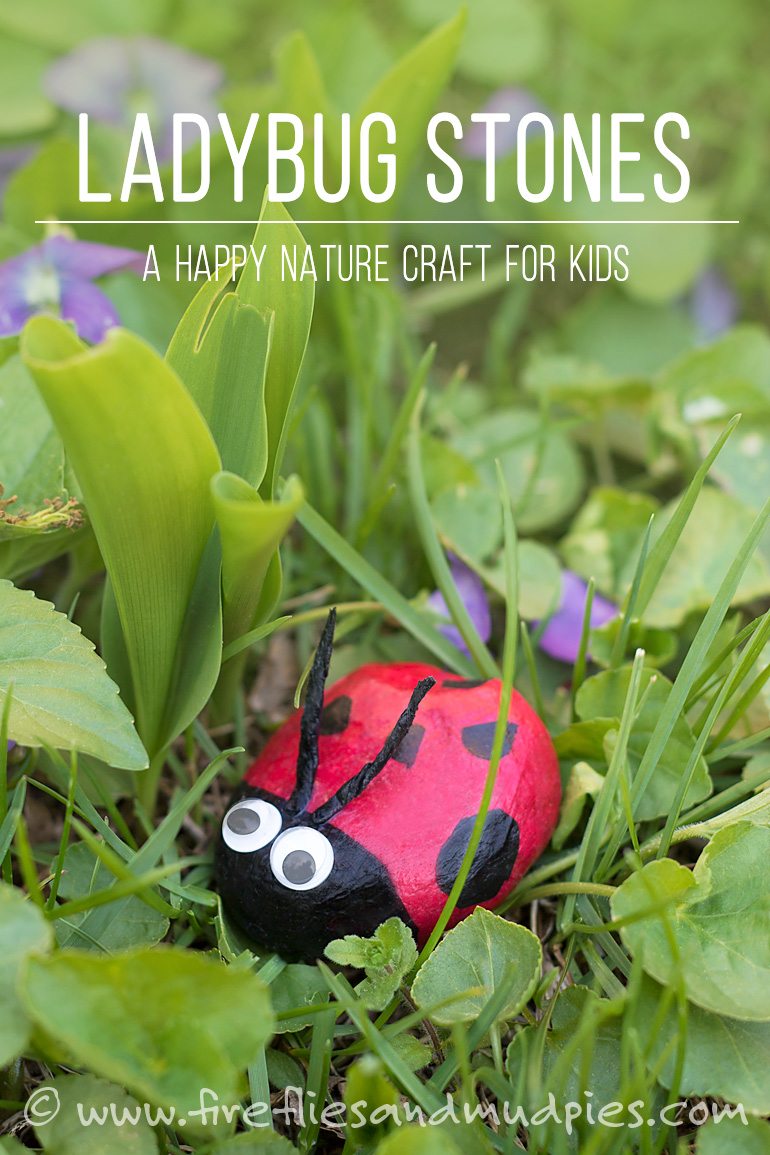
Whimsically tucked into garden beds, stonewalls, or playscapes, Ladybug Stones are guaranteed to invite smiles and creative play.
This post contains affiliate links. Opinions are my own.
Ladybug Stones
Want to make some with your children or class? The first thing you need to do is head outside to collect stones. The kids will have a great time seeking “the perfect stones” then washing them off in warm, soapy water.
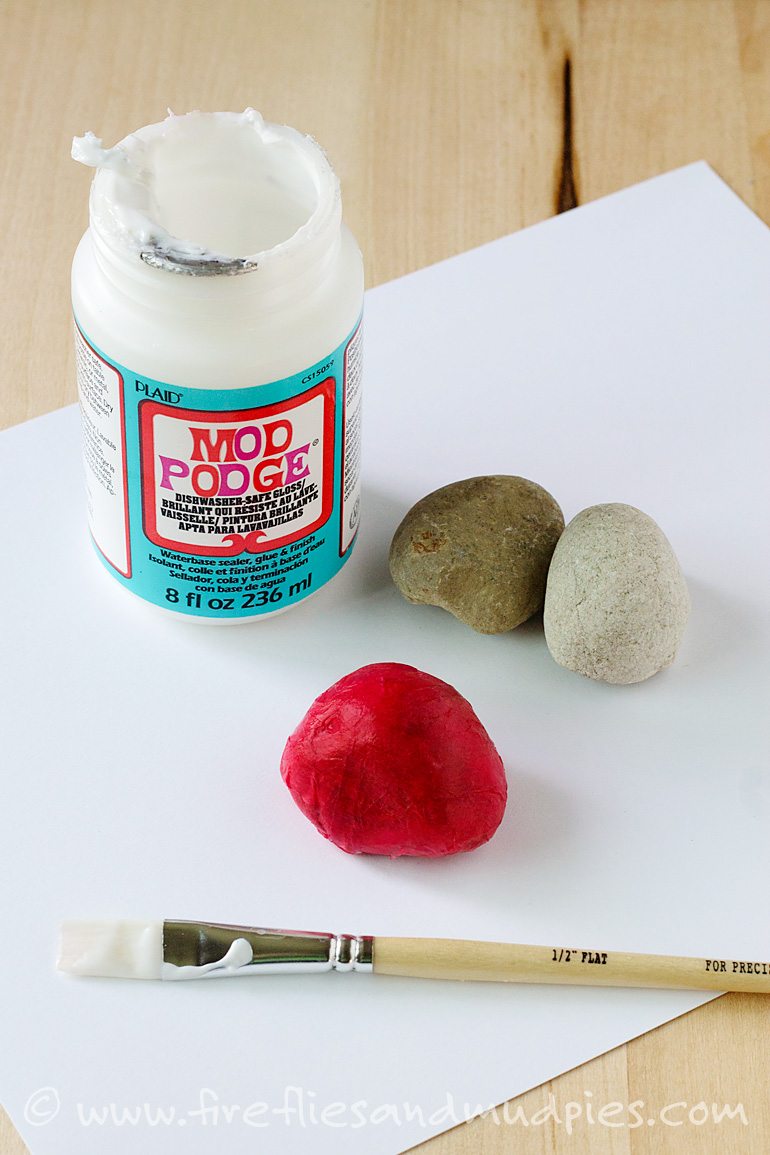
Materials:
- stones (washed and dried, or buy some here)
- red and black tissue paper (cut into small squares)
- googly eyes
- scissors
- paintbrushes
- Mod Podge—Dishwasher Safe Gloss
Directions:
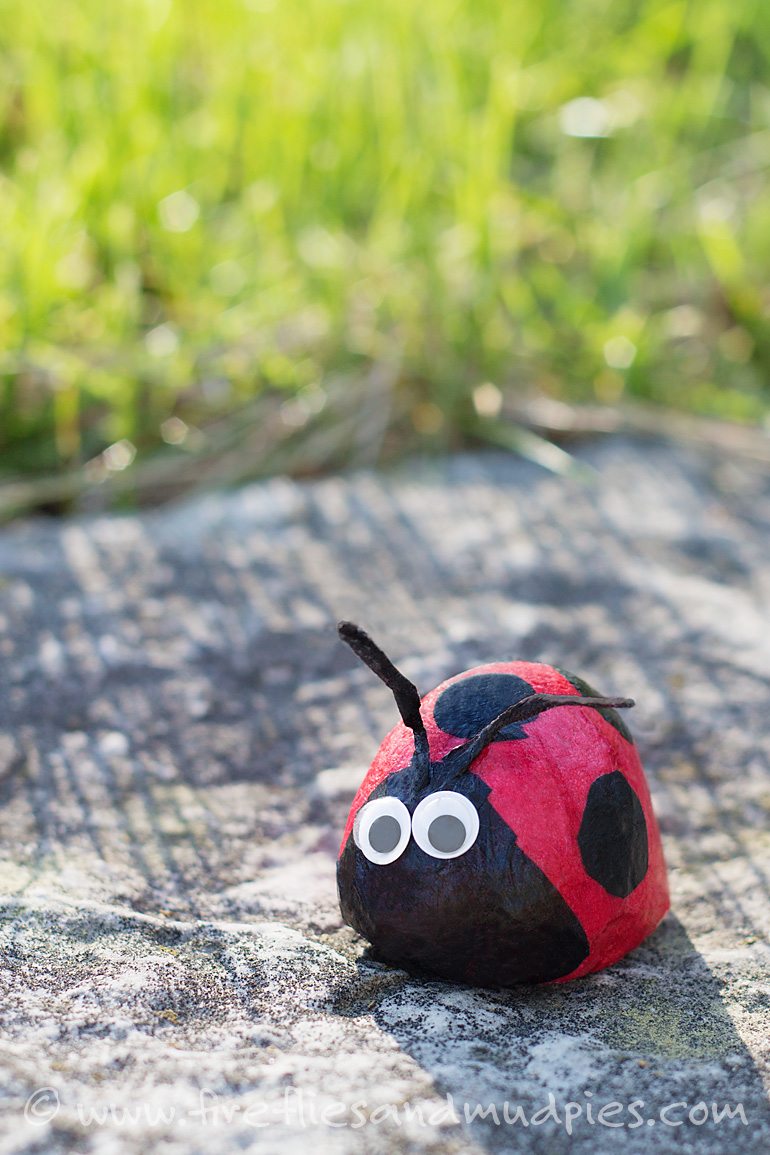
1. Decoupage the tissue paper onto the stones by placing the paper on the stone, then painting over it with Mod Podge. (We used this technique to make Gratitude Stones earlier this fall.) My children used scissors to cut small black circles from the black tissue paper. Continue layering tissue paper over the stone until you are satisfied with your ladybug. I LOVE decoupaging with tissue paper—much less cleanup than paints!
2. Make the ladybug’s antennae by twisting tissue paper between your fingers, then smoothing Mod Podge over it. Use the wooden end of your paintbrush to press it down onto the rock.
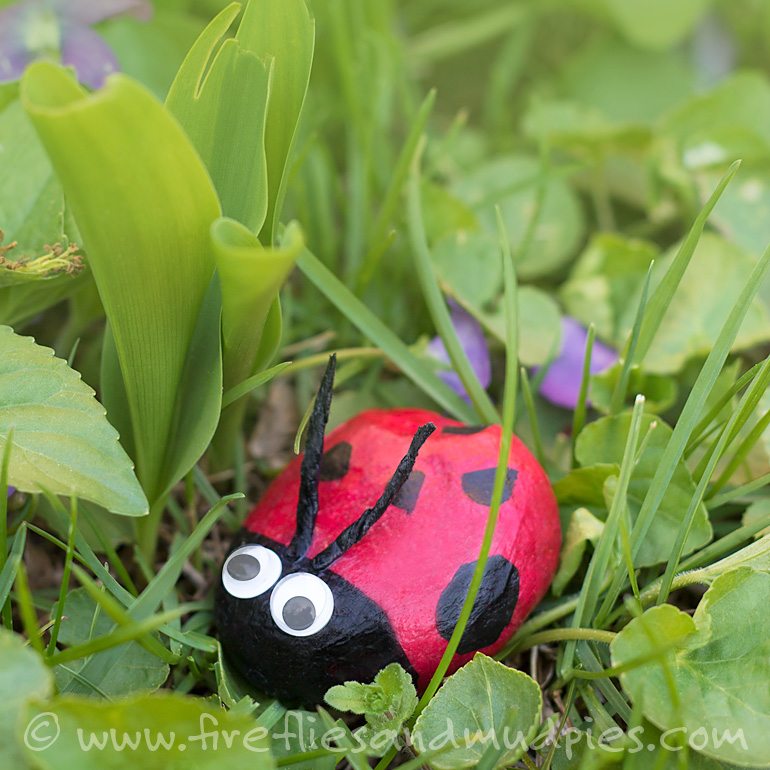
3. While the Mod Podge is still wet, attach 2 googly eyes to the stone. Allow the ladybug to dry completely before placing it outside for play or decoration.
Do you love kid’s nature crafts? Follow along with my Nature Crafts board on Pinterest.


sbobet says
Want to make some with your children or class? The first thing you need to do is head outside to collect stones. The kids will have a great time seeking “the perfect stones” then washing them off in warm, soapy water.