


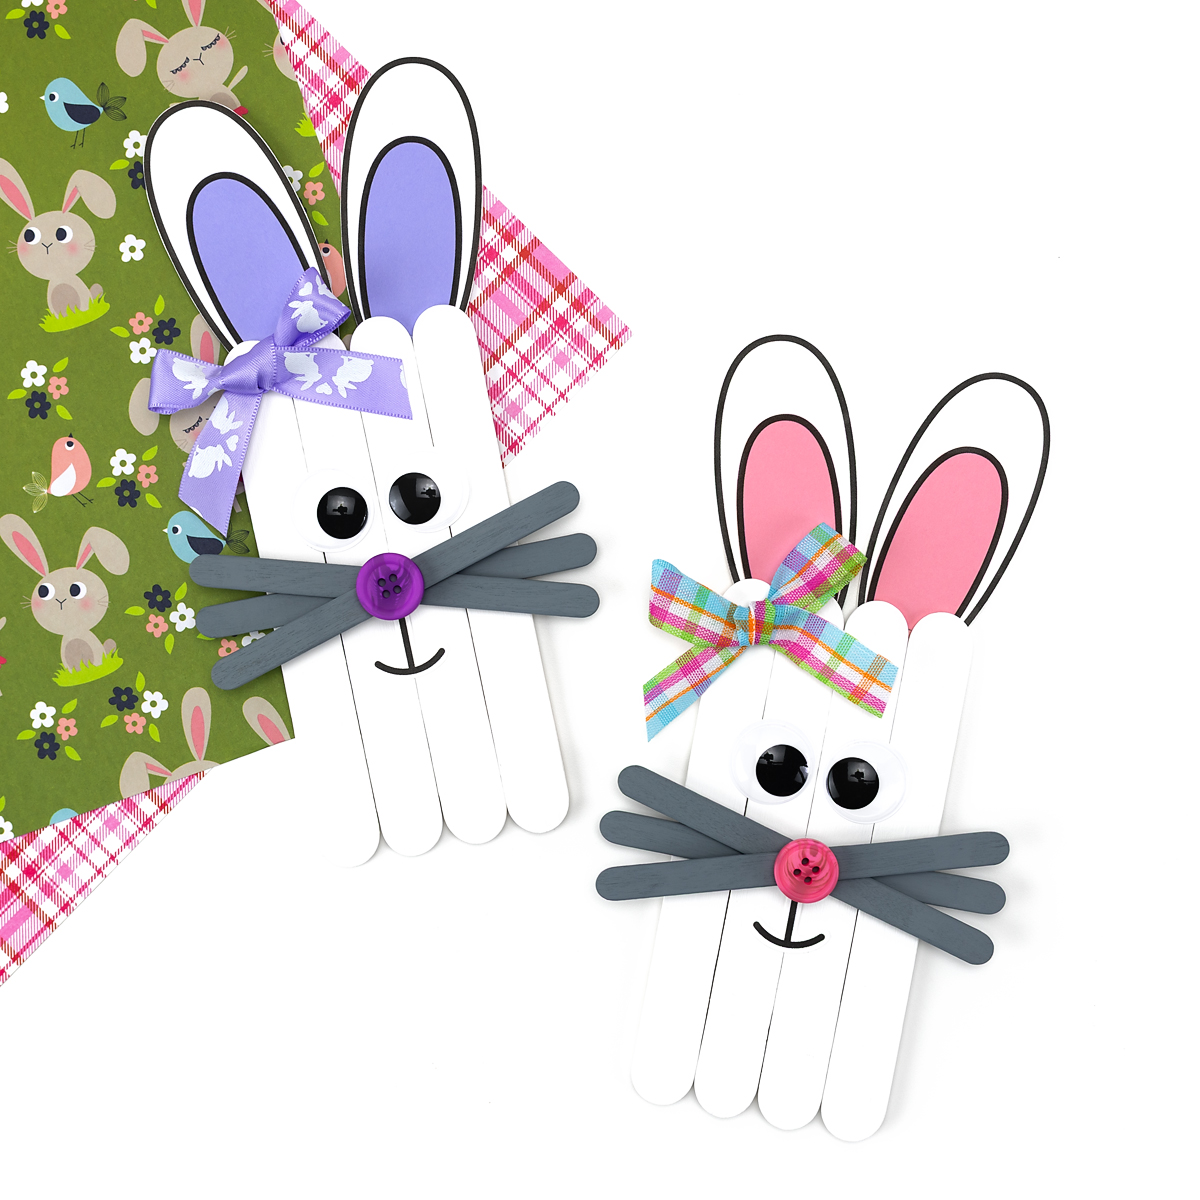
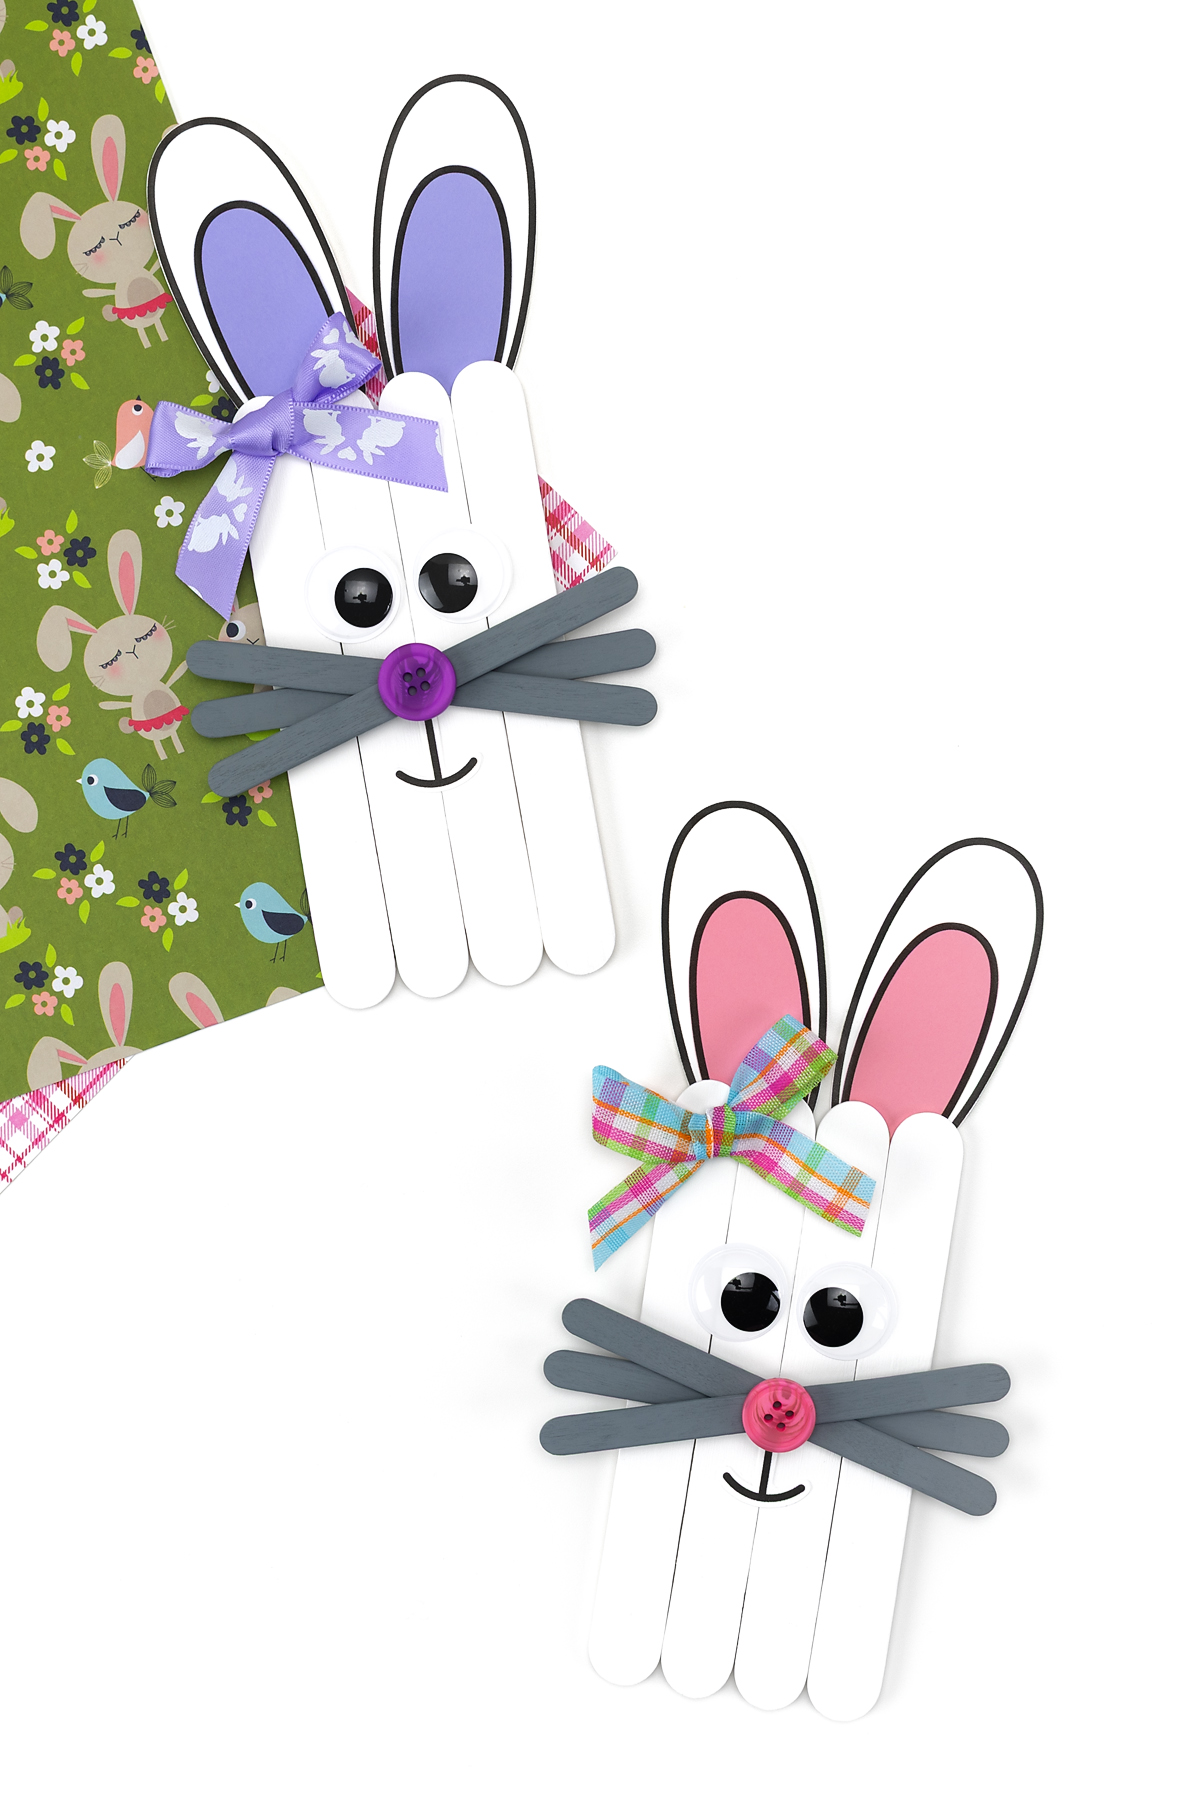
This Popsicle Stick Bunny craft is a quick, easy project that turns out especially cute! Kids build a front-facing bunny face using wide craft sticks, then add printed ears, eyes, and a mouth from a template. Finish it off with popsicle stick whiskers for a fun touch. It works well as an Easter activity, a spring art project, or a rainy afternoon craft at home.
Make your Easter crafts even cuter! Pair this bunny craft with a Popsicle Stick Chick for a fun spring activity.
Why You’ll Love This Popsicle Stick Bunny Craft
This bunny craft is simple to set up, easy to manage with a group, and turns out consistently cute. Here’s why it works so well:
- Simple materials – Wide craft sticks, mini sticks, and standard popsicle sticks are inexpensive and easy to find. You may already have everything you need on hand.
- No drawing required – The printable template includes the ears, eyes, and mouth, so kids don’t need to freehand anything. That means less frustration and a more polished result.
- Kid-friendly for multiple ages – Preschoolers and kindergarteners can complete most steps with light help, while first and second graders can work more independently.
- Quick to complete – Most kids finish in about 20 to 30 minutes, making it a great option for classrooms or a simple afternoon activity.
- Optional wiggly eyes – The template includes printed eyes, but adding wiggly eyes on top gives the bunny extra personality.
Craft Supplies Needed
You won’t need a long list of supplies for this craft. Here’s everything to have ready before you start:
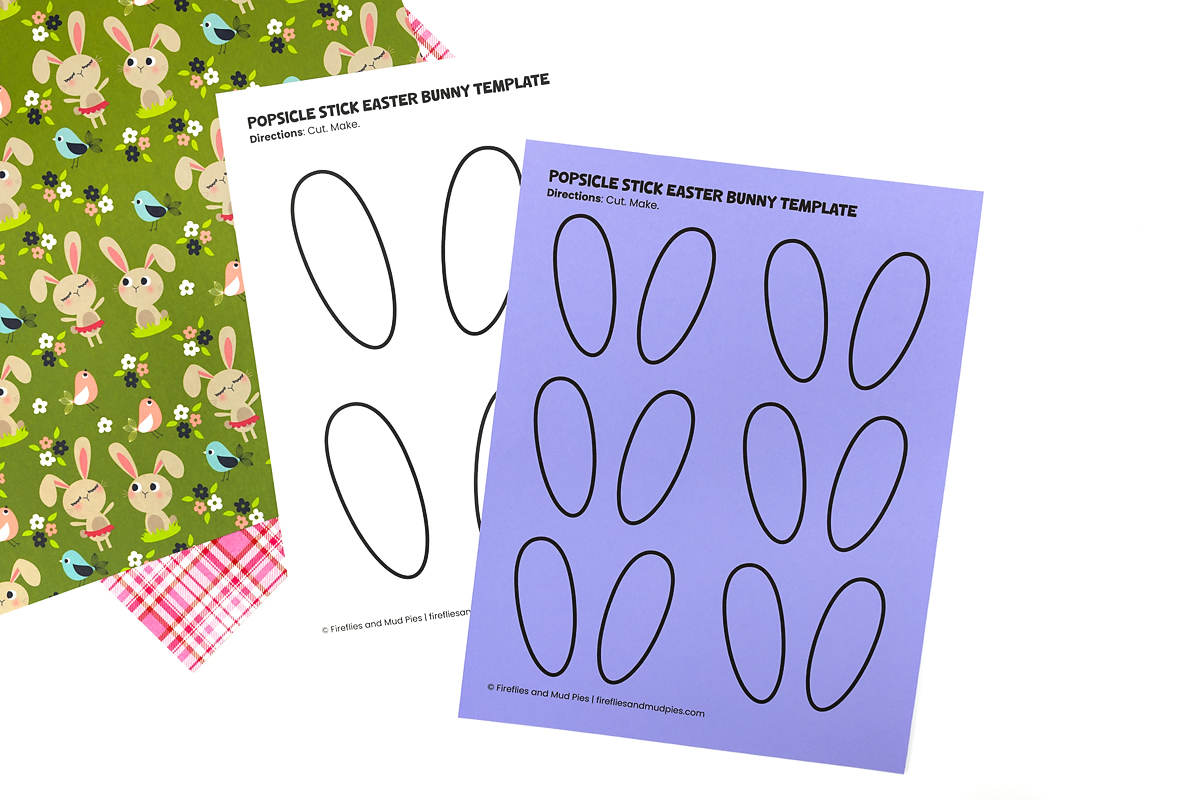
- Popsicle Stick Bunny Template
- White cardstock
- Colored cardstock
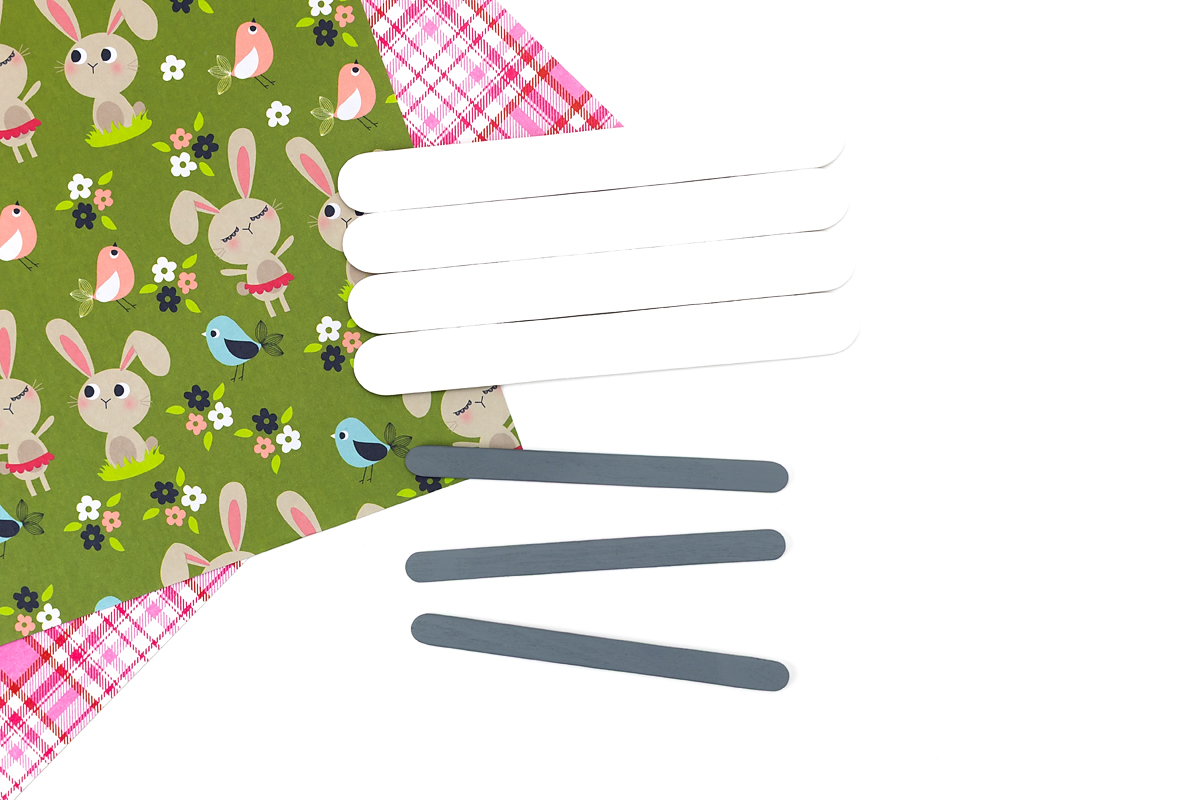
- Wide popsicle sticks (4)
- Mini popsicle sticks (2)
- Standard popsicle sticks (3)
- Hot glue gun and glue sticks or tacky craft glue
- Buttons
- Ribbon
- Scissors
- 24 mm wiggly eyes (optional)
How to Make a Popsicle Stick Bunny
Follow these steps to put the bunny together. The instructions work for both kids crafting at home and teachers running this as a classroom project.
STEP 1: Print and cut the template. Print the bunny template and cut out the ears, mouth, and eyes. Set them aside for now.
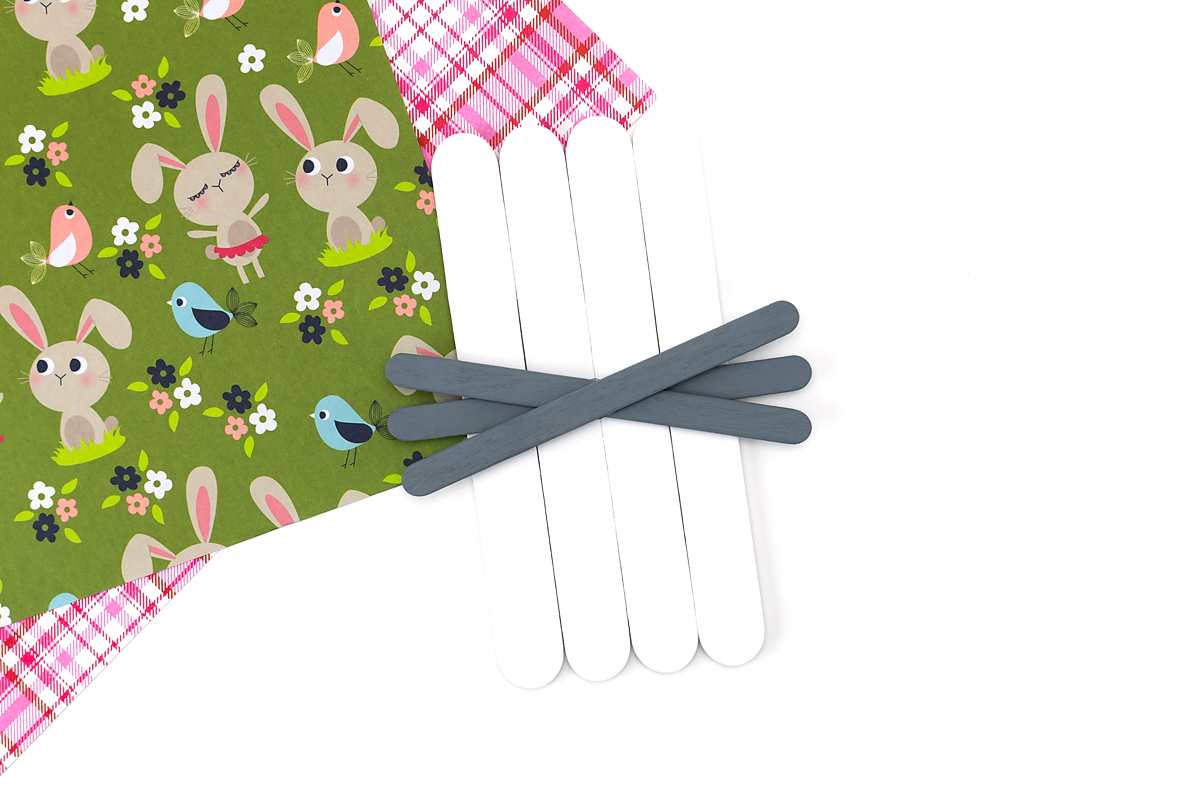
STEP 2: Build the bunny face. Lay the four wide popsicle sticks side by side on a flat surface so they form a rectangle. Glue the two mini popsicle sticks horizontally across the back, one near the top and one near the bottom, to hold all four wide sticks together. Let the glue dry before flipping back over.

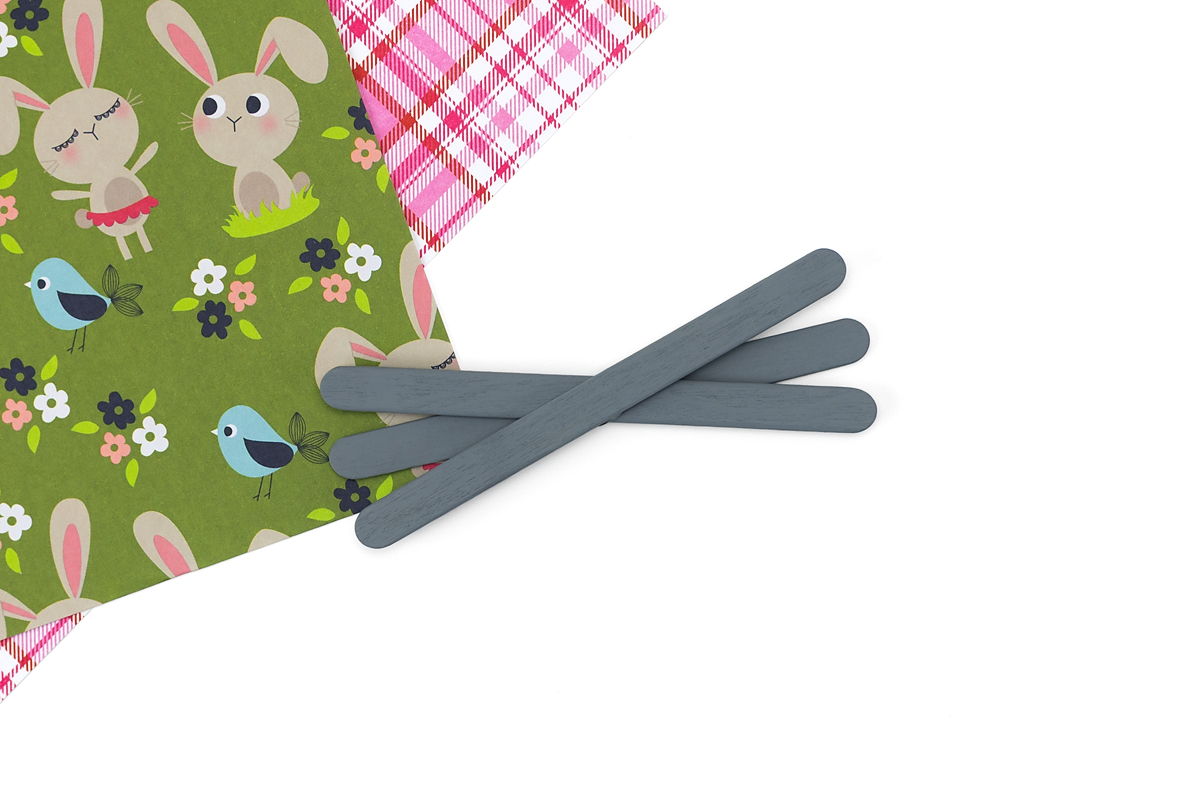
STEP 3: Paint the sticks. Paint the four wide popsicle sticks white for the bunny’s face. Paint the three standard popsicle sticks grey for the whiskers. Let everything dry fully before the next step. Kids can also choose their own colors if they want to put their own spin on it.
STEP 4: Assemble the whiskers. Glue the three grey standard popsicle sticks together to form the whisker shape, following the photo below for reference. Set aside to dry.
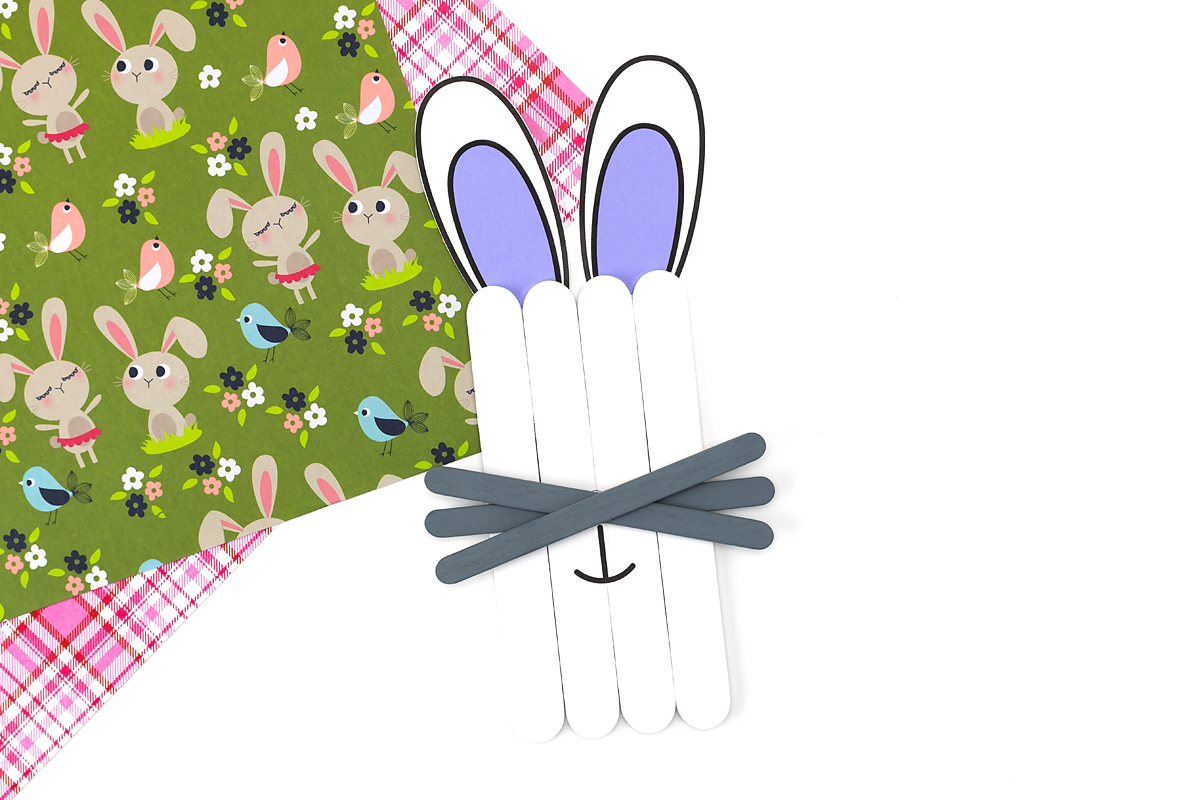
STEP 5: Attach the whiskers to the face. Once the whiskers are dry, glue them to the center of the bunny’s face. Let the glue set before moving on.
STEP 6: Add the ears. Assemble the printed ear pieces and glue them to the back of the bunny’s face so they peek out from the top.
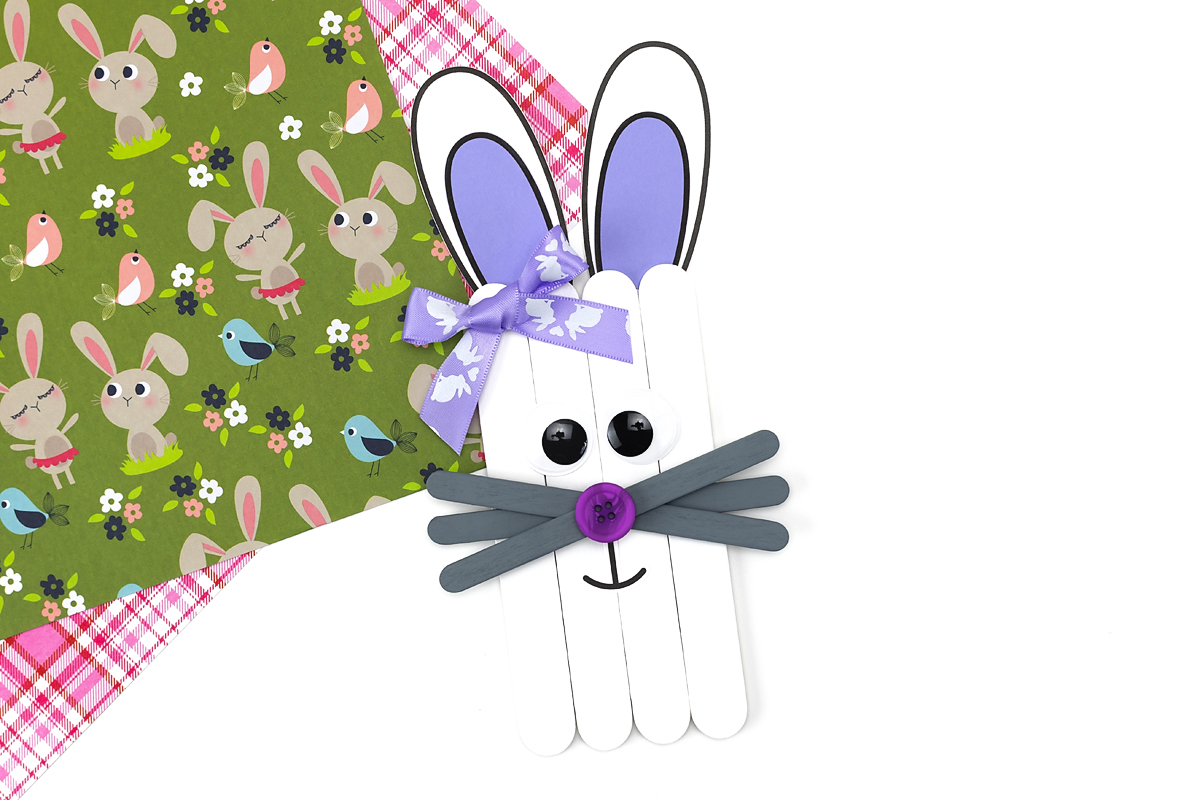
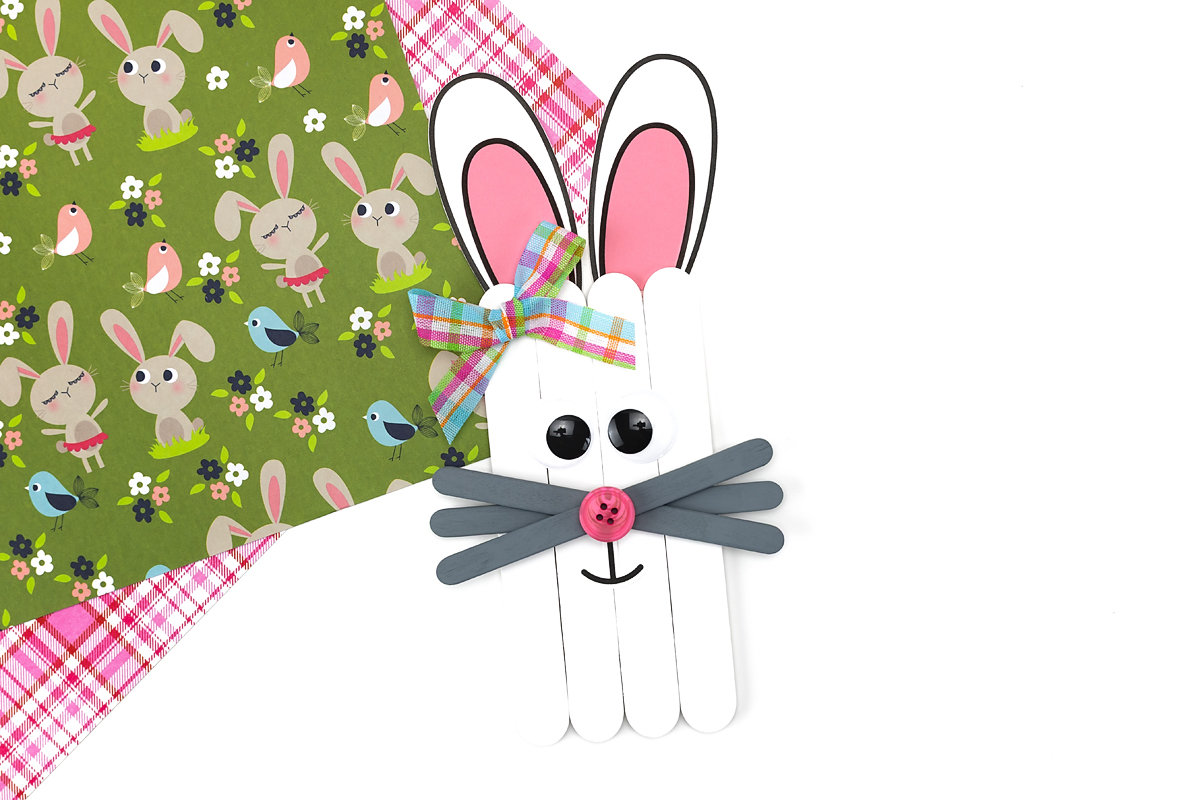
STEP 7: Add the face details and bow. Glue on the eyes, nose, and mouth from the template. If you are using wiggly eyes, swap those in instead of the printed ones. Finish by gluing the bow to the top of the bunny’s head.
Tips for Teachers
This craft adapts easily to a classroom setting. A few things that help it run smoothly:
- Pre-cut the template pieces for younger students (PreK and kindergarten) to save time and keep the focus on assembly.
- If scissor skills are part of your lesson goals, skip the pre-cutting and let kids cut out the template pieces themselves. The ears and bow offer good practice with curves!
- Use a low-temp glue gun at a teacher station for stronger holds, and let kids use school glue for the face pieces, which do not need as much strength.
- Print templates on cardstock for sturdier ears that hold their shape better.
- Set up an assembly line if you are doing this with a large group: one station for building the face, one for adding whiskers, one for gluing on face pieces.
Easy Ways to Extend This Craft
Once your bunny is finished, there are plenty of simple ways to keep the creativity going or connect this craft to other learning areas. These easy extensions build on the activity while giving kids room to explore, create, and personalize:
- Turn the bunny into a gift tag or Easter card – Add a loop of ribbon to the back for easy hanging.
- Add a cotton ball tail – Glue one to the back for a classic bunny detail.
- Use it as a story starter – “Where is this bunny hopping to?”
- Sort and count the sticks – A great PreK math tie-in before building.
- Make it magnetic – Glue a magnet to the back for a fridge display
- Add extra decorations – Try glitter, sequins, or washi tape.
- Turn it into a puppet – Attach a craft stick handle to the back.
- Create a display – String bunnies on twine for an easy garland.
Frequently Asked Questions
If you’re planning to make this craft at home or in the classroom, these quick answers will help you know what to expect and how to prep:
This craft works well for a wide range of ages, from preschool through elementary school. Younger kids will need more help with the gluing steps, while older kids can work more independently and even add their own creative details.
Not necessarily. Tacky craft glue works fine, but you will need to let each step dry before moving on. A low-temp glue gun speeds things up significantly, especially when securing the wide sticks together on the back.
Yes. If you’re doing this as a class project, you can pre-assemble the backs (wide sticks secured with mini sticks) the day before. Then students just need to add the whiskers and face pieces.
Yes! The printable template for the ears, mouth, and eyes is included with this post. Just scroll down to download it.
The finished bunny can be used as a decoration, a bookmark, or a small gift. Some kids like to hang it on their bedroom door or turn it into a magnet with a strip of magnetic tape.
More Easter Crafts for Kids
Want more fun Easter ideas for kids? These easy crafts are perfect for home or classroom and are great for little hands to make and enjoy.
- Easter Egg Template – Use these Easter egg templates for coloring, decorating, or tracing. Perfect for simple Easter activities at home or in the classroom.
- Popsicle Stick Easter Bonnet Craft – Build a fun Easter bonnet using popsicle sticks and paper. Kids can decorate with bows, stickers, or pom-poms for a festive look.
- Paper Easter Egg Art – Turn plain paper eggs into colorful works of art. Paint, collage, or add patterns for a creative spring activity.
- Easter Suncatchers – Transform egg templates into bright, glowing suncatchers. Layer tissue paper for a cheerful decoration that shines in the window.
- Easter Egg Wreath for Kids – Create a playful Easter wreath using decorated egg templates. Hang it on doors or walls for a festive touch.
- Easter Hedgehog Craft – Make an adorable Easter hedgehog with paper and simple craft supplies. A fun, hands-on project for kids of all ages.
Save This Craft
📌 Pin this simple bunny craft so you have it ready for Easter or spring activities!


Want even more?
Make sure to follow on Facebook, Pinterest, and Instagram for more easy crafts, activities, recipes, and parenting tips. And don’t forget to subscribe to our emails.