

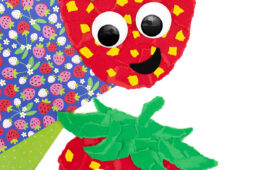
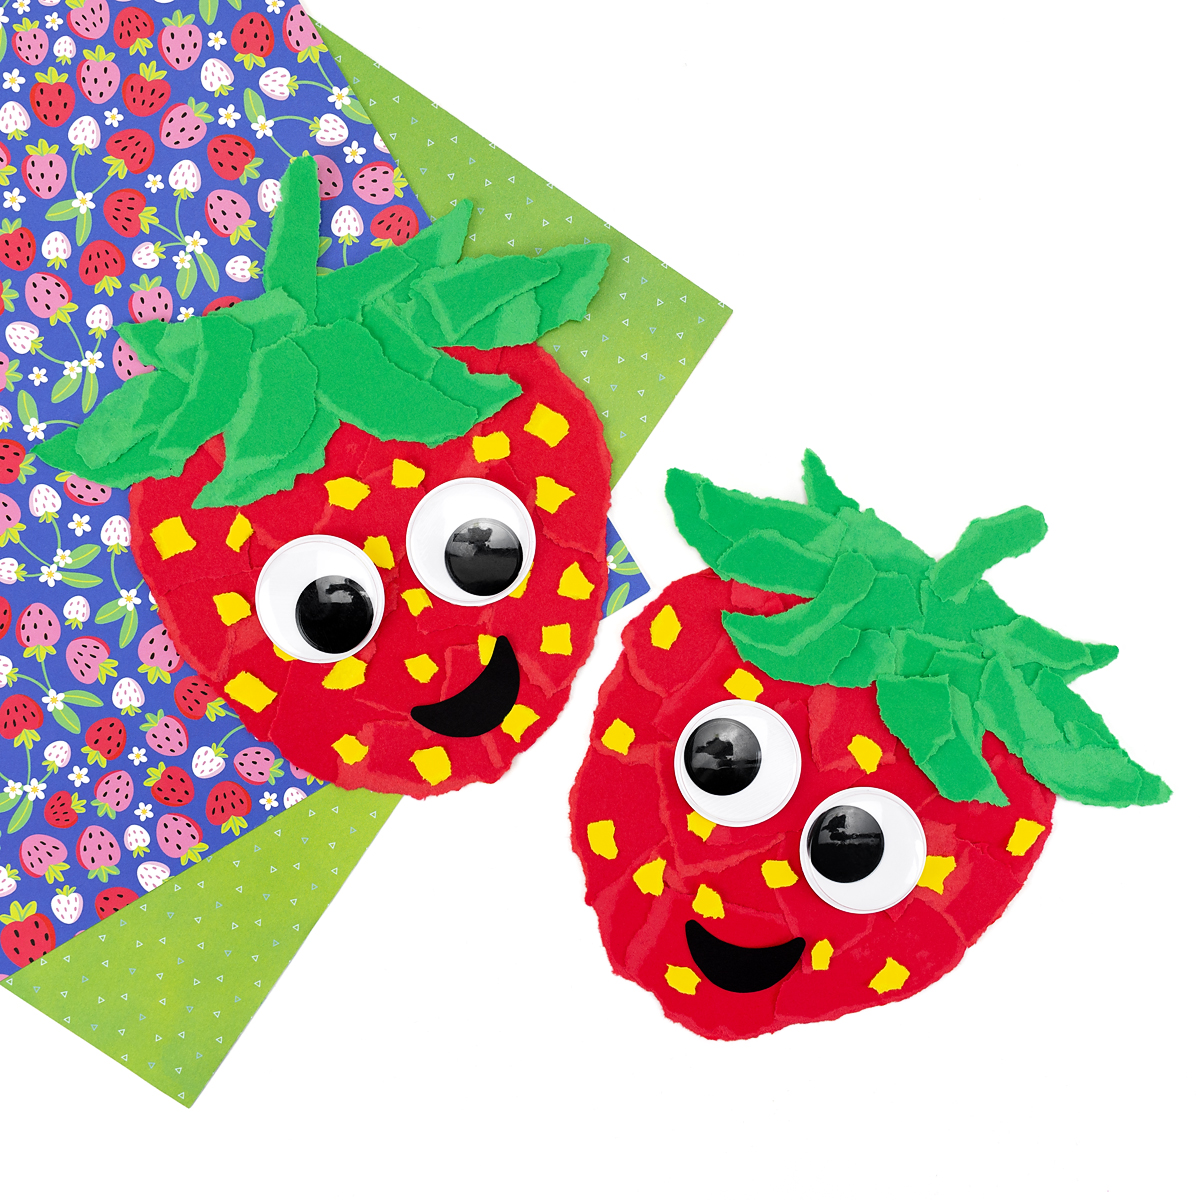
Looking for a simple, hands-on craft to keep little ones engaged and learning? Our Torn Paper Strawberry Craft is the perfect activity for preschoolers and young kids! Using just a few basic supplies, children can create an adorable strawberry character while practicing important fine motor skills. Plus, the silly wiggly eyes and smile make this craft extra fun and inviting!
Pair this cute craft with our Popsicle Stick Strawberry, a Strawberry Suncatcher, or this cute Quilted Strawberry Paper Craft!
Easy Torn Paper Strawberry
Tearing paper is one of those classic activities that never gets old. When my kids were younger, they loved any project that let them rip, tear, and glue—and honestly, I loved it too! Not only is tearing paper satisfying, but it’s also a fantastic way to strengthen little hands and fingers. This Torn Paper Strawberry Craft is a bright, cheerful project that supports fine motor development, encourages creativity, and brings a little fun into your home or classroom. It’s a great choice for spring, summer, or even a garden or food-themed learning unit!
Craft Supplies Needed
Before you start this craft, make sure you have all the right supplies.
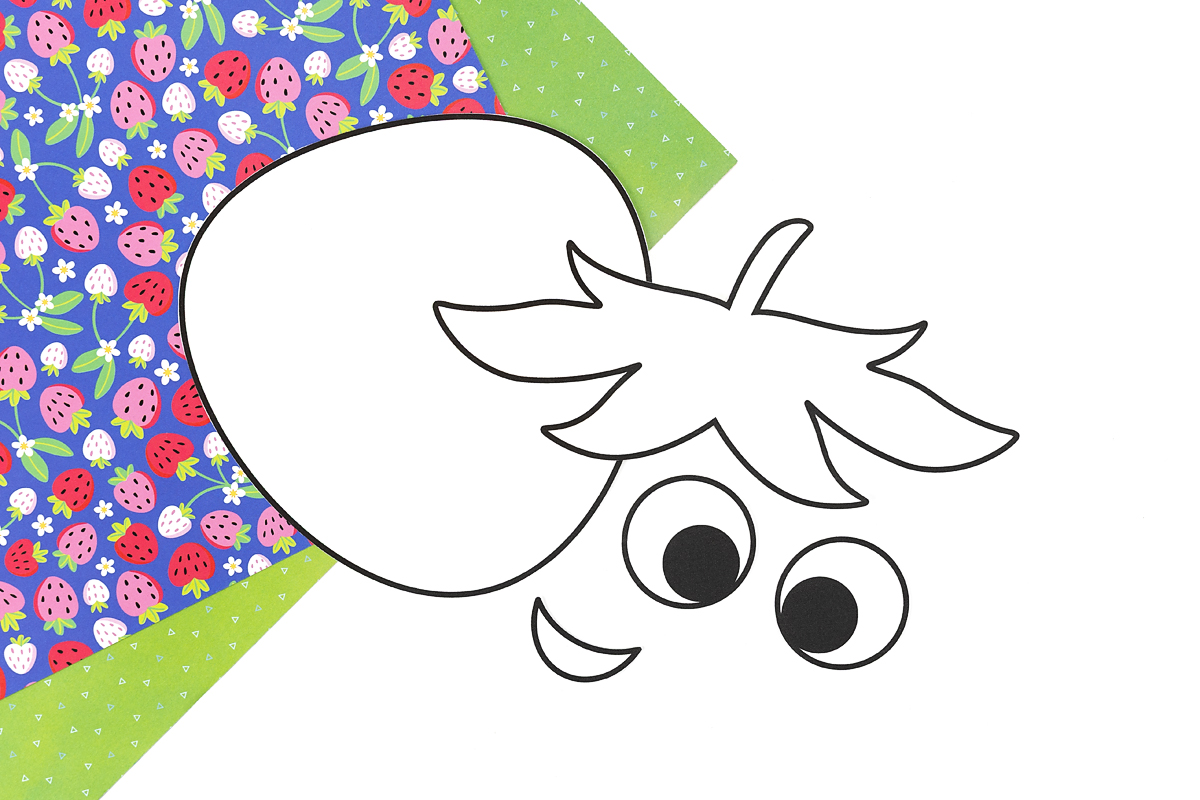
- Torn Paper Strawberry Craft Template
- White cardstock
- Red, green, yellow, and black construction paper or cardstock
- Glue stick or white school glue
- Wiggly eyes (40 mm)
Directions for Ripped Paper Strawberry Craft
This craft is easy and fun to make! Follow along with the directions below to see how we did it.
STEP 1: Print the template. Start by printing out the free strawberry craft template.
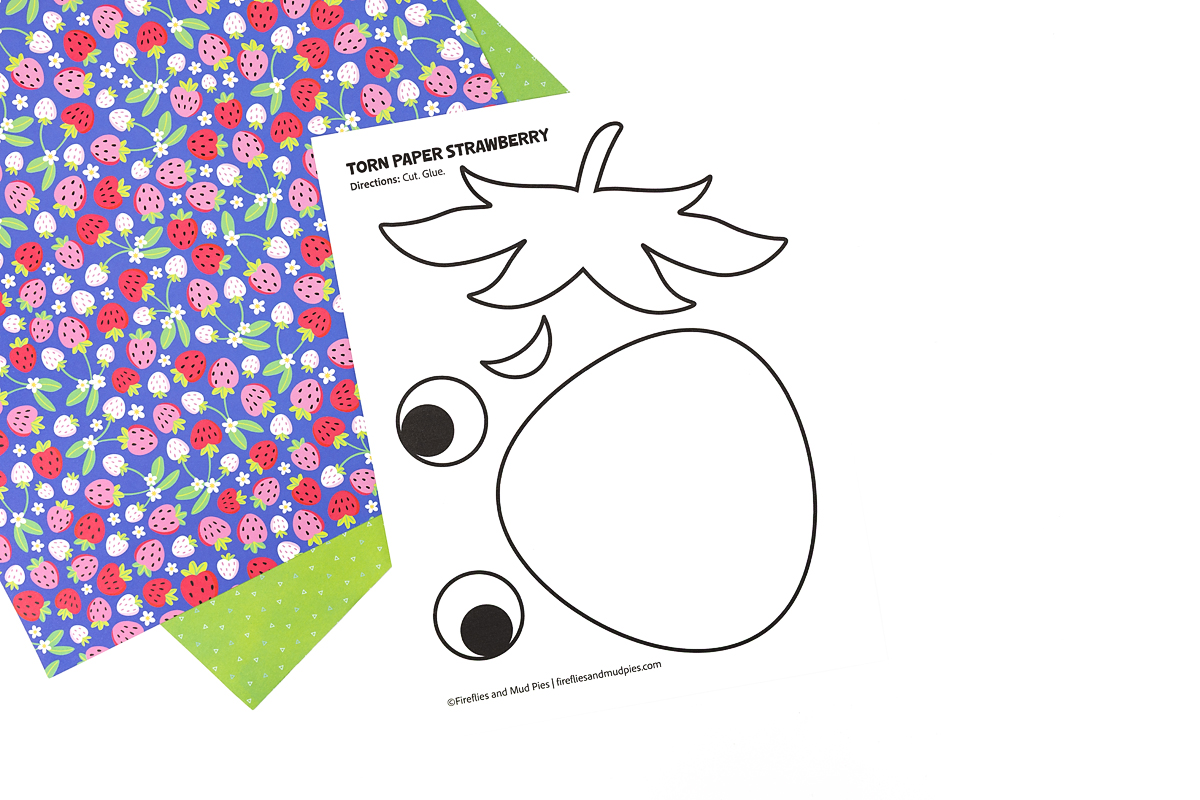
STEP 2: Cut out the template. Use scissors to cut out the strawberry template, then set the pieces aside.
STEP 3: Tear the paper. Invite kids to tear the red, green, and yellow paper into small pieces. Encourage them to use their fingers rather than scissors to help build hand strength and coordination.
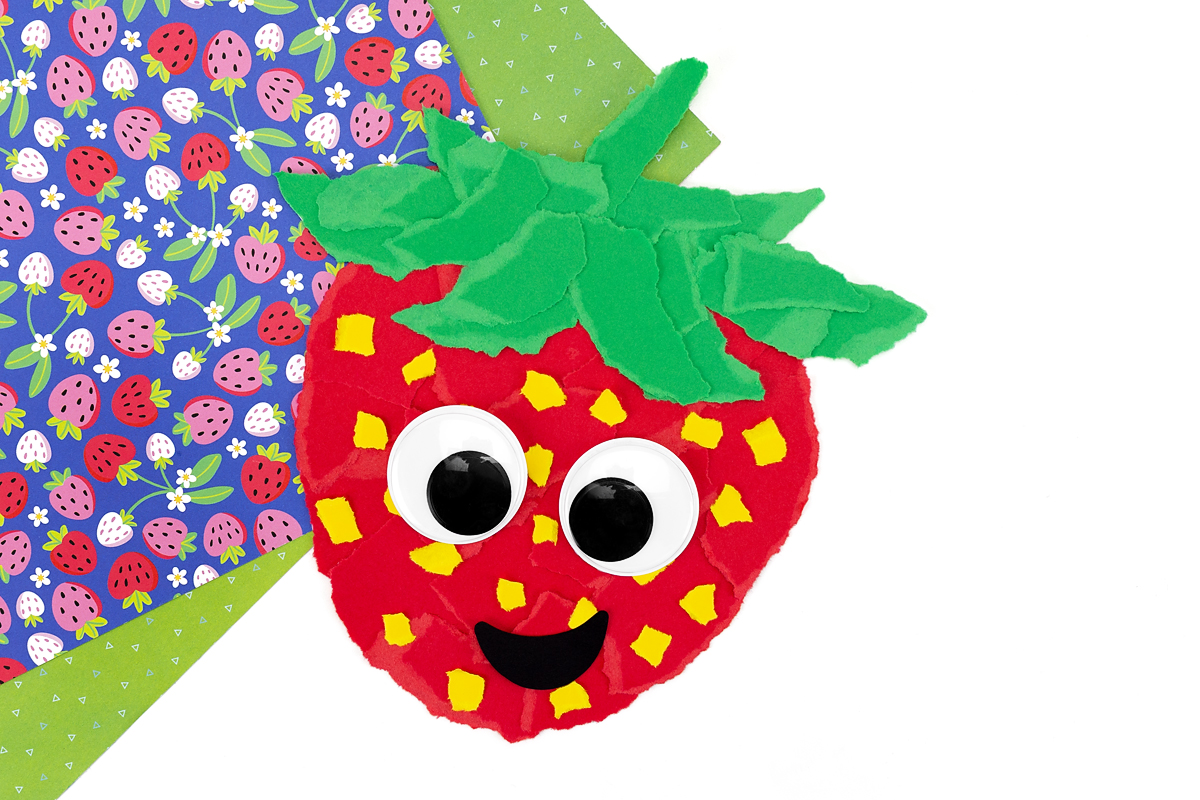
STEP 4: Glue the torn pieces. Help your child apply glue to sections of the strawberry shape. Press the torn red paper onto the strawberry area, the green onto the leafy top, and the yellow pieces randomly as strawberry seeds.
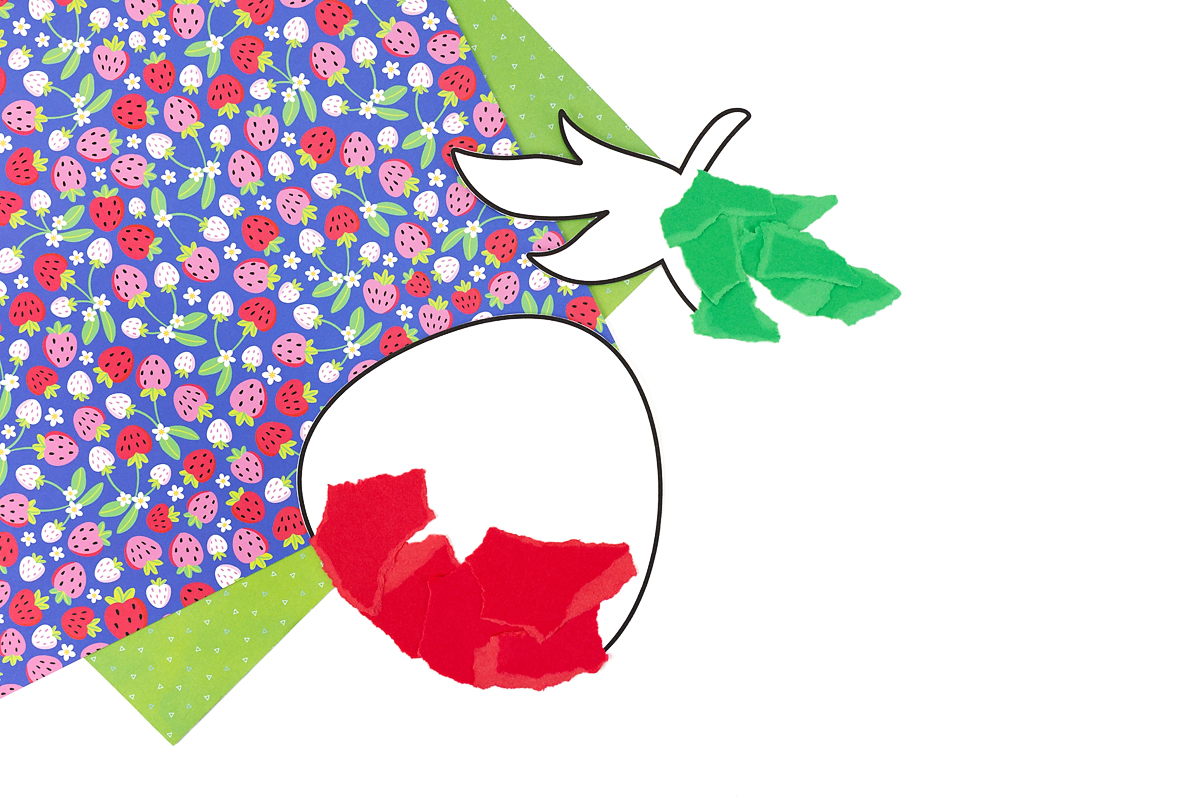
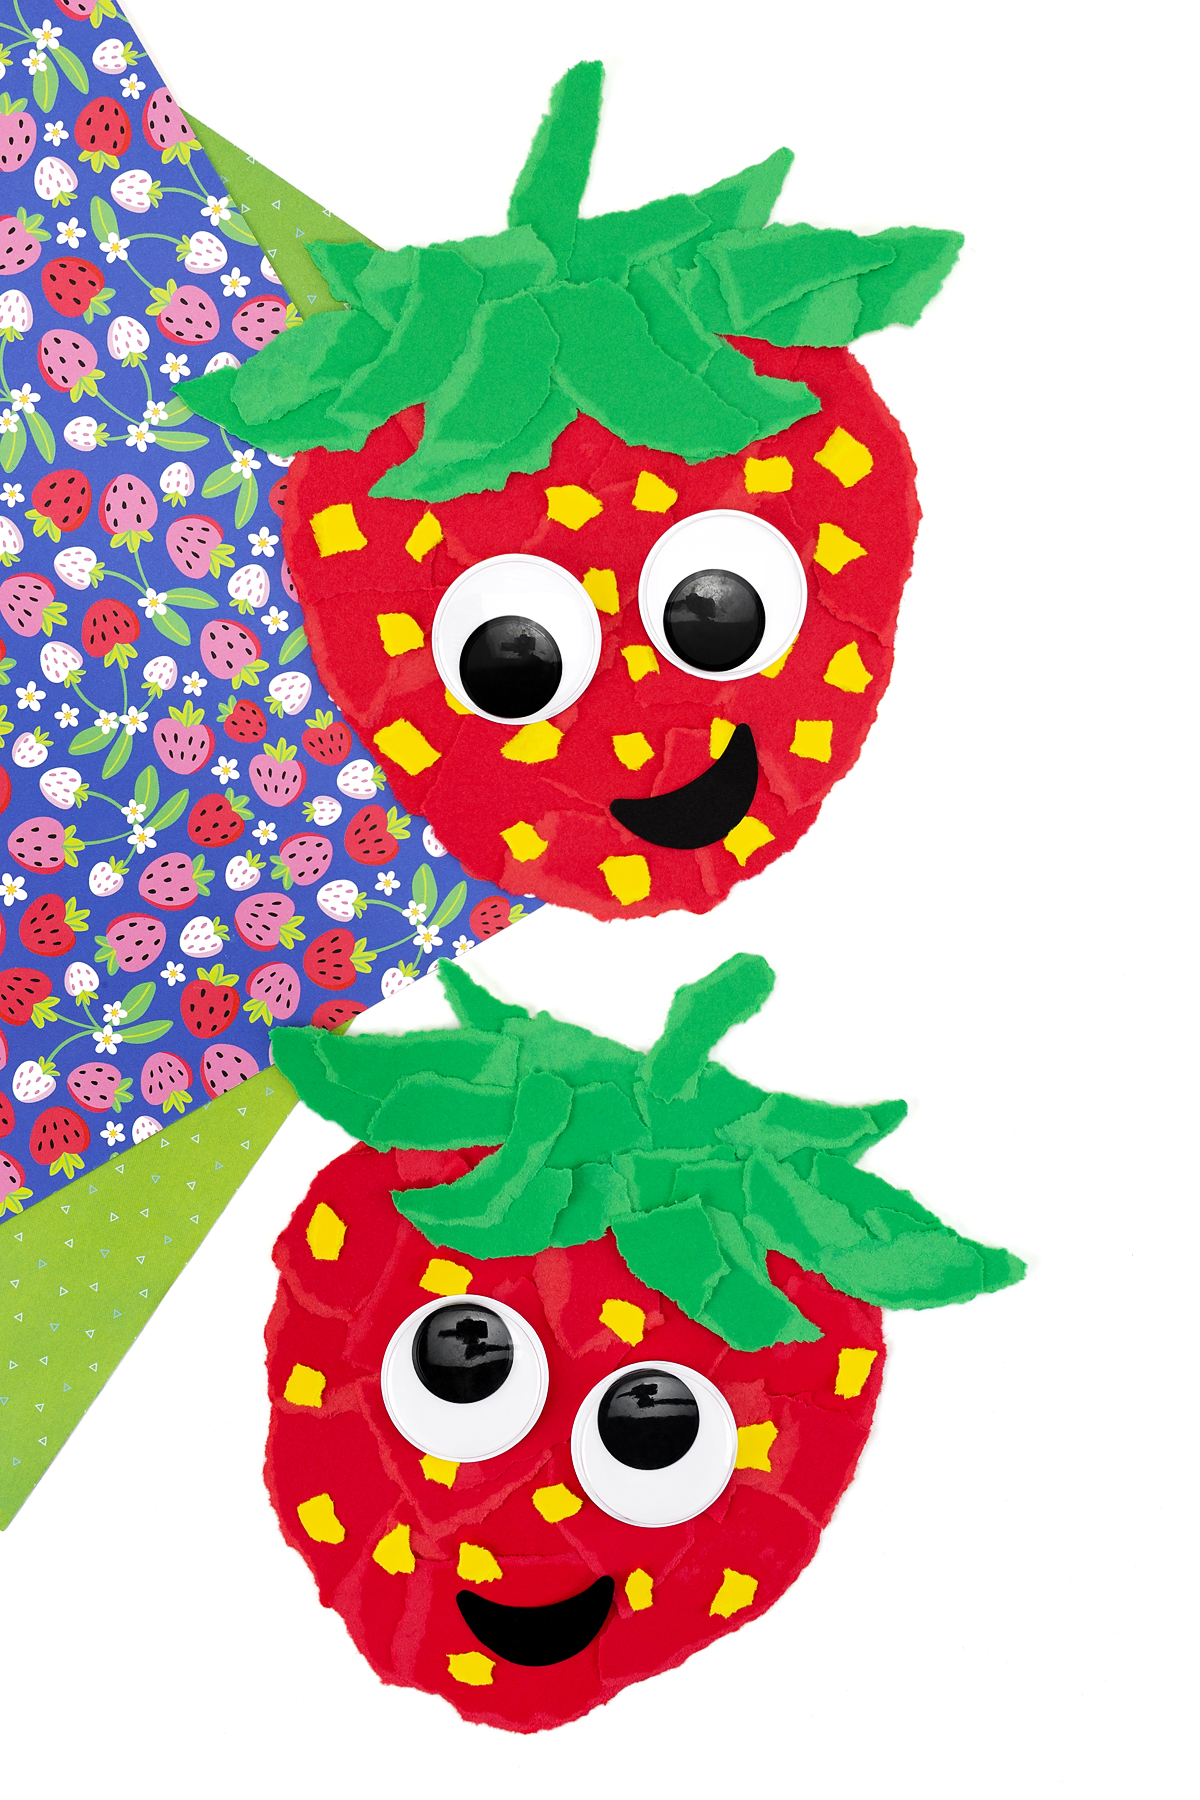
STEP 5: Continue covering the shapes. Keep pressing paper onto the shapes until they are completely covered, then glue the strawberry leaves to the fruit. You may end the craft here, or you can continue to the next step to make a strawberry buddy!

STEP 6: Add the face. Once the strawberry is covered, glue on the wiggly eyes. Next, trace the mouth shape onto black cardstock, then glue it onto the fruit.
Take It Further
Looking for expansion ideas? You may like to:
- Create a strawberry patch! Encourage kids to make a whole bunch of strawberries and arrange them into a colorful patch scene for your classroom bulletin board.
- Practice patterns. Challenge children to make a patterned strawberry by alternating red and pink paper.
- Add extra details. Invite kids to glue their strawberries onto a larger piece of paper and draw vines, flowers, or even a cute bug or two!
- Try new colors! Show kids how they can make their strawberries different shades of pink or red.
- Storytime tie-in. Pair this craft with a favorite strawberry-themed book like The Little Mouse, the Red Ripe Strawberry, and the Big Hungry Bear by Don and Audrey Wood.
- Sensory fun. Use textured paper like tissue paper, crepe paper, or even fabric scraps for a unique sensory experience.
More Torn Paper Crafts for Kids
Looking for more ideas? You may also enjoy:
Save This Craft
Save this craft on Pinterest using the image below!


Want even more?
Make sure to follow on Facebook, Pinterest, and Instagram for more easy crafts, activities, recipes, and parenting tips. And don’t forget to subscribe to our emails.