


Are you looking for an easy rainbow craft for kids to brighten up your windows this spring? Our tissue paper Rainbow Suncatcher is perfect for preschoolers and elementary students! This simple classroom spring craft uses just a few materials like tissue paper squares, black cardstock, and our free printable rainbow template to create a beautiful rainbow window cling that captures the sunlight and fills your home with colorful reflections.
Planning ahead? You may enjoy our Flower Suncatchers and Easter Suncatchers!

Rainbow Suncatcher Craft
Stuck indoors on a rainy spring day or planning a classroom activity for St. Patrick’s Day? This rainbow suncatcher craft is a simple, low-prep solution. It uses supplies most families already have and creates a bright window display that brings instant cheer when the sun shines through.
Rainbow suncatchers aren’t just fun to make—they also help kids build essential fine motor skills. Cutting and arranging tissue paper strengthens small hands while giving kids plenty of room to be creative.
We used traditional rainbow colors for our suncatchers, but this craft is easy to customize. It would be beautiful using tertiary colors like vermilion, amber, chartreuse, teal, indigo, and magenta. (Definitely adding that idea to my to-do list!)
This rainbow craft works beautifully all year long and is especially popular for:
- March: Spring celebrations and St. Patrick’s Day
- April: Spring break activities and rainy day crafts
- June: Pride Month decorations
- Summer: Vacation Bible School or camp crafts
- Any time: Indoor recess, rainy days, or when you need a cheerful window decoration
Decorating for St. Paddy’s Day? You may also like our Shamrock Suncatcher.
Craft Supplies Needed
Before you start this rainbow craft, make sure you have all the right supplies.
- Rainbow Suncatcher Template (free with email subscription)
- Tissue paper squares
- Black cardstock (1 sheet per suncatcher)
- White cardstock (1 sheet for template)
- Scissors
- Contact paper or self-seal laminating sheets (2 sheets per suncatcher)
- Double-sided tape
Watch the Video Tutorial
Check out the video below to see how we created our rainbow window suncatcher.
Directions for DIY Rainbow Suncatcher
Follow the instructions below to create a colorful tissue paper rainbow suncatcher for St. Patrick’s Day!
STEP 1: Download and print the rainbow template. Access the printable rainbow template by clicking the link in the materials list and subscribing to our free craft newsletter. After subscribing, navigate to the post in our Substack titled Rainbow Suncatcher Free Printable to find your download link.
Print the free rainbow template on white cardstock. Our template includes one large rainbow, but you could make it smaller by adjusting the scale in your printer menu.

STEP 2: Cut out the rainbow frame. Carefully follow the outlines of the rainbow suncatcher template with scissors. Because the shapes are curved, younger children may need a bit of help. To create a solid black frame for the suncatcher, try one of these methods:
- First, cut out the template, trace it onto black cardstock with a white pencil, and then cut it out.
- Place black cardstock behind the template, staple them together, and cut through both layers at the same time.

STEP 3: Position the rainbow outline. Lay the rainbow template onto the sticky side of the contact paper or self-seal laminating sheet. If you’re using shapes cut from white cardstock, ensure the side with the black ink is facing downward.

STEP 4: Attach the tissue paper. Fill the rainbow frame with tissue paper pieces, trimming them as needed to fit smaller details like the arcs. Keep layering the tissue paper until the entire frame is covered, creating a colorful stained-glass effect.
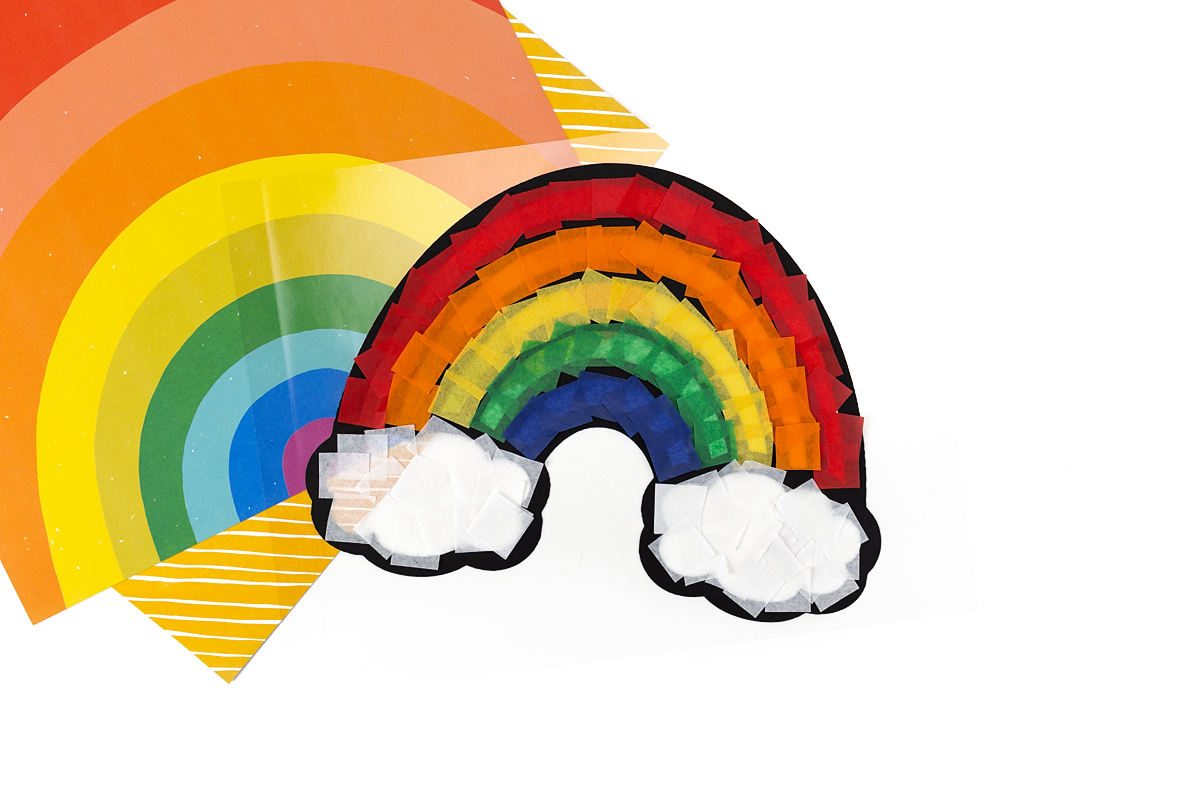
STEP 5: Secure the design. Once the tissue paper is in place, cover it with a second adhesive sheet to seal everything together. Then, carefully trim around the edges of the suncatcher frame with scissors.
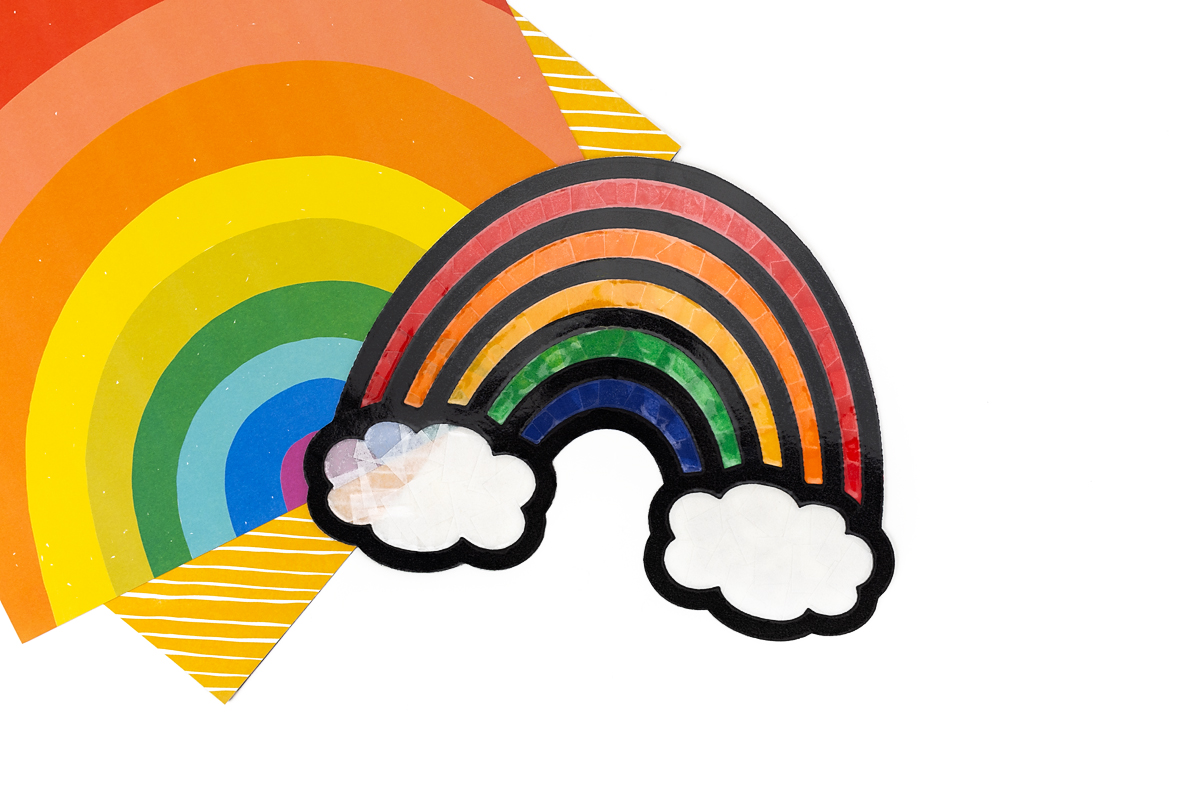
STEP 6: Display your window decorations. These contact paper suncatchers add a happy splash of color to any window—especially against the muted tones of early spring—brightening up the whole room! Use double-sided tape or sticky tack to hang them.

Take it Further
The bright colors and simple steps make this craft ideal for all ages! Want to add to the fun? Try these simple extension ideas:
- Pair this activity with a lesson on rainbows, weather, or colors.
- Use this craft as a party activity—rainbow suncatchers make great keepsakes for kids to take home.
- For younger children, pre-cut the tissue paper and rainbow frames to make the craft easier to complete.
- Use cellophane, acetate sheets, construction paper, or crepe paper instead of tissue paper.
- Pair this craft with a book about St. Patrick’s Day.
- Use this craft as a make-and-take at your community nature or library program.
- Decorate classroom or school office windows with a collection of suncatchers made by students.
- Use our rainbow template as a coloring page.
Crafting Tips
These simple tips will help make your tissue paper suncatcher easier to assemble and look its best!
- Prevent tissue paper tearing: Handle tissue paper gently and avoid dragging it across the sticky surface. Press it down carefully once it’s in place.
- Contact paper sticking to itself: Work slowly and peel back only a small section at a time. If it folds onto itself, gently separate it instead of pulling.
- Trimming curved edges: Use sharp scissors and turn the paper—not the scissors—as you cut. Small, controlled snips create smoother curves than long cuts.
- Making it stick to windows: Clean the window first with glass cleaner. Sticky tack works better than tape and won’t leave residue. For heavier suncatchers, use a small piece in each corner.
Frequently Asked Questions
This craft takes about 30 minutes from start to finish, making it perfect for short attention spans or quick classroom activities.
This craft works well for ages 3 and up. Younger children (ages 3-5) may need help cutting the curved shapes, while older kids can complete it independently.
Gently peel from one corner. If using double-sided tape, warm it slightly with a hairdryer to loosen the adhesive. Clean any residue with a bit of rubbing alcohol on a cloth.
Yes! You can draw your own rainbow shape on cardstock or trace a bowl/plate to create the curved arcs.
More Rainbow Crafts for Kids
Looking for more ideas? You may also enjoy:
- Rainbow Tissue Paper Craft – A bright, hands-on craft that helps kids explore colors using simple supplies.
- Torn Paper Rainbow Craft – An easy fine motor activity where kids tear paper to create a colorful rainbow.
- Fused Bead Rainbow Suncatcher – A fun suncatcher craft that turns beads into colorful window art.
- Rainbow and Pot of Gold Craft – In this craft, kids color, cut, and write about what they would do if they found a pot of gold!
Save This Craft
Save this craft on Pinterest using the image below!


Rainbow Suncatcher
Ingredients
- Rainbow Suncatcher Template
- Tissue paper squares
- Black cardstock
- White cardstock
- Scissors
- Contact paper or self-seal laminating sheets
- Double-sided tape
Instructions
- Download and print the rainbow template. Click the link in the materials list to access the printable by subscribing to our free craft newsletter.
- Cut out the rainbow frame. Carefully follow the outlines of the rainbow suncatcher template with scissors.
- Position the rainbow outline. Place the rainbow template onto the sticky side of the contact paper or self-seal laminating sheet. If using white cardstock shapes, be sure the printed side faces down.
- Attach the tissue paper. Fill the rainbow frame with tissue paper pieces, trimming as needed to fit smaller details like the arcs. Layer the pieces until the entire frame is covered for a vibrant stained-glass effect.
- Secure the design. After the tissue paper is in place, cover it with a second adhesive sheet to seal everything. Then carefully trim around the edges of the suncatcher frame with scissors.
- Display your window decorations. These contact paper suncatchers bring a cheerful splash of color to any window, brightening the room—especially on gray early-spring days. Hang them using double-sided tape or sticky tack.


Want even more?
Make sure to follow on Facebook, Pinterest, and Instagram for more easy crafts, activities, recipes, and parenting tips. And don’t forget to subscribe to our emails.