

If you’re looking for an easy autumn craft that combines creativity with fine motor skills, try making Leaf Scribble Art! This simple fall leaf art project invites kids to explore warm and cool colors while celebrating the beauty of the season.
Planning a fall leaf unit study? You may enjoy pairing this project with Leaf Spray Painting or Fall Leaf Suncatchers!
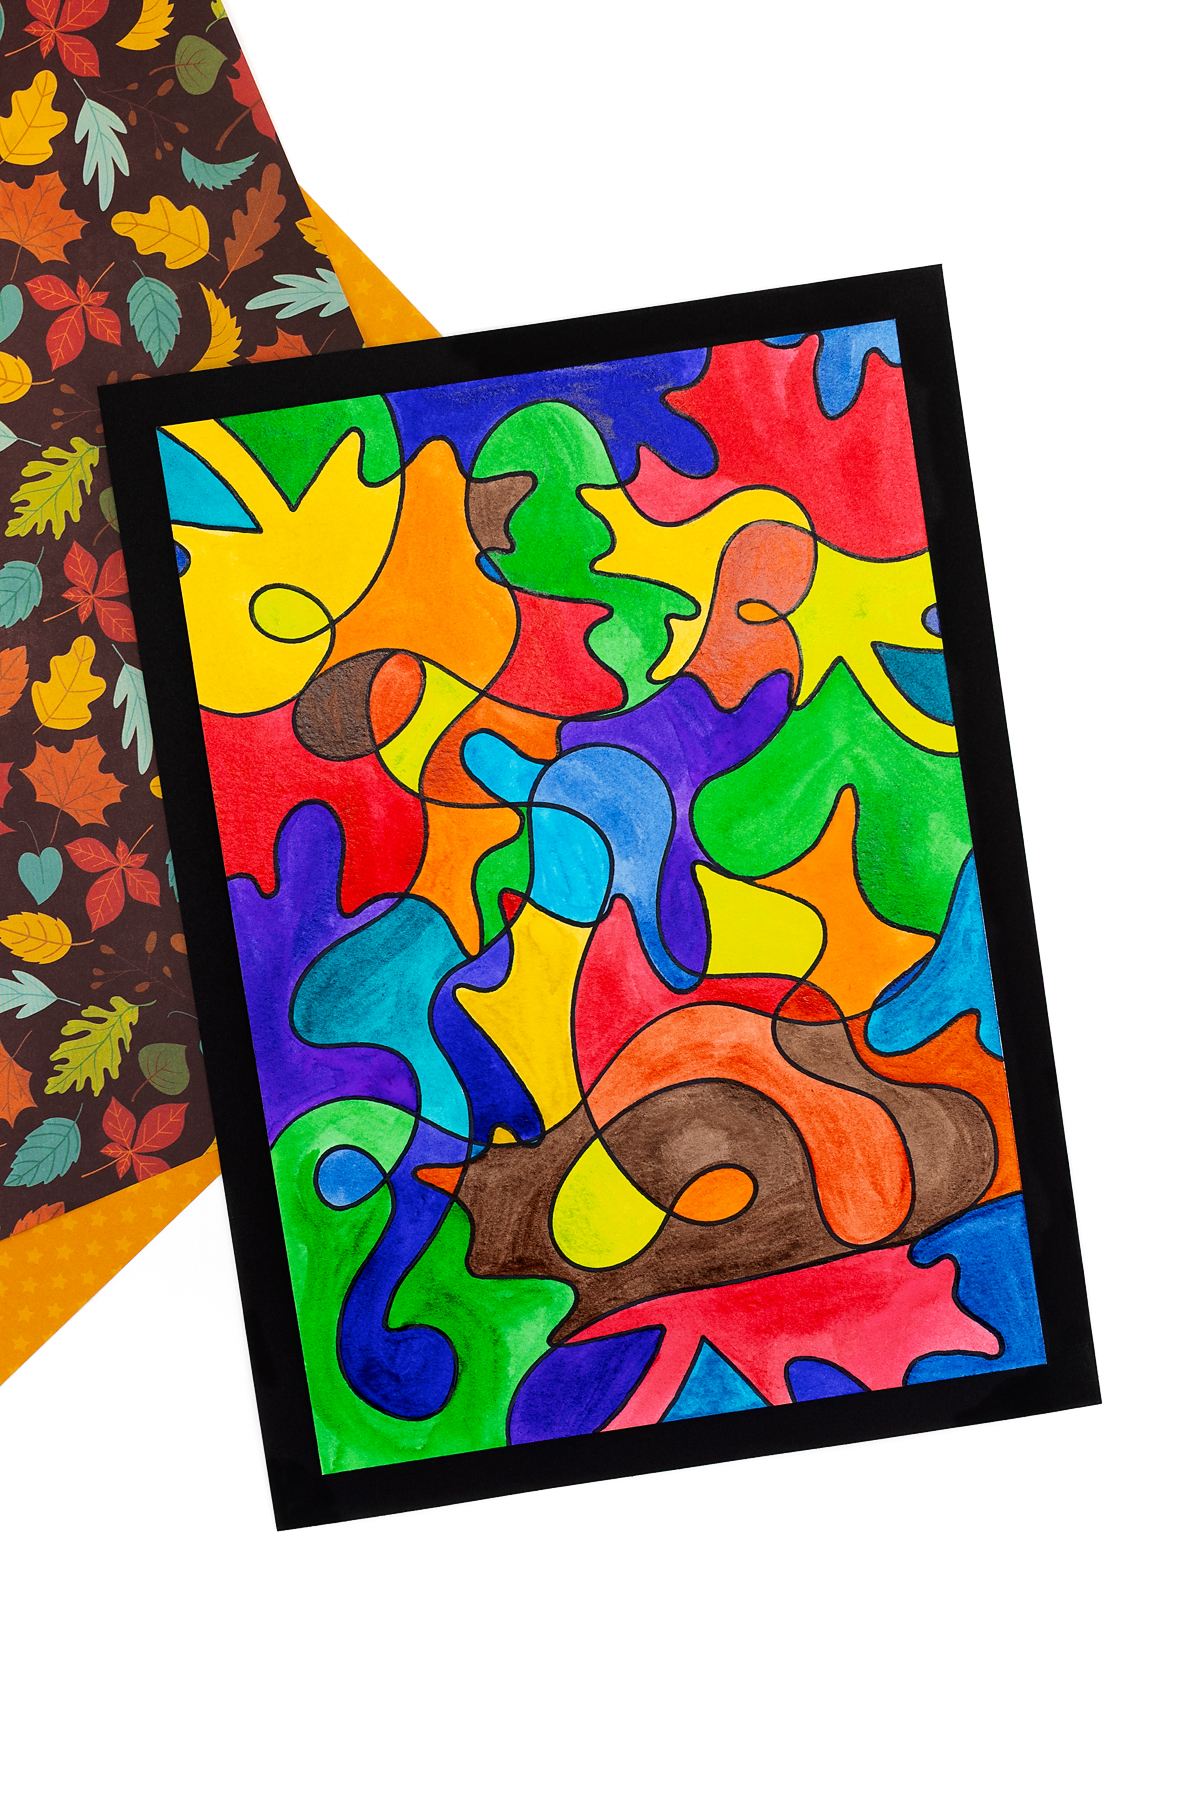
Fall Leaf Scribble Art for Kids
I first shared my favorite childhood art activity, Scribble Art, back in 2016, and it quickly became a go-to for my own kids. Since then, we’ve tried many different versions, each one proving just how fun and flexible this activity can be. It’s more than just a craft. For kids, it builds fine motor skills, encourages playful drawing, and encourages experimenting with colors in creative ways. And it’s not just for little ones—teens enjoy it too! My teens and I made leaf scribble art together while watching Wednesday, and it turned into the perfect cozy evening art project.
Why You’ll Love This Art Project
This autumn leaf art activity is simple to set up, fun for kids of all ages, and filled with creative possibilities.
- Easy and affordable – You only need basic supplies like watercolors, markers, or crayons.
- Builds skills – Kids practice fine motor control, color recognition, and creative thinking.
- Open-ended – Every project looks different, which makes each piece unique.
- Relaxing activity – The doodling and coloring process is calming, enjoyable, and has a beautiful end result!
- Perfect for all ages – Younger kids can keep it simple, while older kids and teens can add more detail.
Craft Supplies Needed for Leaf Art
Before you get started, make sure you have all the right supplies:
- Free Printable Maple Leaf Template
- Masking tape
- Watercolor paper
- Pencil
- Sharpie marker (black)
- Watercolors – I used Prang paints, which dry with a slight shine.
- Paintbrush
- Scissors
- Cardstock
- Double-sided tape
How to Make Leaf Scribble Art
Follow these easy directions to make your own colorful leaf scribble art.
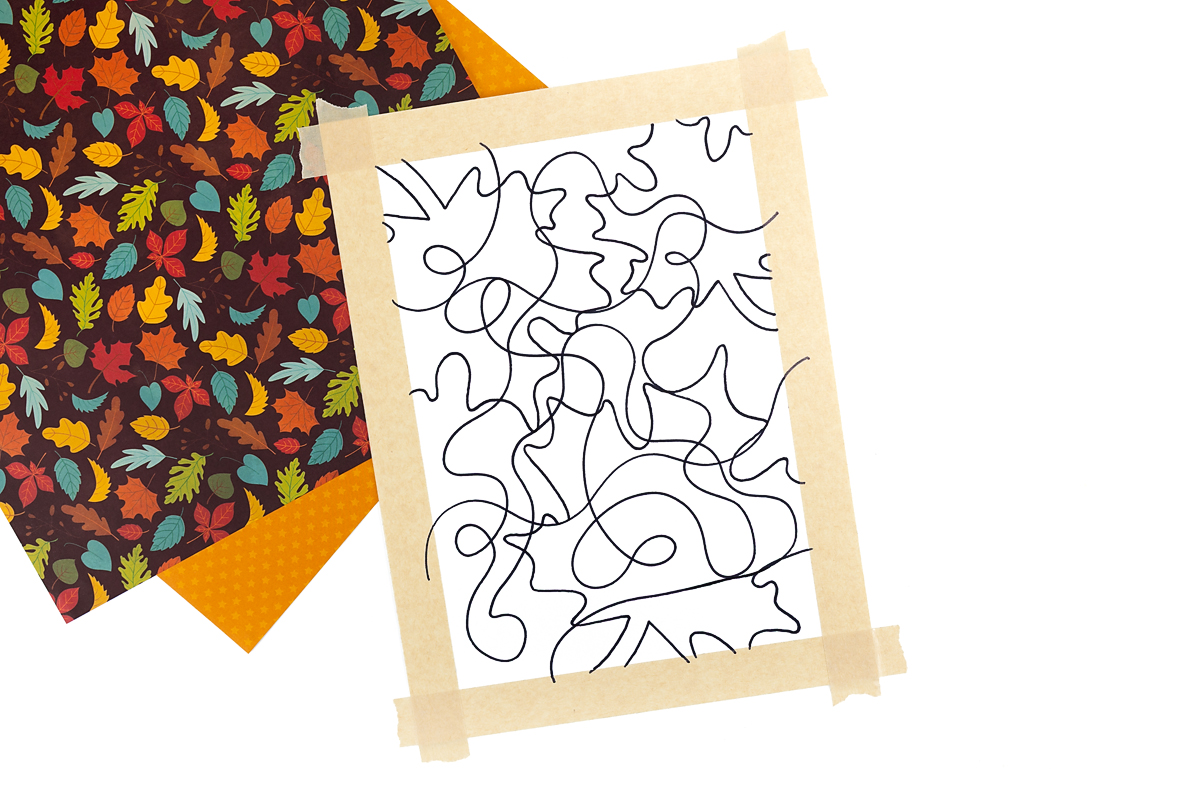
STEP 1: Prepare the template. Download and print our free autumn leaf cutouts. While they print, tape a sheet of watercolor paper to your work surface. Cut out the fall leaf patterns and arrange them on the paper.
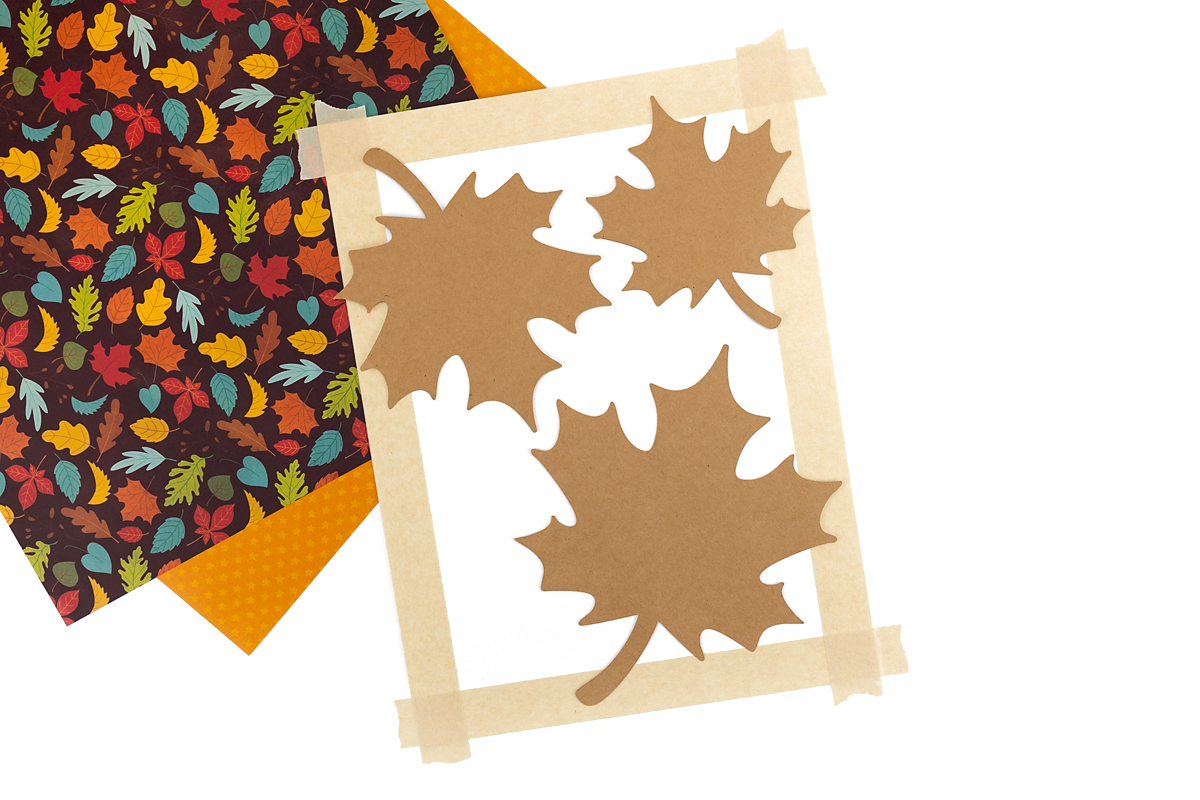
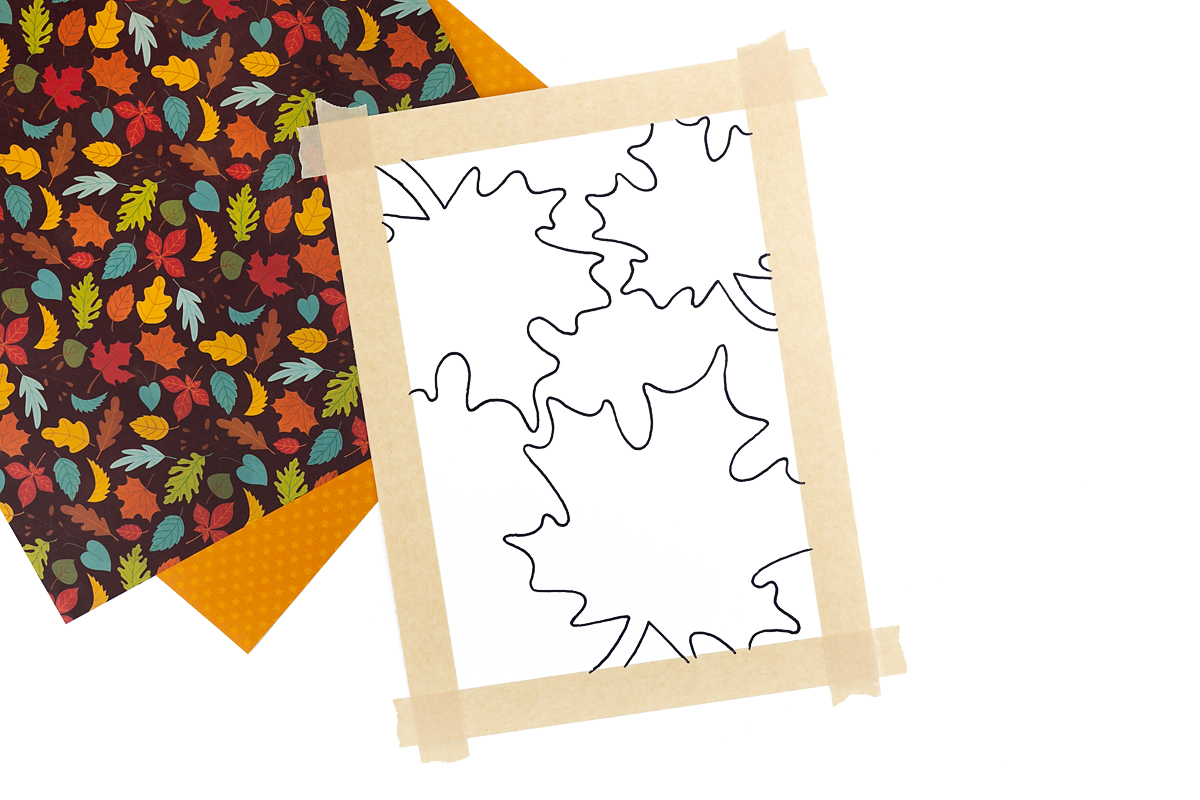
STEP 2: Trace the leaves. First, trace around each leaf shape lightly with a pencil. Remove the templates to reveal your leaf shapes, then go over the pencil lines with a black marker to create bold outlines. Erase any extra pencil lines.
STEP 3: Add scribbles. Scribble all around your paper, filling the space with playful squiggles, loops, lines, and doodles. Encourage kids to try different patterns for variety!
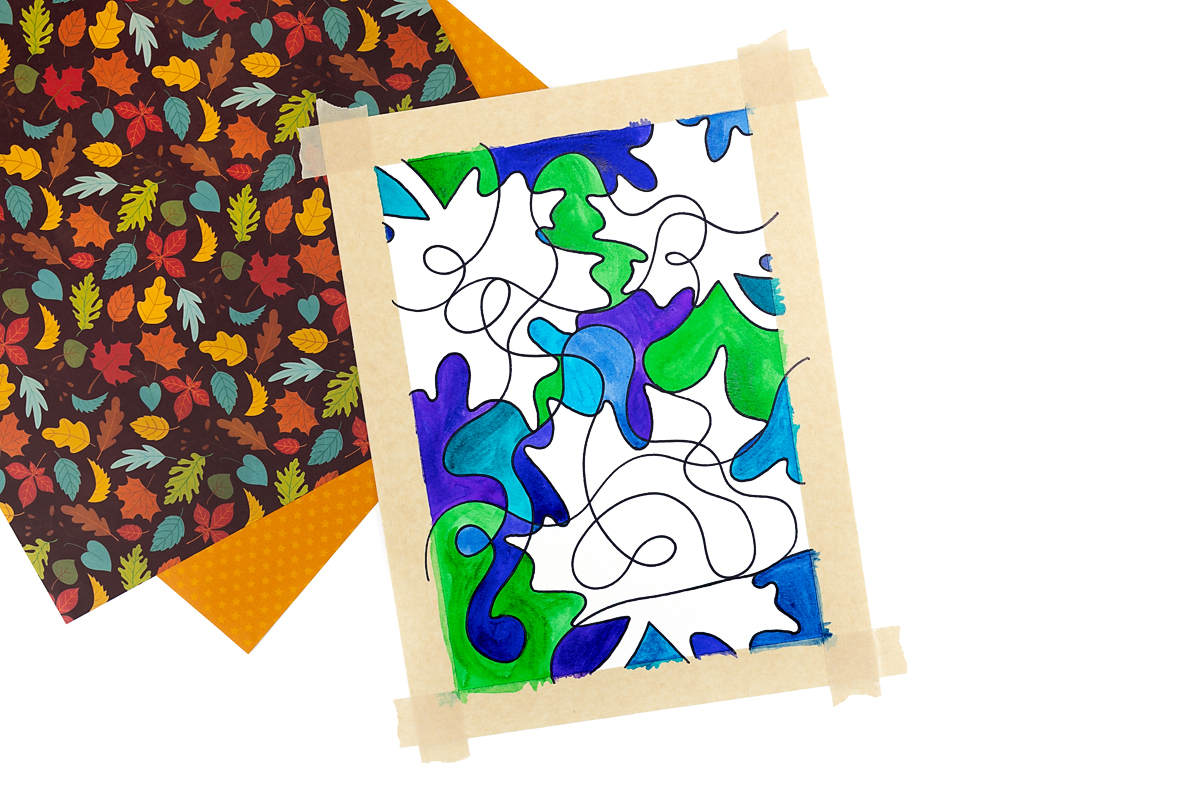
STEP 4: Add cool colors. Use blues, greens, purples, or other cool shades to fill in the areas outside the leaves. These colors create a background that makes the autumn leaves pop.
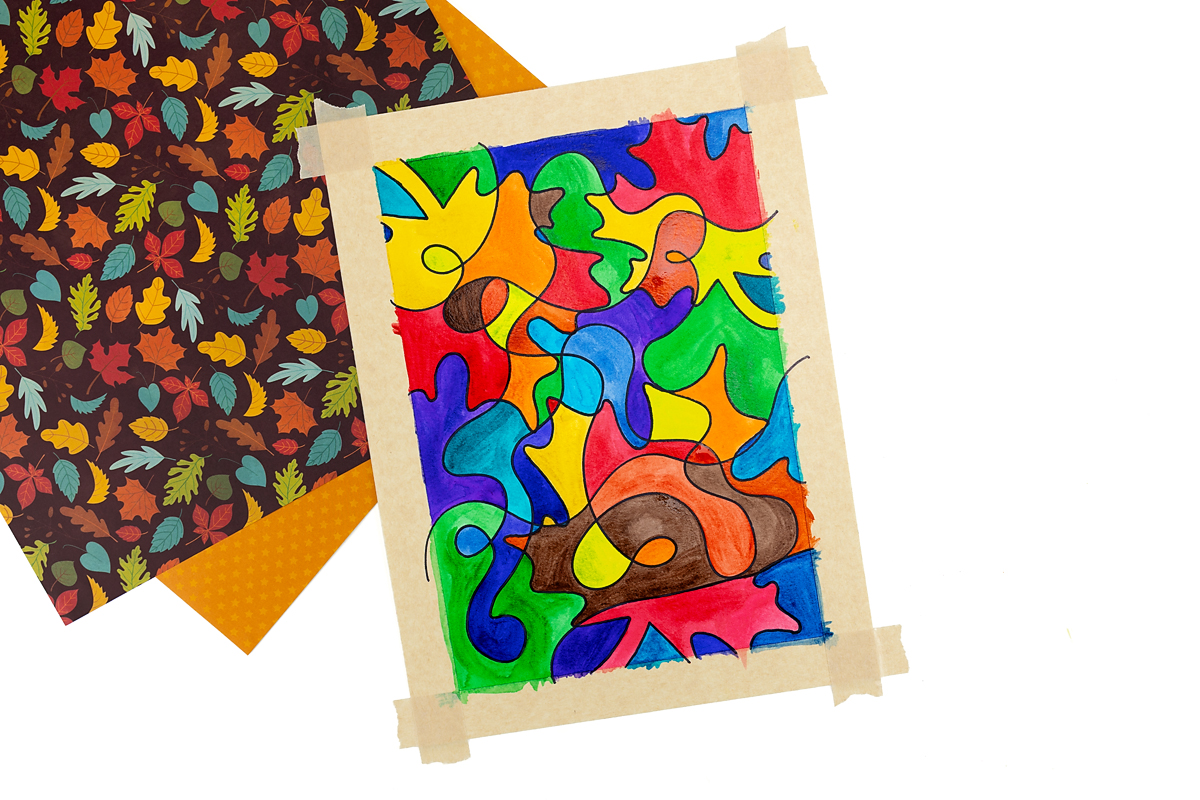
STEP 5: Add warm colors. Color the leaves with reds, oranges, browns, yellows, or other warm shades. Layer and blend as desired to give each leaf a vibrant, autumn-inspired look.
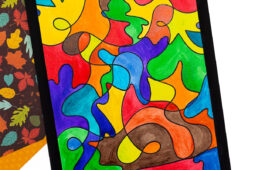
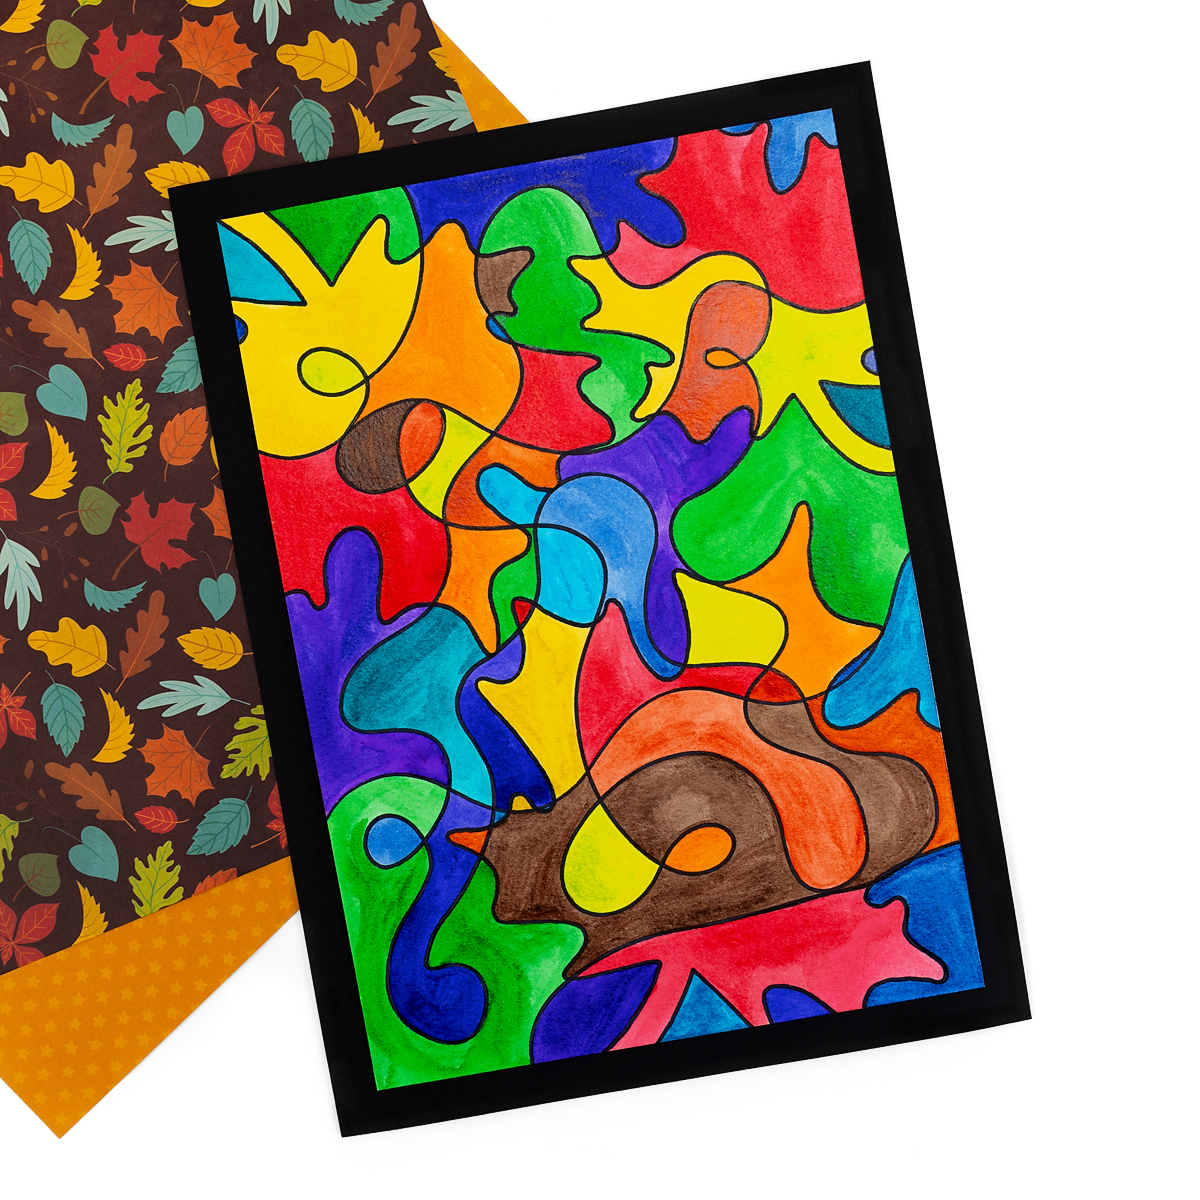
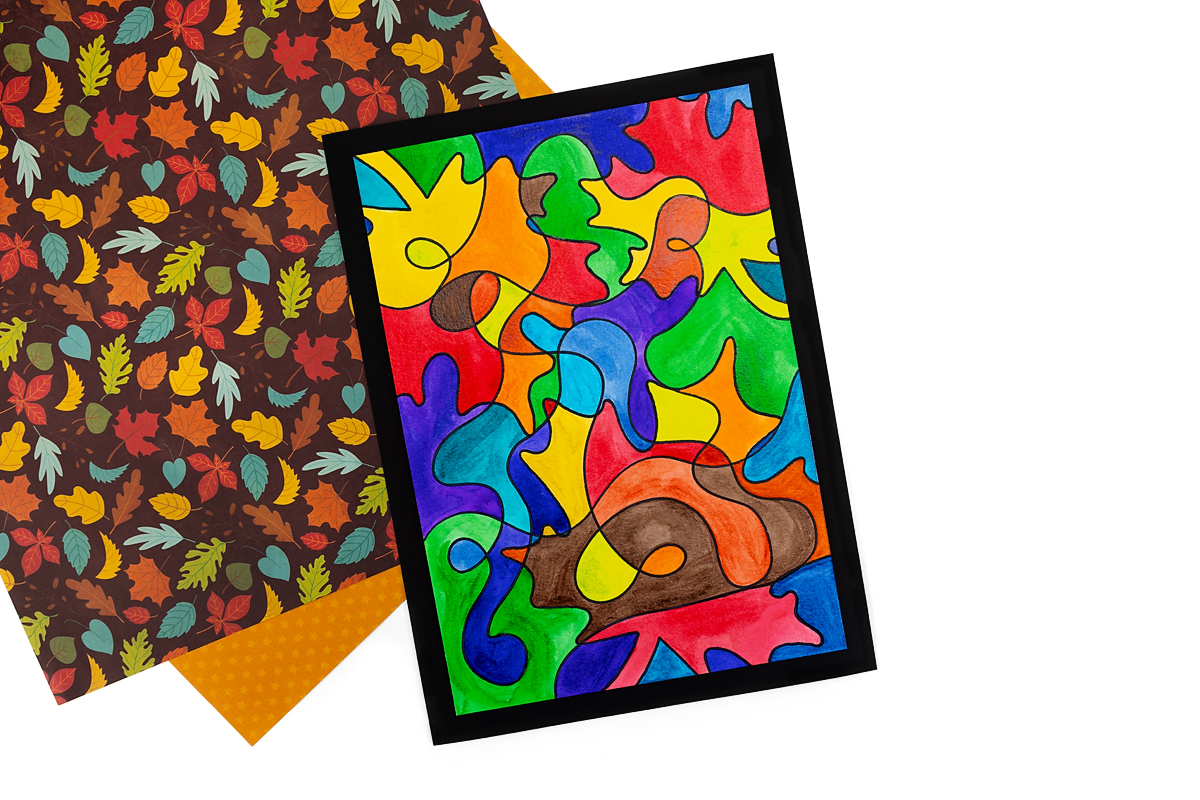
STEP 6: Finish and display. Gently peel back the masking tape, then carefully cut along the white outline of your leaf art. Mount the finished piece on black cardstock using double-sided tape to make the colors pop and proudly display your artwork.
Choosing Warm and Cool Colors for Leaf Scribble Art
Using both warm and cool colors makes your leaf scribble art more interesting. Warm colors like red, orange, and yellow feel bright and cozy, while cool colors like blue, green, and purple feel calm and soft. Mixing them together makes your artwork look balanced and vibrant.
Warm Colors (for the leaves):
- Red
- Orange
- Yellow
- Yellow-green
- Brown
Cool Colors (for the background scribbles):
- Blue
- Green
- Purple
- Teal
When choosing colors, remember that warm colors stand out and make the leaves the focus, while cool colors fade into the background. Let kids try layering, blending, and mixing to see how different combinations change the look of their artwork.
Take It Further
Once you’ve tried the basic leaf scribble art, here are some creative ways to explore even more:
- Try different supplies – Use colored colored pencils, Sharpie markers, oil pastels, or gel pens instead of watercolors for a new look.
- Trace real leaves – Collect leaves from outside, trace around them, and turn each unique shape into a design.
- Create a gallery – Make a collection of leaves in different sizes and colors, then display them together on a bulletin board or wall.
- Turn it into a card – Mount a finished leaf on folded cardstock to make a handmade autumn greeting card.
- Experiment with patterns – Fill leaves with swirls, zigzags, or tiny fall icons like pumpkins and acorns. Check out this Leaf Doodle Art for a great example!
More Fall Leaf Arts and Crafts for Kids
Looking for more ideas? You may also enjoy:
- Melted Crayon Leaf Suncatchers – Melt crayons between wax paper to create colorful, translucent leaf designs that catch the light beautifully.
- Stamped Leaf Shirts – Use real leaves and fabric paint to stamp unique fall patterns onto plain t-shirts for wearable art.
- Fall Leaves Hedgehog Craft – Glue paper leaves onto a paper hedgehog shape to make a cute, spiky fall friend.
- Creating Nature Art with Leaves – Arrange leaves in patterns or scenes on paper to make creative, textured collages inspired by autumn.
- Leaf Printing – Learn how to make beautiful leaf prints with paint and a brayer.
Save This Craft
Save this craft on Pinterest using the image below!


Want even more?
Make sure to follow on Facebook, Pinterest, and Instagram for more easy crafts, activities, recipes, and parenting tips. And don’t forget to subscribe to our emails.