

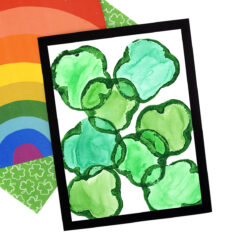
Green Pepper Shamrock Stamping always gets a reaction! Slice a green pepper in half and you’ve already got a shamrock-shaped stamp. Kids press it onto paper, let the prints dry, then fill in each section with watercolor paints in different shades of green. Low-prep and adaptable, it works well in classrooms, community programs, or at home.
If you enjoy this pepper printing project, you may also enjoy Pumpkin Leaf Printing or Apple Stamping.
Why You’ll Love This Craft
This shamrock craft is simple to set up, easy to manage with a group, and produces consistent results. Here’s why it works so well:
- Fine motor practice – Pressing the pepper, controlling paint coverage, and carefully painting inside each section all help strengthen hand muscles and improve brush control.
- Two art techniques in one – Children explore basic printmaking first, then add watercolor painting once the prints are dry.
- Low-prep and budget-friendly – A single green pepper creates multiple shamrock prints, making this an affordable classroom activity.
- Works across age levels – Younger children can focus on stamping, while older students can experiment with shading and color blending.
- Easy to display – The bold stamped outlines and layered watercolor details make these shamrocks stand out on bulletin boards and classroom walls.
Craft Supplies Needed
You only need a few basic materials for this shamrock art activity.
- 1 green bell pepper
- Knife (adult use only)
- Paper towels
- Watercolor paper (trimmed to 7½ × 10 inches)
- Green tempera or acrylic paint
- Paper plate or shallow tray
- Paint brushes
- Green watercolors (multiple shades if available)
- Cup of water
- Black cardstock
- Glue
Directions for Shamrock Stamping
Follow these simple steps to create stamped shamrocks with watercolor details:
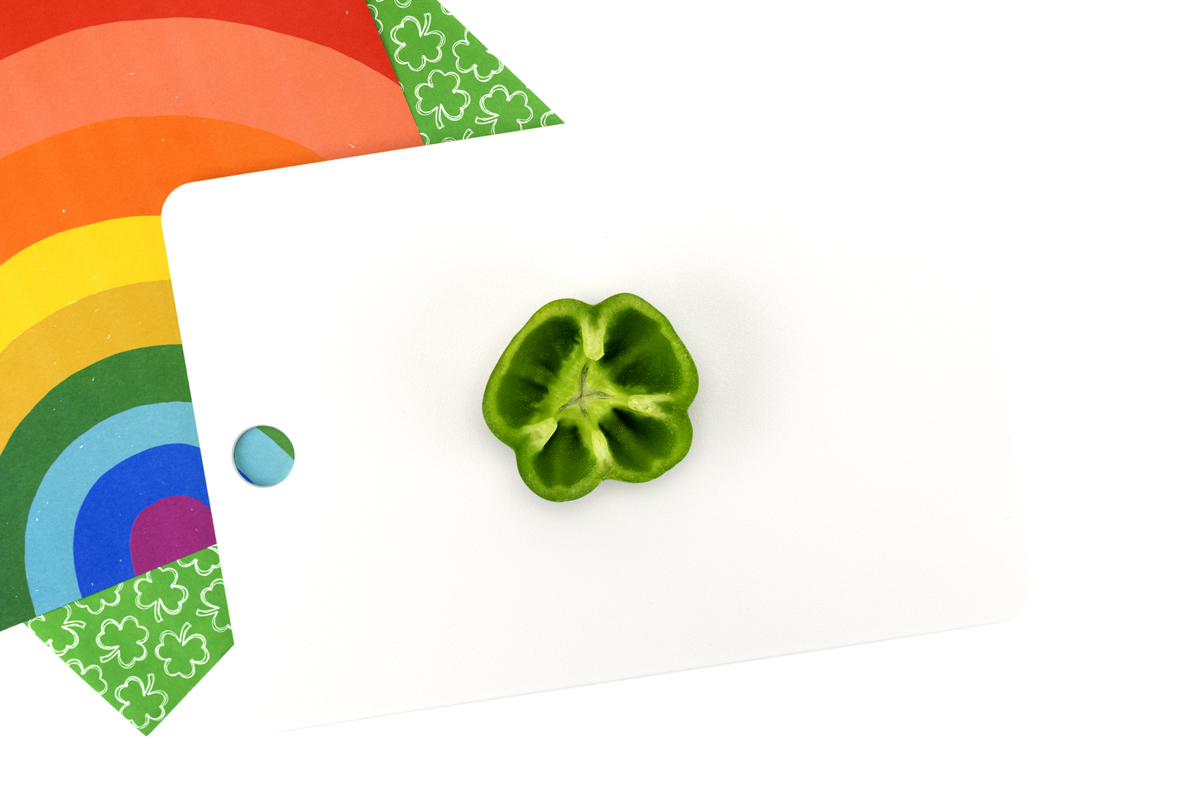
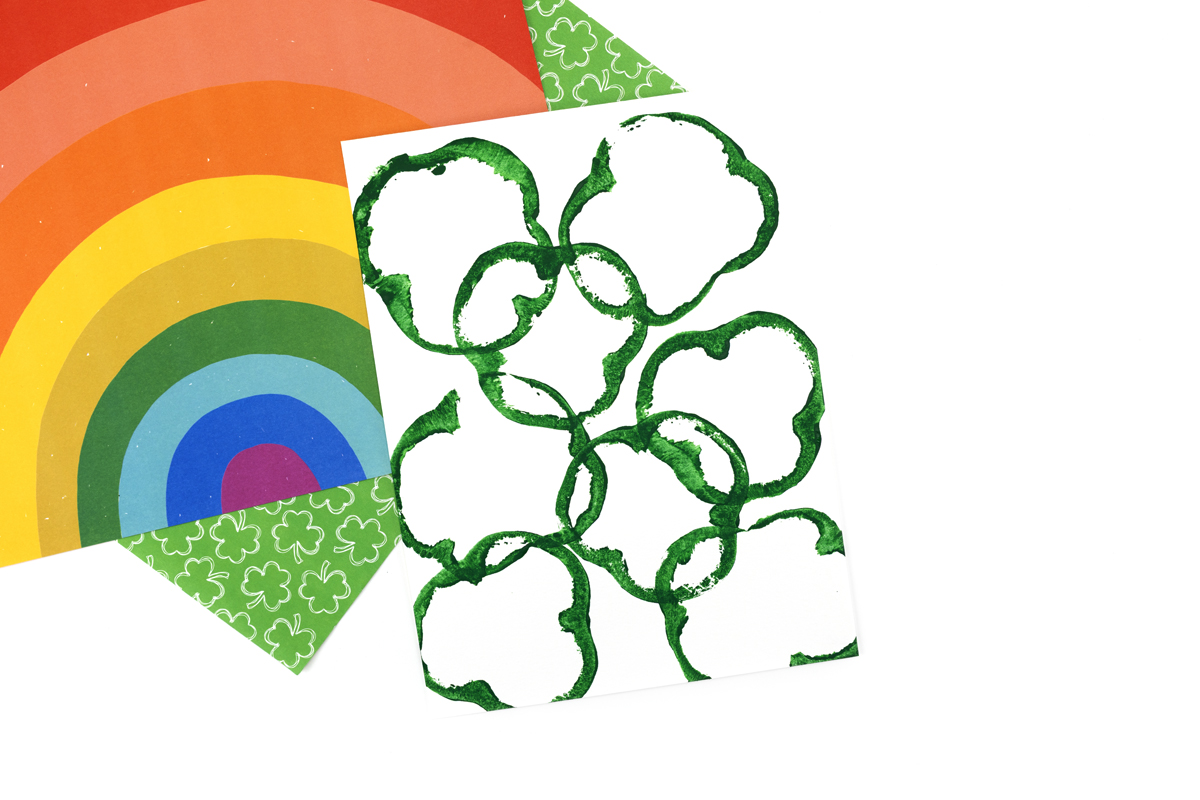
STEP 1: Cut and prepare the green pepper. An adult should cut the green bell pepper horizontally across the middle to reveal the shamrock shape inside. Blot the cut sides gently with a paper towel to remove excess moisture.
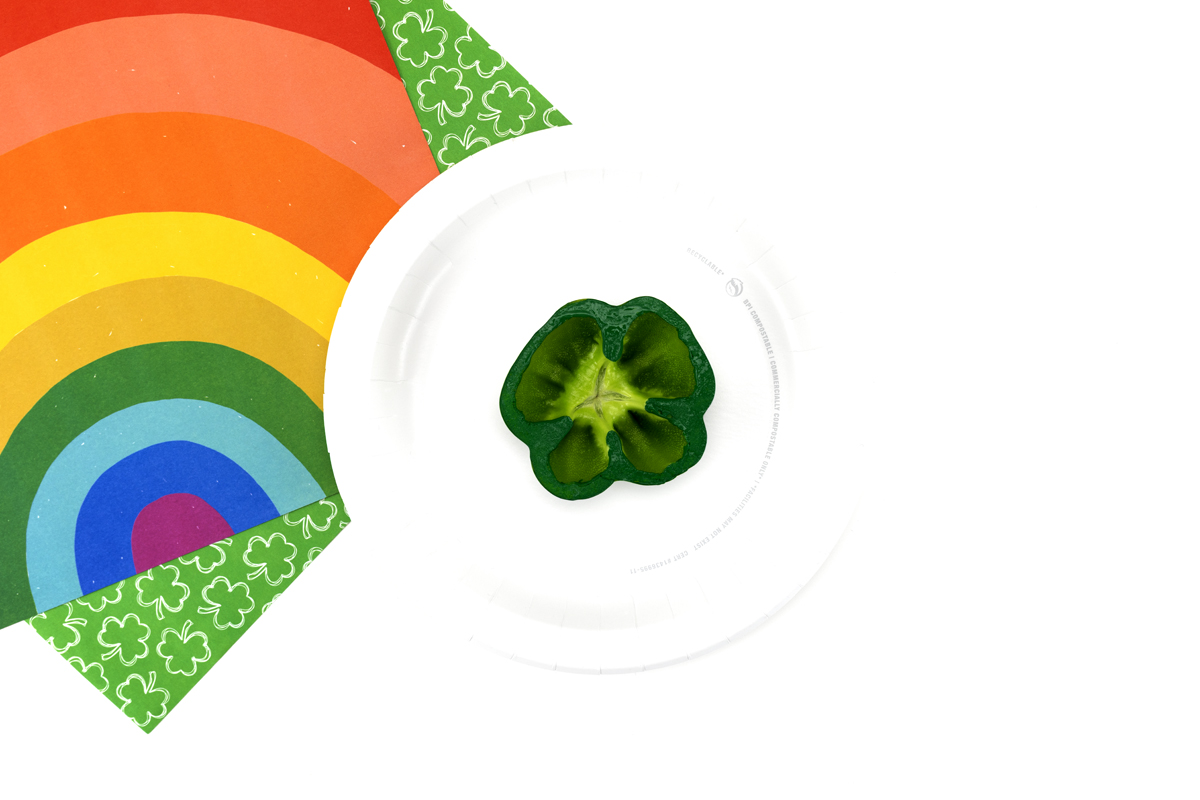
STEP 2: Add paint to the pepper. Pour a thin layer of green tempera or acrylic paint onto a plate or shallow tray. Press the cut side of the pepper into the paint, making sure it is evenly coated but not dripping.
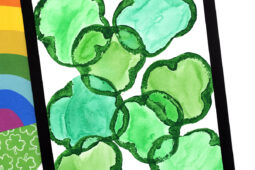
STEP 3: Stamp the shamrocks. Press the painted pepper firmly onto white cardstock. Lift straight up to create a clear print. Repeat to make multiple shamrocks on the page. Allow the paint to dry completely.
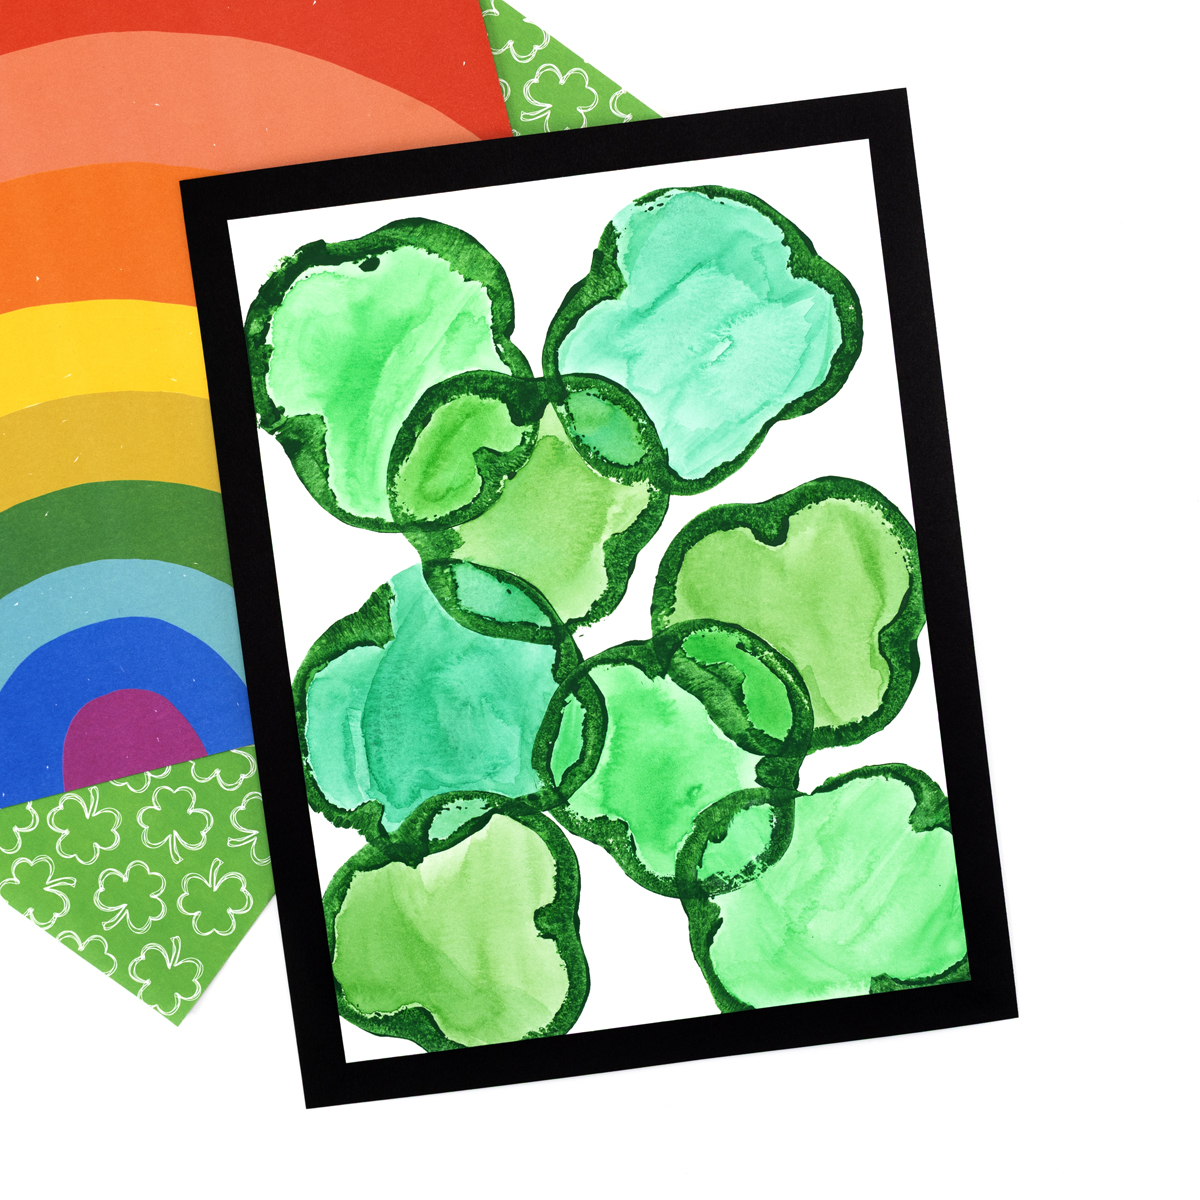
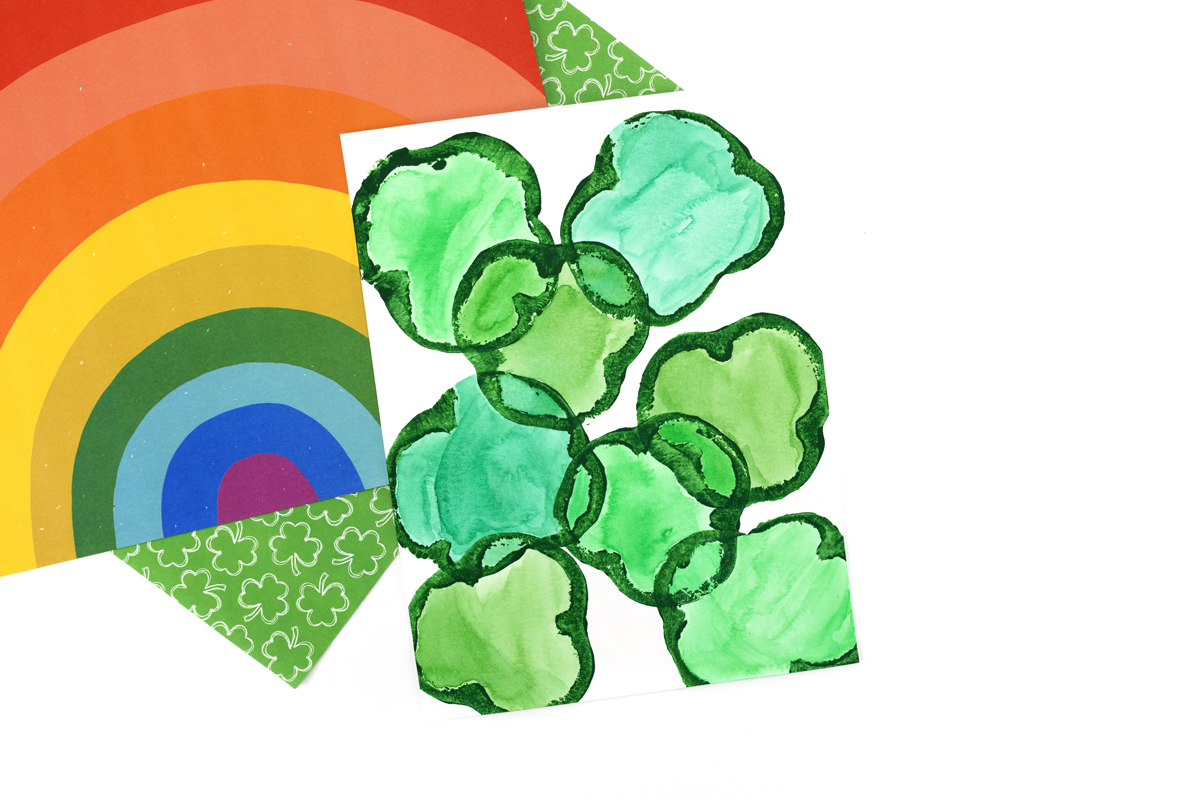
STEP 4: Paint inside the shamrock sections. Once the stamped outlines are dry, use watercolors to paint inside each section of the shamrock. Encourage children to use different shades of green or blend light and dark tones. Place finished artwork flat and allow it to dry completely.
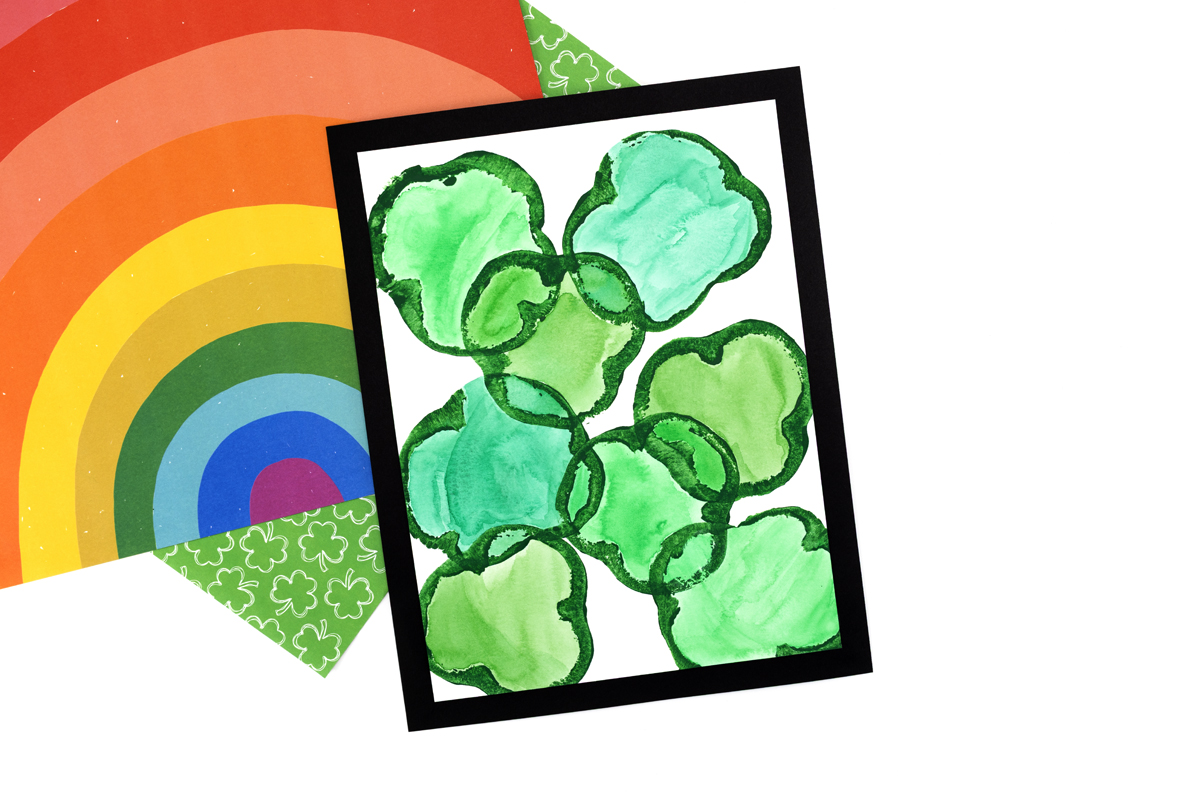
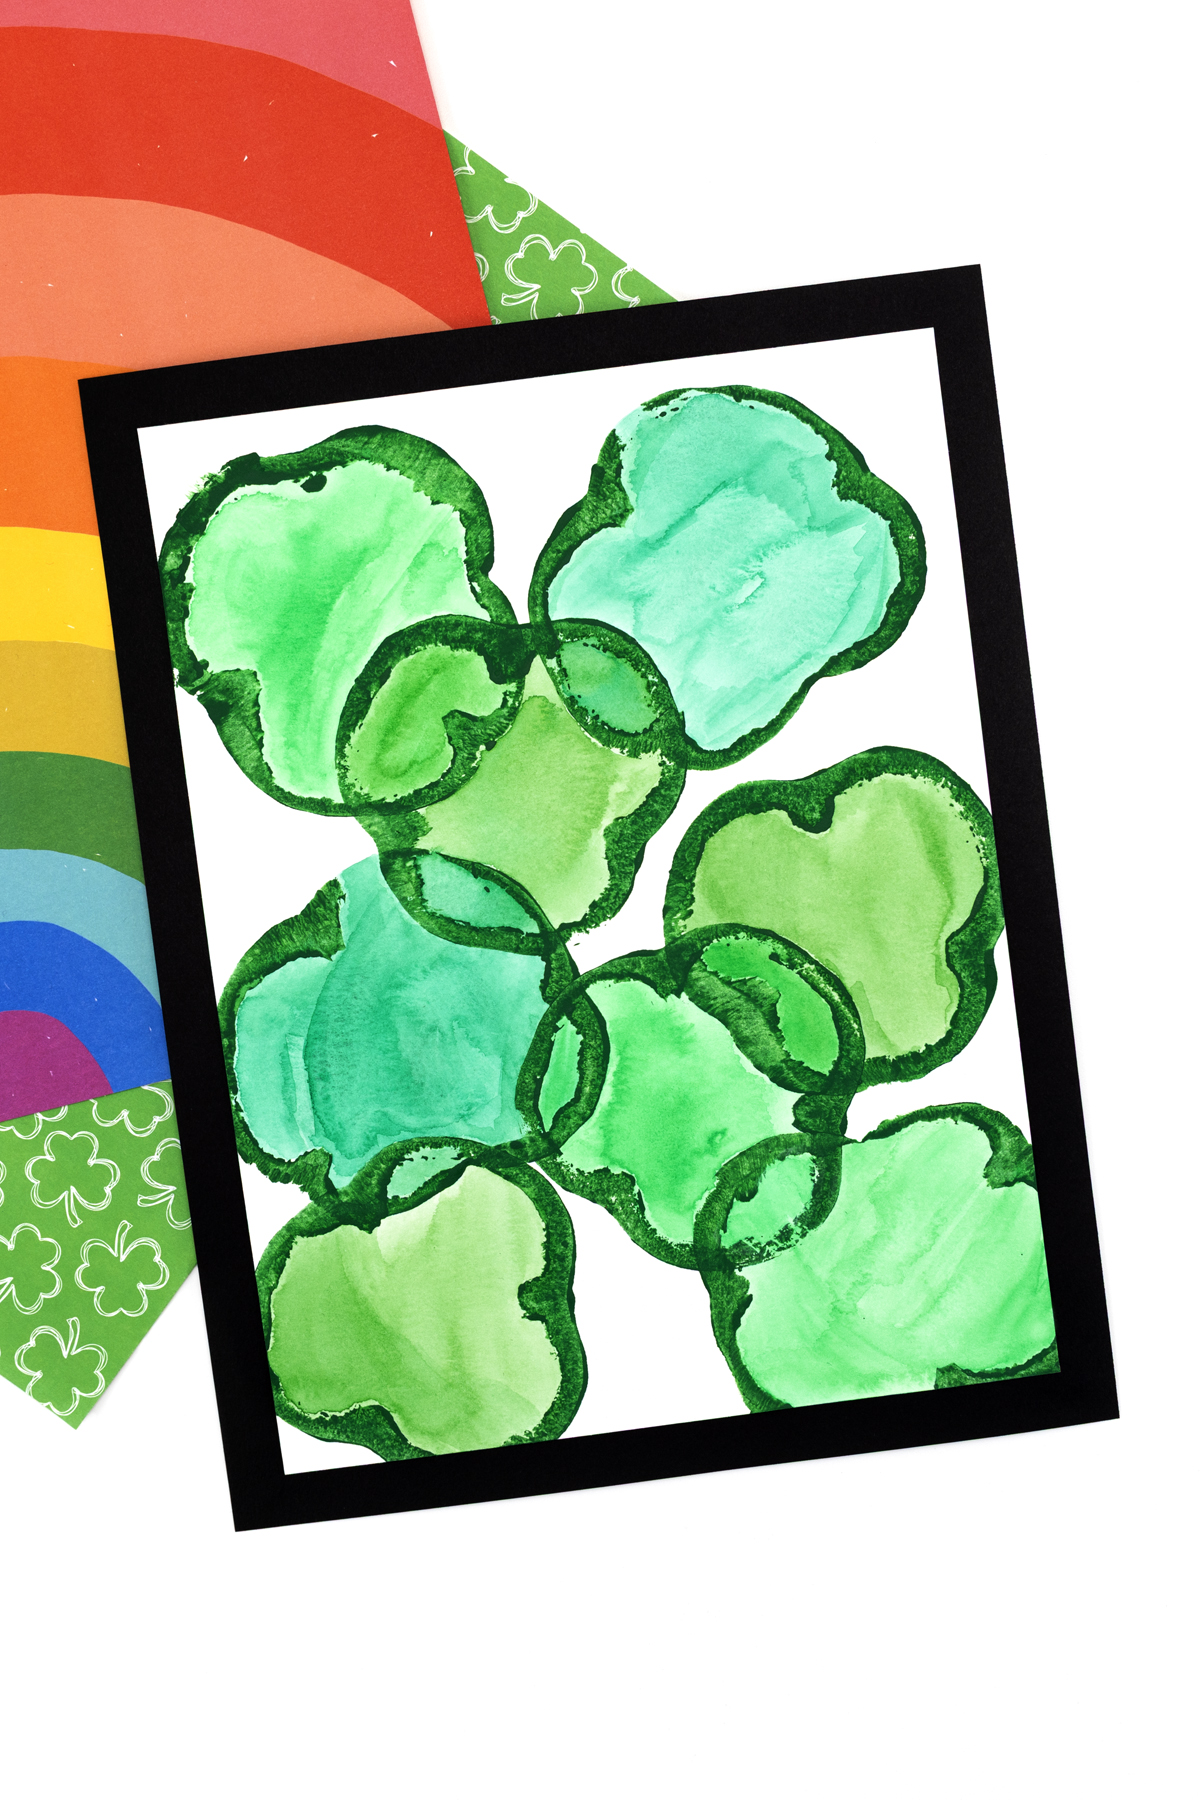
STEP 4: Mount the artwork. Once the shamrock prints are completely dry, trim the white paper if needed. Glue the finished artwork onto a piece of black or green construction paper to create a simple frame. Press gently and smooth it flat. Allow the glue to dry before displaying.
Take It Further
Once your shamrocks are dry, there are plenty of ways to keep the creativity going or tie the activity into other areas of learning. These simple extensions build on the printmaking process and keep the focus on observation, technique, and creative choice:
- Experiment with paint instead of watercolor – Use tempera or acrylic inside the stamped sections for a bolder, more opaque finish.
- Add fine-line details – Once dry, use a thin marker to draw stems, veins, or simple zentangles inside the shapes.
- Vary stamping pressure – Press lightly on one print and firmly on another. Compare how pressure affects the thickness and clarity of the lines.
- Turn prints into usable items – Fold finished artwork into greeting cards or cut into bookmarks for a classroom or library display.
- Connect to printmaking – Introduce the term printmaking and explain that artists use objects and tools to transfer images onto paper.
- Make it collaborative – Provide one large sheet of paper and let each student contribute several shamrock stamps to create a shared class display.
- Add rainbows – Fill in the white space around the peppers with rainbow colors!
Frequently Asked Questions
Here are some helpful tips and answers before you begin stamping:
Most green bell peppers have three or four rounded sections inside. When cut horizontally, those sections form a shape that looks like a shamrock. It’s a fun way to show kids how nature creates patterns!
Stamp the pepper with acrylic paint or washable temperate paint.
After cutting the pepper, blot the cut side gently with a paper towel. You can also remind kids to press straight down and lift straight up. Too much paint can make the shape smudge, so a thin, even layer works best.
This activity works well for preschool through elementary students, but it’s honestly fun for older kids and even adults. Younger children enjoy the sensory stamping process, while older students can experiment with patterns, layered prints, mixed media details, or turning their artwork into cards and decor.
While it’s perfect for St. Patrick’s Day, this activity also works for spring art lessons, printmaking units, or nature-themed studies. The focus on patterns and plant structure makes it versatile.
More St. Patrick’s Day Crafts for Kids
Looking for more festive ideas? Try these St. Patrick’s Day crafts that are easy and classroom-friendly:
- Torn Paper Shamrock Craft
- Preschool Shamrock Craft
- Shamrock Suncatchers
- Pot of Gold Craft and Writing Activity
- Easy Paper Rainbow Craft for Kids
Save This Craft
Pin this simple shamrock craft so you have it ready for St. Patrick’s Day or spring celebrations!
Green Pepper Shamrock Stamping
Ingredients
- Green bell pepper
- Knife adult use only
- Paper towels
- Watercolor paper trimmed to 7½ × 10 inches
- Green tempera or acrylic paint
- Paper plate or shallow tray
- Paint brushes
- Green watercolor paints
- Water
- Black or green cardstock
- Glue
Instructions
- Cut and prepare the green pepper. An adult should cut the green bell pepper horizontally across the middle and gently blot the cut side dry.
- Stamp the shamrocks. Dip the pepper into green tempera paint and press onto paper to create shamrock prints. Repeat! Let dry completely.
- Add watercolor details. Use watercolor paints to fill in and enhance the shamrock shapes. Allow the paint to dry.
- Mount the artwork. Glue the finished shamrock art onto black or green construction paper to create a simple frame.


Want even more?
Make sure to follow on Facebook, Pinterest, and Instagram for more easy crafts, activities, recipes, and parenting tips. And don’t forget to subscribe to our emails.