

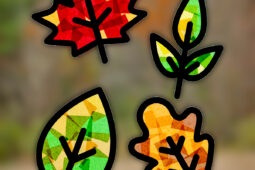
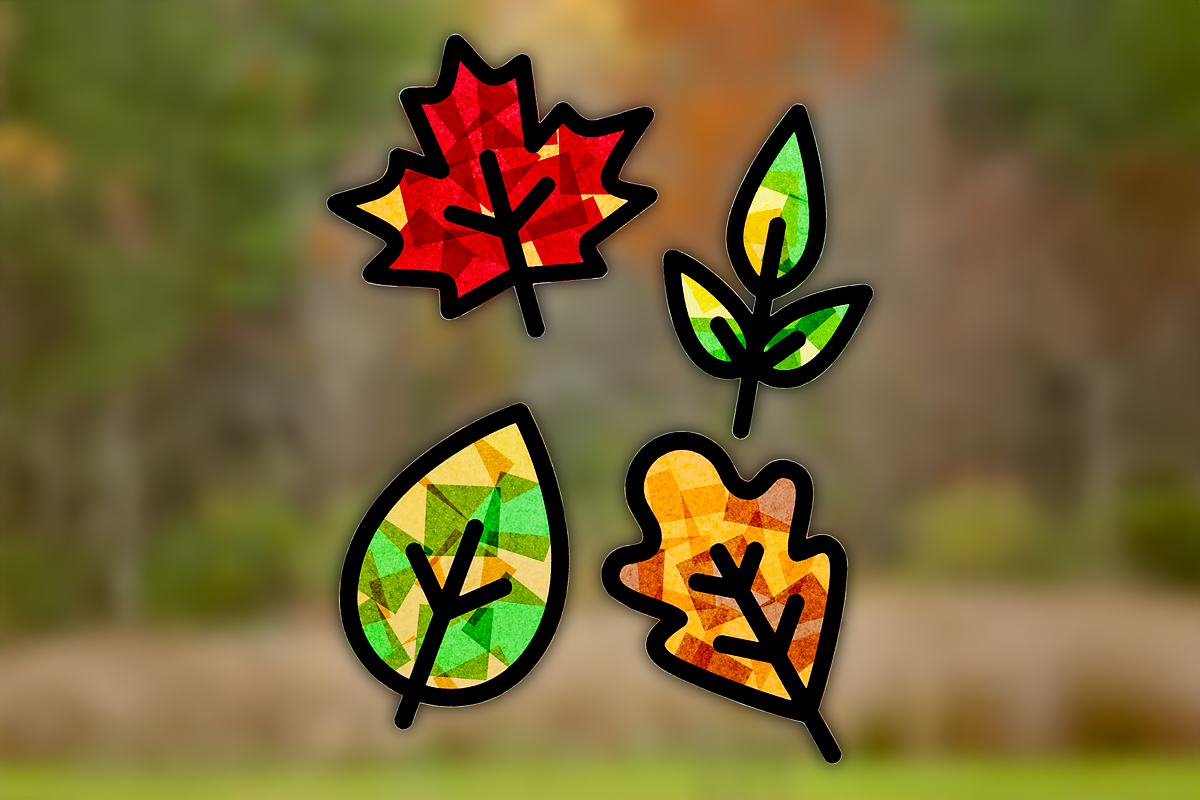
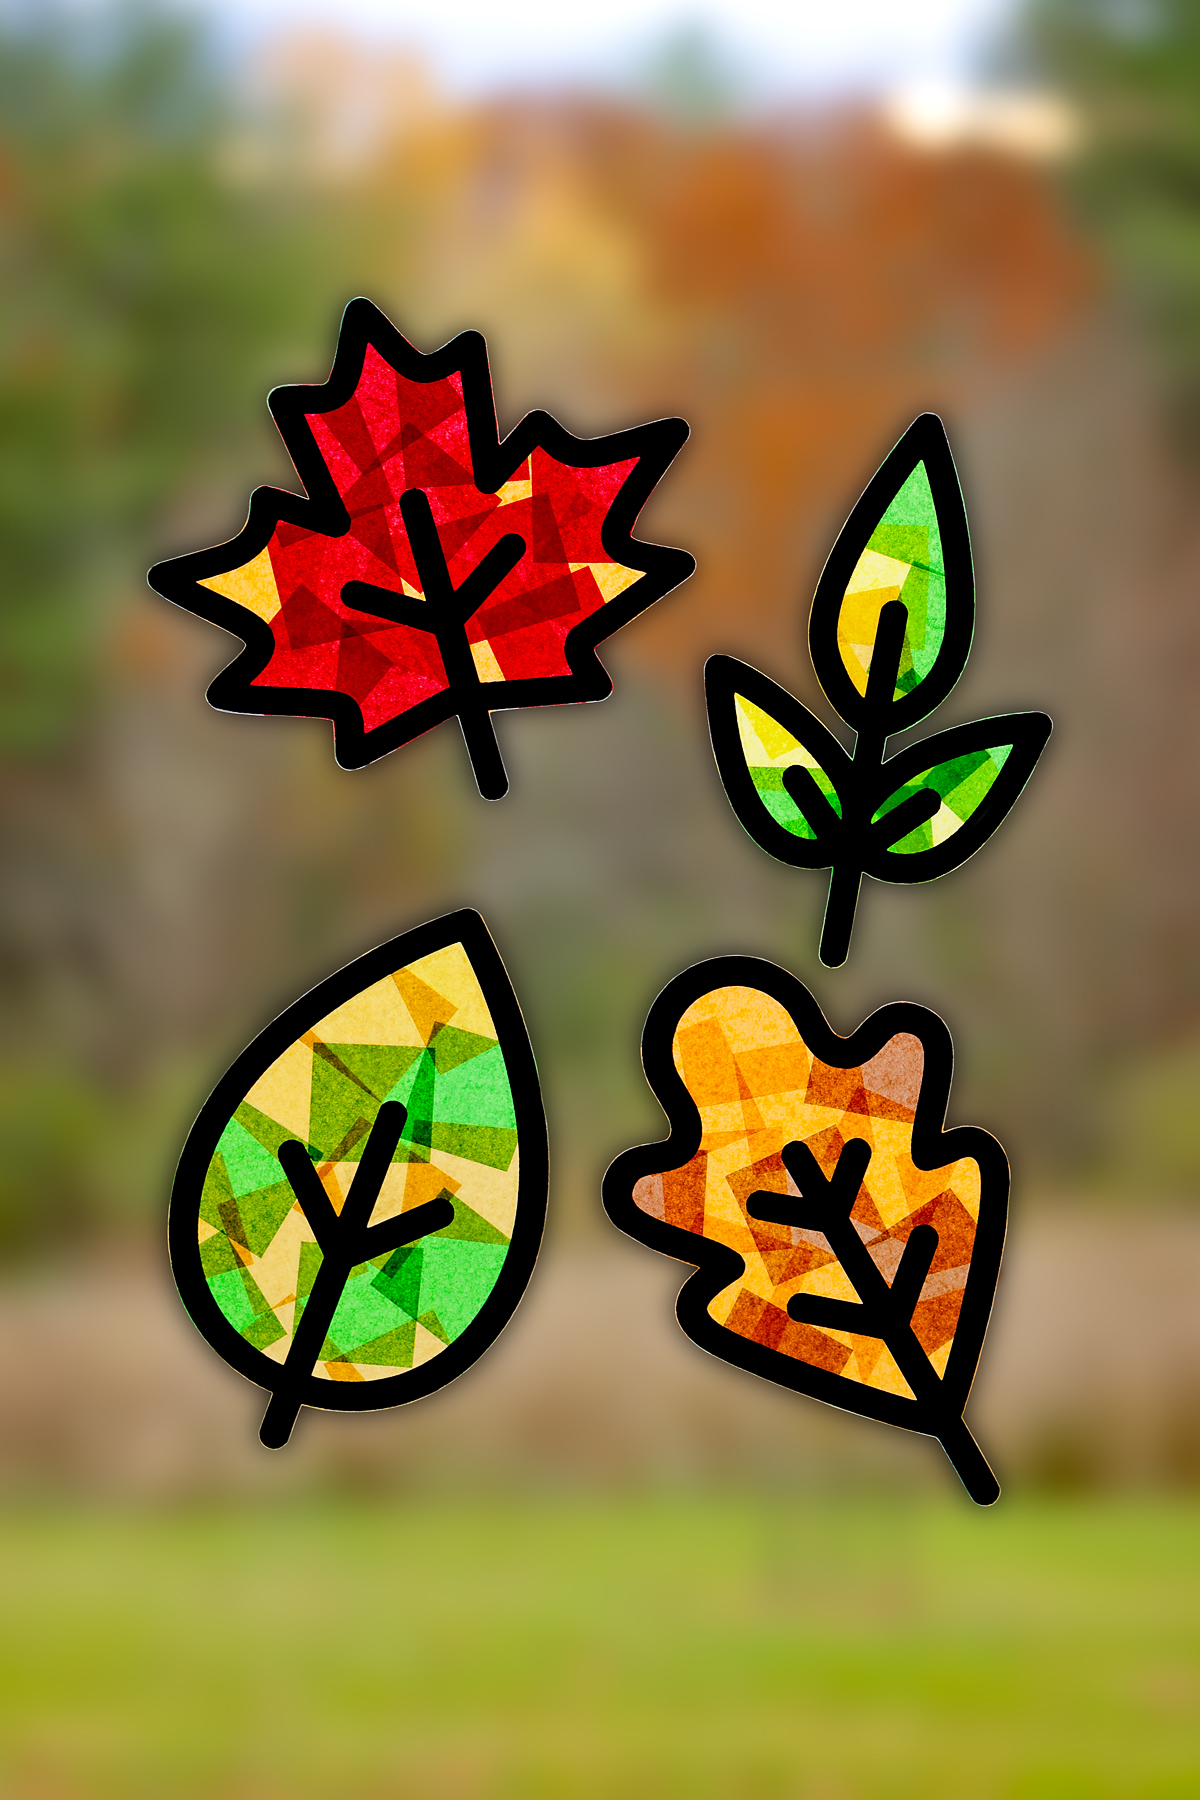
Fall Leaf Suncatchers are a simple, colorful project that brings the beauty of the season indoors! Using our free printable fall leaves template, bright tissue paper squares, and a few easy-to-find supplies, kids can create glowing maple, oak, ash, and birch leaf suncatchers to hang in a sunny window. This cheerful leaf craft is perfect for home, school, or after-school art activities.
Planning ahead? You may enjoy our making our Halloween Suncatchers or our Thanksgiving Suncatchers.
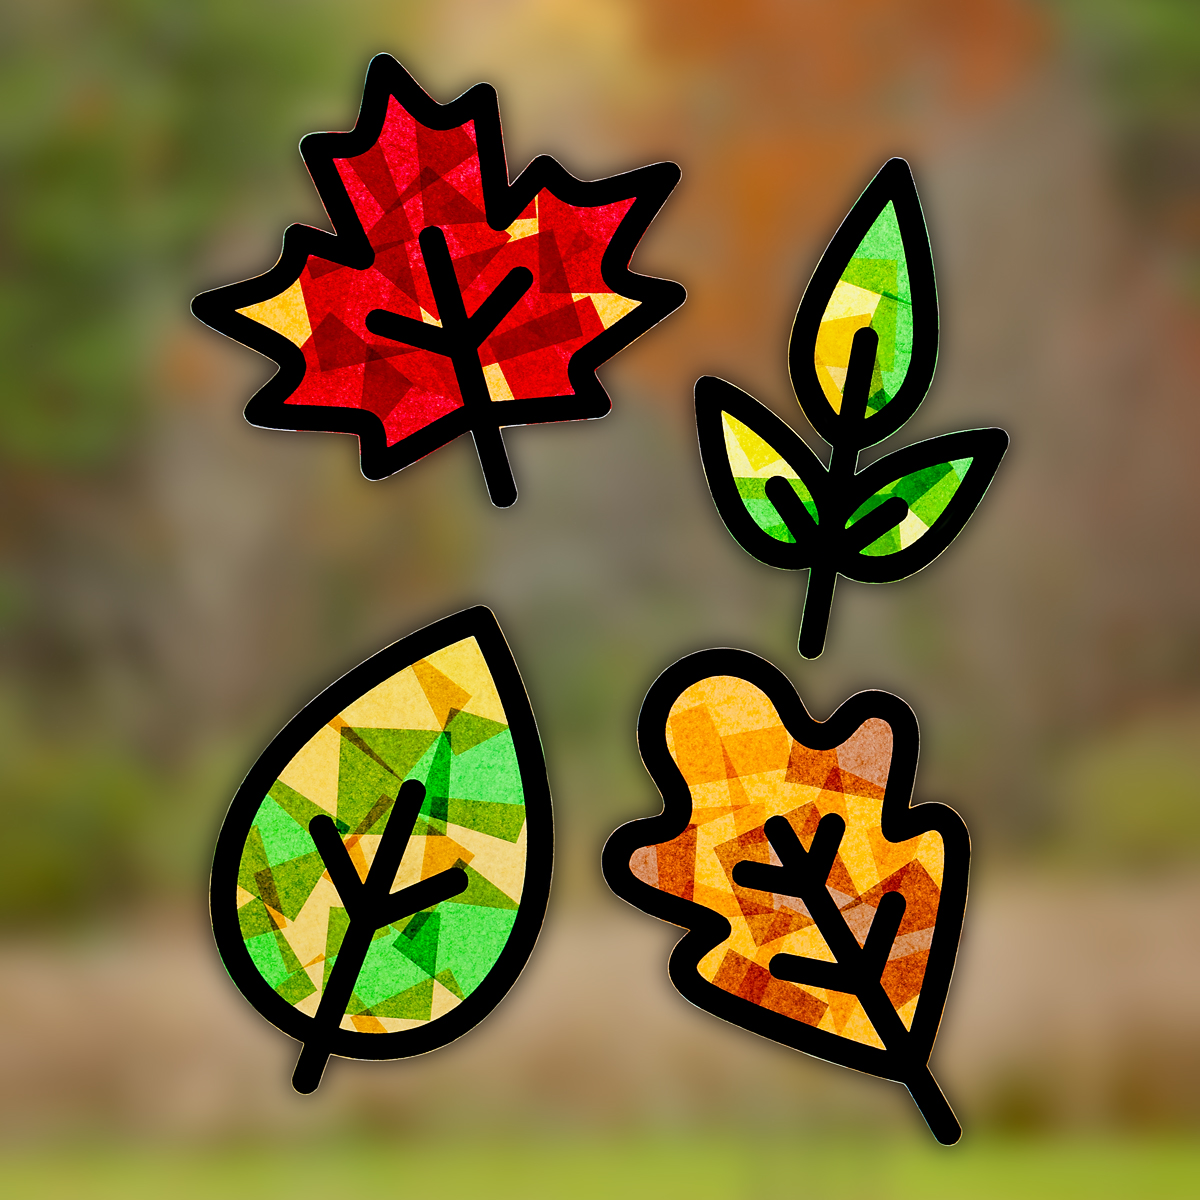
Leaf Suncatcher Craft for Kids
Autumn has always been my favorite time of year! I love watching the trees change, walking my dog through crunchy leaves, and breathing in the crisp air. Making fall suncatchers captures that joy! Children feel proud as their artwork shines, and it’s a fun craft for fall unit studies at home or school.
Why You’ll Love This Craft
This craft is easy to set up, budget-friendly, and full of learning opportunities:
- Includes free printable leaf templates for easy prep.
- Engages kids of all ages and skill levels.
- Encourages creativity with colors and patterns.
- Looks beautiful in a window or classroom display.
- Strengthens fine motor skills while working with tissue paper.
- Provides a calming, sensory-friendly craft experience.
Supplies Needed to Make Fall Leaf Suncatchers
Before you get started, make sure you have all the right supplies:
- Fall Leaf Suncatchers Template (free with email subscription)
- Tissue paper squares
- Contact paper or self-seal laminating sheets
- White cardstock
- Black cardstock
- Double-sided tape
- Scissors
How to Make Autumn Leaf Suncatchers
Follow these steps to create bright, colorful window art with your kids:
STEP 1: Download the template. Click the link in the supplies list to access the free leaf templates. After subscribing to our craft newsletter, open the post titled Fall Leaf Suncatchers on Substack to find your download link. Print the templates on white cardstock and get ready to start your leaf suncatcher craft.
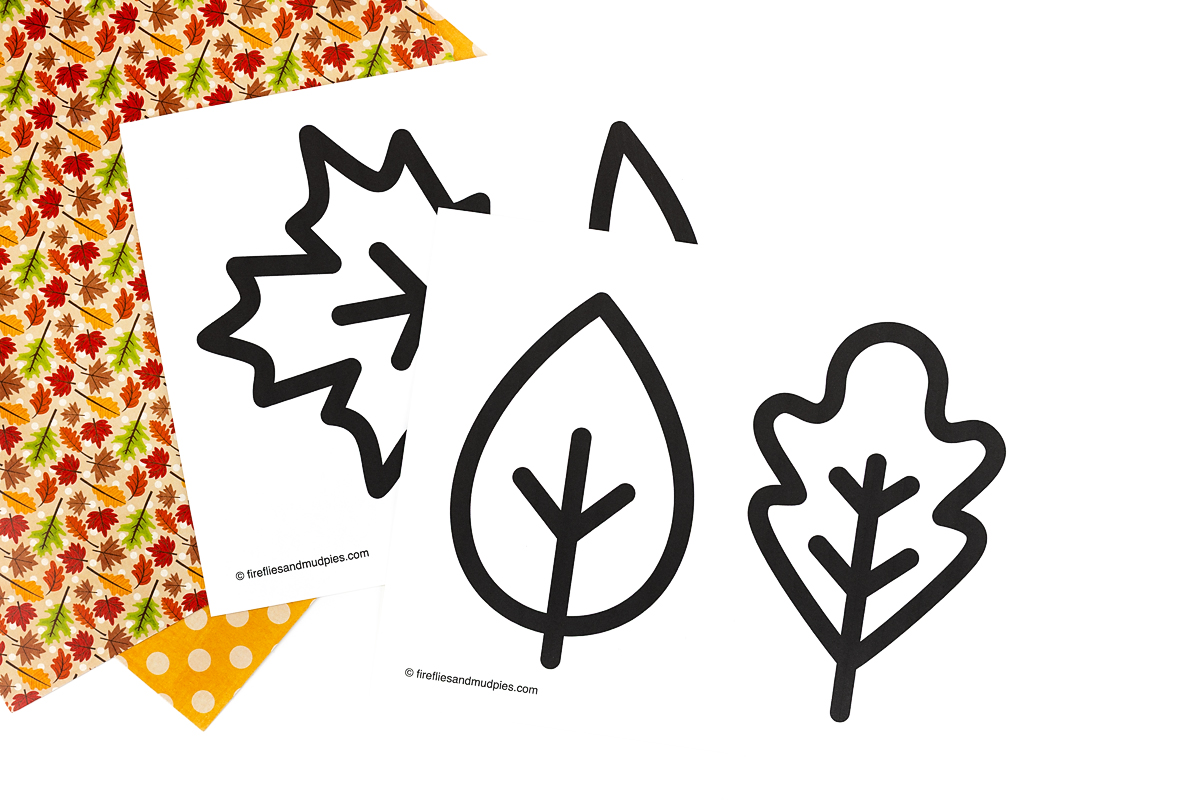
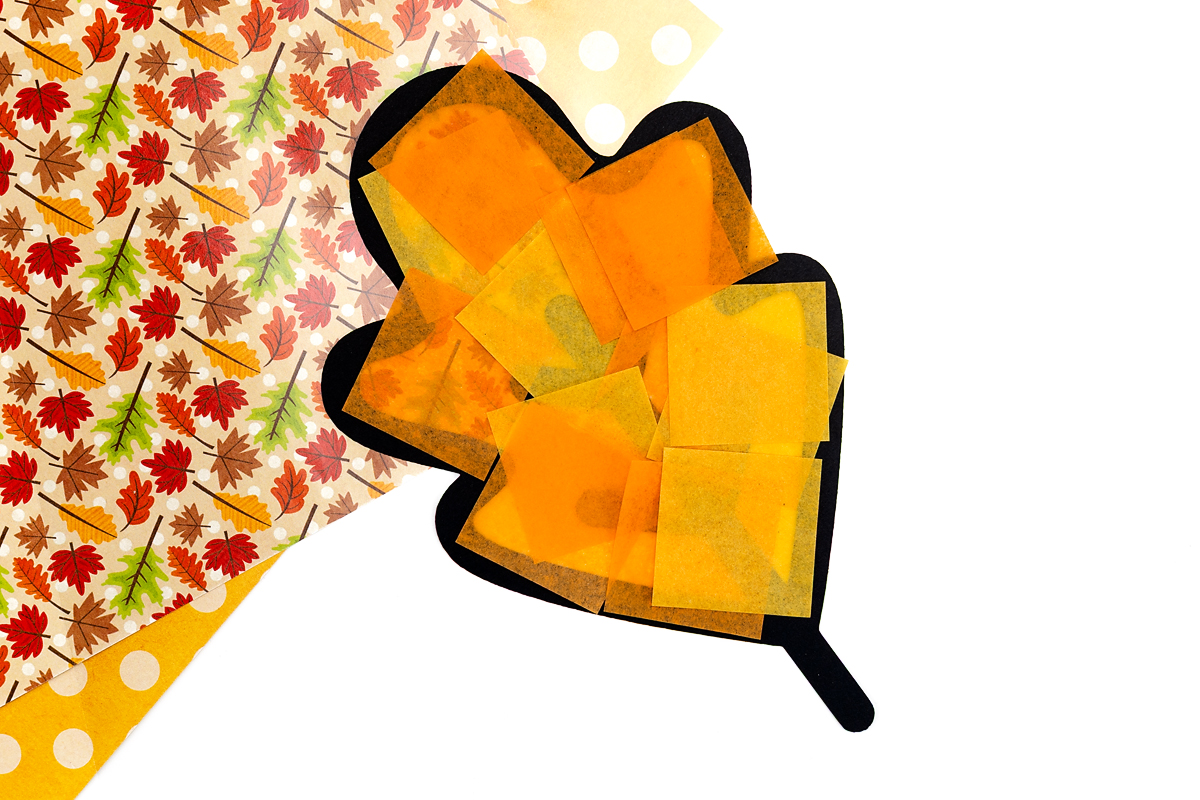
STEP 2: Cut out the leaf shapes. Use scissors to carefully follow the bold outline of the leaf outlines. Older kids can usually manage this on their own, while younger children may need help with the points and curves inside the leaves.
To create a dark frame for your leaf suncatchers, you have two options:
- Place a sheet of black cardstock behind the printed template, secure them together with staples, and cut both layers at once.
- Or, cut out the template first, trace it onto black cardstock, and then cut along the traced lines.

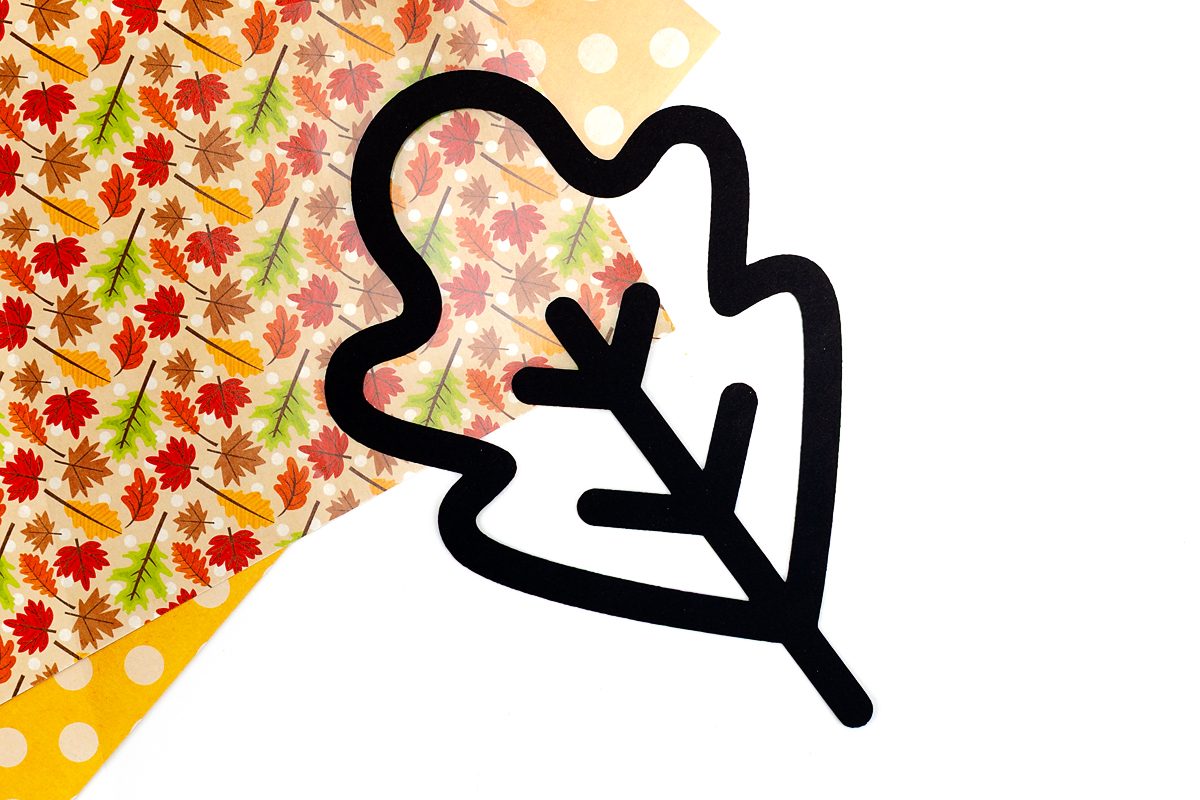
STEP 3: Position the outline. After cutting, place the leaf frame onto the sticky side of a self-adhesive laminating sheet. If you used printed cardstock, make sure the printed side is facing down.
STEP 4: Add the tissue paper. Fill the leaf frame with small squares of colored tissue paper, overlapping the pieces to create a layered, stained-glass effect.
STEP 5: Seal the leaf. Once the tissue paper is in place, cover the design with a second sheet of self-adhesive laminating film. Press gently to smooth out any wrinkles, then trim around the leaf frame, leaving a small border to keep the edges sealed.
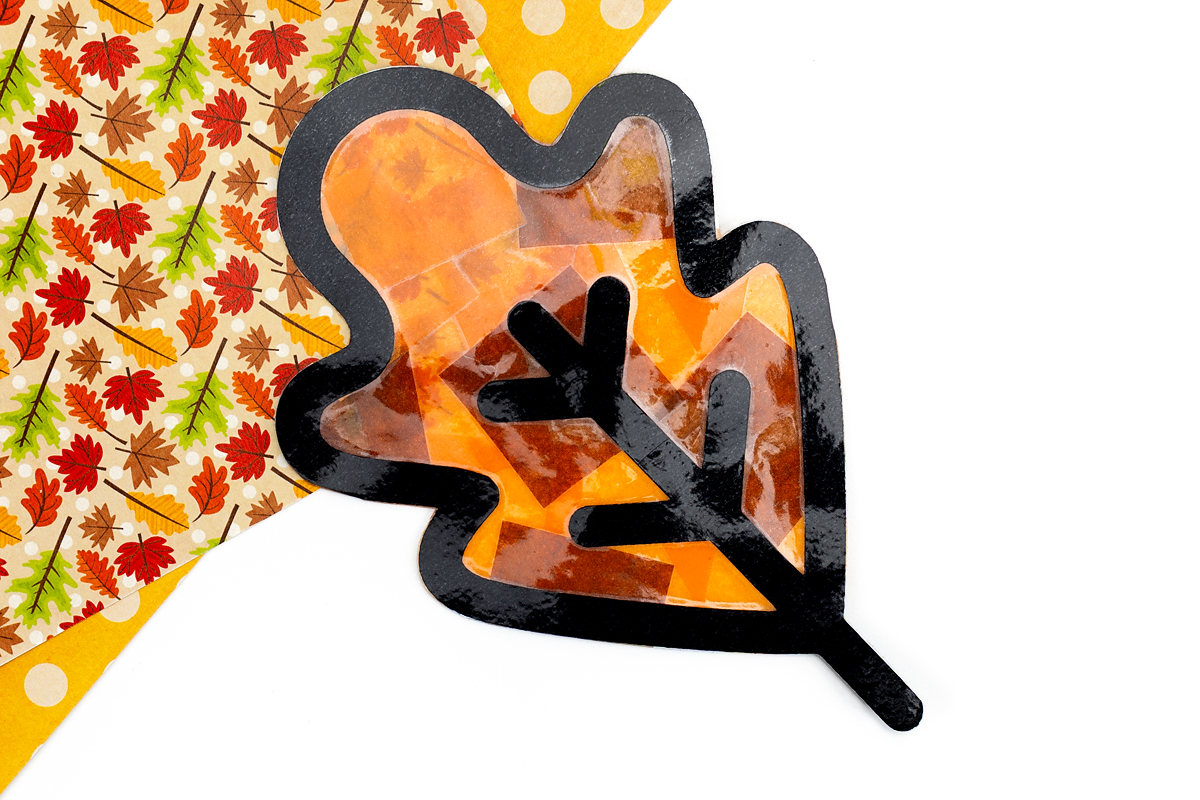
STEP 6: Display your leaf. Choose a sunny window and hang your leaf suncatcher using double-sided tape. When sunlight passes through, the colors will shine, creating a cheerful and bright addition to any room.
Take It Further
Once your leaf suncatcher is finished, there are lots of ways to expand the activity and keep kids engaged. These ideas let children explore creativity, nature, and hands-on learning:
- Play with color combinations: Layer different shades of tissue paper for gradients, patterns, or autumn-inspired rainbows. You could also experiment with colored cardstock for a bold frame.
- Layer and texture effects: Add multiple layers of tissue paper or cut shapes for overlapping colors. A touch of glitter or metallic paper adds a fun sparkle.
- Storytime pairing: Connect the craft to fall-themed books about trees, leaves, or the changing season.
- Nature learning: Go on a short walk to collect real leaves, then compare their colors, shapes, and sizes to the suncatchers.
- Hands-on skills: Let children explore the sticky texture of contact paper while arranging tissue paper for fine motor practice.
- Display ideas: Hang a collection of autumn leaves in a window or on a wall for a bright, seasonal display.
- Creative challenges: Encourage kids to make patterns, symmetrical designs, or even create “leaf families” with different shapes and sizes.
More Fall Leaf Craft Ideas for Kids
If your kids enjoyed this leaf spray painting project, try these other creative leaf-themed crafts and activities:
- Leaf Spray Painting – Use spray bottles filled with diluted paint to create colorful leaf prints on paper. Kids can experiment with mixing colors and layering shapes.
- Leaf Scribble Art – Trace or outline leaves and let children fill them with scribbles, patterns, or doodles for a fun and expressive art activity.
- Melted Crayon Leaf Suncatchers – Melt shaved crayons between sheets of wax paper, then cut into leaf shapes for cheerful, colorful decorations that shine in the window..
- Stamped Leaf Shirts – Paint real leaves with fabric paint and press them onto t-shirts to create unique, wearable fall art.
- Fall Leaf Hedgehog Craft – Glue paper leaves onto a hedgehog outline for a playful and spiky seasonal craft.
- Nature Art with Leaves – Arrange real leaves into patterns, pictures, or collages to make textured, autumn-inspired artwork.
- Leaf Printing – Collect leaves and turn them into beautiful pieces of art!
Save This Craft
Save this craft on Pinterest using the image below!


Want even more?
Make sure to follow on Facebook, Pinterest, and Instagram for more easy crafts, activities, recipes, and parenting tips. And don’t forget to subscribe to our emails.